
This Sticky Rice is made with short grain glutinous rice soaked overnight and cooked in chicken broth, sesame oil, and butter. It is tender, chewy, and makes a savory side dish for any Asian inspired dinner.
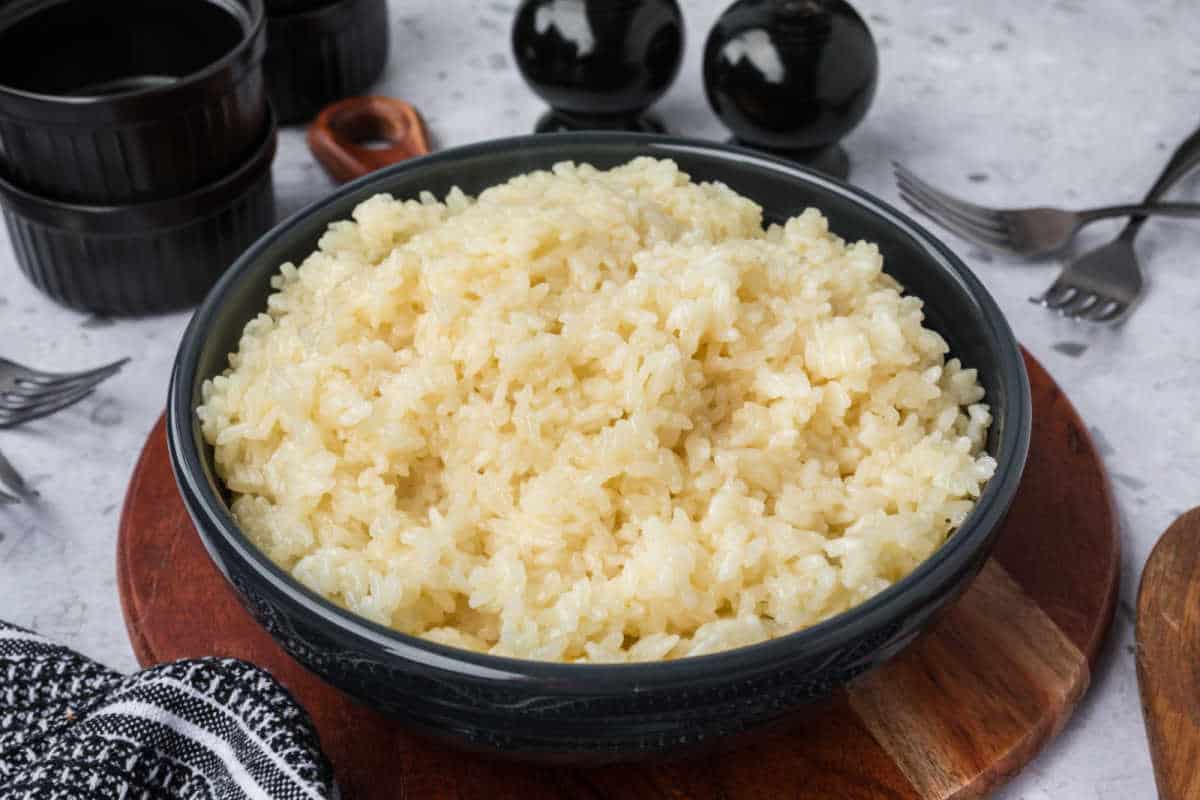
Sticky rice has become one of our most used side dishes for Asian-inspired dinners. My kids love it alongside anything with a sauce because the sticky texture means every grain holds onto the sauce beautifully rather than letting it pool at the bottom of the bowl. This stovetop version doesn’t require a steamer — just a pot with a lid — and costs about $0.75 a serving.
If you have made our Yellow Rice, Lemon Rice, Sushi Rice, Butter Rice, Jasmine Rice Recipe, Basmati Rice Recipe and Garlic Butter Rice then you know this sticky rice recipe will be just as easy and delicious.
Why You’ll Love This Recipe!

- No steamer needed — just a pot with a lid
- Just 5 ingredientsBudget friendly at $0.75 a serving
- Holds onto sauce beautifully, perfect alongside any Asian-inspired main
- Doubles as a dessert base for mango sticky rice and other sweet treats (cooked in water instead of broth)
What is Sticky Rice?
Sticky rice gets its distinctive texture from its unique starch composition — it contains almost entirely amylopectin and very little amylose compared to regular white rice.
This ratio is what causes the cooked grains to cling together rather than staying separate and fluffy like regular rice.
Why This Method Works
Two steps make the difference between perfect sticky rice and disappointing results — soaking and resting.
Why soaking matters: Glutinous rice grains need time to fully hydrate before cooking. A proper 4–6 hour soak allows moisture to penetrate each grain evenly so they cook uniformly from the inside out. Skipping or shortening the soak leaves the center of each grain underhydrated which results in a chewy hard core even after the outside appears done.
Why the absorption method works without a steamer: Traditional sticky rice is steamed — but the stovetop absorption method used here replicates the result by controlling the exact amount of liquid so the rice absorbs everything before it has a chance to overcook. The tight-fitting lid traps steam inside the pot doing the same job as a dedicated steamer without the equipment. The 5–10 minute covered rest after removing from heat is essential — it allows the residual steam to finish cooking the outer layers gently without the direct heat that would make the bottom layer gummy.
Ingredients
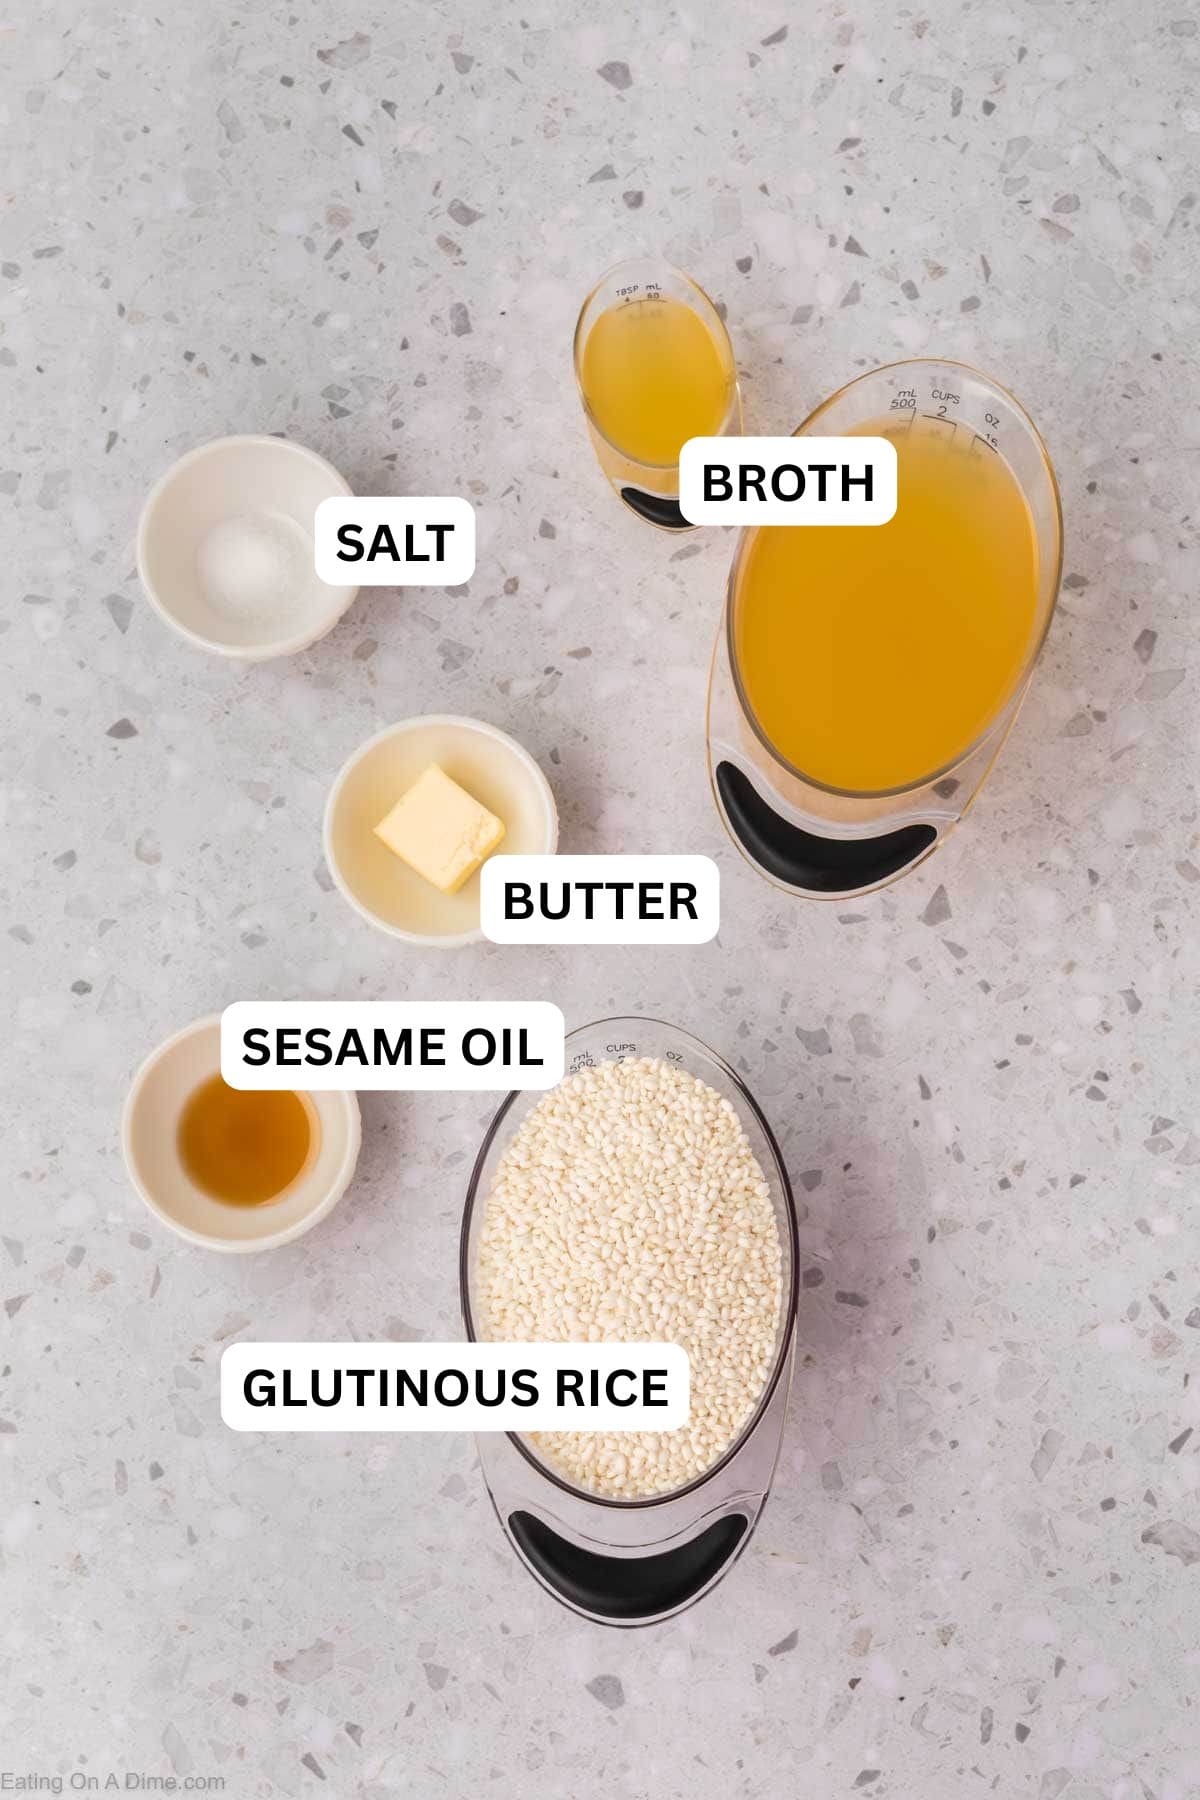
- Glutinous Rice — also called sweet rice or sticky rice, this is a completely different type of rice than jasmine or long grain, with a starch composition that makes it clump together rather than staying separate. See “Choosing the Right Rice” below for exactly what to look for at the store.
- Chicken Broth – the cooking liquid that adds savory flavor throughout.
- Butter – adds richness. We use unsalted so we can control the salt separately.
- Sesame Oil – adds a toasty, nutty background note.
Choosing the Right Rice — This Is the Most Important Step
This is the single most common point of confusion for first-time sticky rice makers — you must use glutinous rice. Regular white rice long grain rice jasmine rice and basmati rice will not produce sticky rice no matter how long you cook or soak them. The starch composition is fundamentally different and cannot be replicated.
What to look for at the store:
The same rice is sold under several different names depending on the brand — all of these refer to the exact same product:
- Glutinous rice
- Sweet rice
- Sticky rice
- Mochigome (Japanese brands)
- Waxy rice
Look in the Asian foods aisle or at an Asian grocery store. The bag will typically be labeled in both English and an Asian language.
Long grain vs short grain:
Long grain Thai-style glutinous rice gives a slightly firmer more separated result that is traditional for Southeast Asian dishes. Short grain glutinous rice gives a softer stickier result more common in Japanese and Korean cooking. Either works for this recipe — choose based on what you plan to serve it with.
How to Make Sticky Rice
Follow along with my simple instructions to learn how to make sticky rice in your home kitchen.

Step 1 – Rinse the rice until water runs clear in a fine-mesh sieve or a colander, then soak for 4-6 hours.

Step 2 – Drain the rice and add to a pot with the chicken broth, butter, sesame oil, and salt.

Step 3 – Bring to a boil, then reduce heat to low, cover, and simmer for 15 minutes.

Step 4 – Remove from heat and let stand, covered, for 5-10 minutes. The rice is done when the grains look translucent and glossy with no chalky white centers. Fluff with a fork and serve.
Short on Time? Try the Hot Soak Method
If you don’t have 4-6 hours to spare, you can speed up the soak significantly: pour just-boiled water over the rinsed rice (enough to cover it by about an inch) and let it soak for 20 minutes instead of hours. Drain well before adding to the pot with the broth, butter, and sesame oil, and proceed with the recipe as written.
Expert Tips
- Don’t skip the soaking – This step is crucial for achieving the right texture in sticky rice. It ensures that the rice grains are fully hydrated.
- Soaking Rice – You can soak the rice for a shorter period like 1-2 hours if you’re short on time, but the texture might not be as ideal. The rice may be slightly less sticky and cohesive.
- Adjust Cooking Time – If soaking for less time, you might need to adjust the cooking time and keep an eye on the texture
- Make Ahead – Soaked rice can be drained and refrigerated for up to 2-3 days before cooking, if you want to prep ahead — just bring it to room temperature before adding it to the pot.
Sticky Rice Troubleshooting
My sticky rice is undercooked or crunchy
The most common cause is insufficient soaking time. Always soak for the full 4–6 hours — rice soaked for less time has not fully hydrated and will remain hard in the center even after the full cook time. If you find the rice is still crunchy after cooking add 2–3 tablespoons of water cover and cook on low for an additional 5 minutes then rest covered for 5 more minutes before checking again.
My sticky rice is too soft or mushy
The rice was overcooked or too much liquid was used. Use the exact liquid ratio in the recipe card and resist the urge to add extra liquid during cooking. If your rice comes out mushy spread it in a thin layer on a baking sheet and let it cool at room temperature for 10–15 minutes — this releases excess steam and firms the texture significantly.
My sticky rice is gluey and falling apart
The rice was stirred during cooking or the lid was lifted too often releasing the steam the rice needs. Never stir sticky rice during cooking and always keep the lid on during the simmer and rest period. The absorption method requires an undisturbed sealed environment to work correctly.
My sticky rice is sticking to the pot
The heat was too high during simmering. Always use the lowest heat setting once the liquid comes to a boil and use a heavy-bottomed pot that distributes heat evenly. A light coating of butter on the bottom of the pot before adding the rice and liquid helps prevent sticking.
How to Make Sticky Rice in a Rice Cooker
A rice cooker is a great hands-off alternative to the stovetop method — use exactly the same water to rice ratio as the stovetop version. After soaking and draining the rice:
Step 1 — Add the drained soaked rice to the rice cooker. Add the chicken broth butter sesame oil and salt in the same amounts as the stovetop recipe.
Step 2 — Select the white rice or regular setting on your rice cooker. Do not use the quick cook setting — the standard setting gives the rice the full cook time it needs.
Step 3 — When the rice cooker switches to warm let the rice rest on the warm setting for an additional 10 minutes before opening.
Step 4 — Fluff gently with a fork and serve.
Note: Some rice cookers have a dedicated glutinous rice or sweet rice setting — use that setting if yours has it for the most consistent result.

Serving Suggestions
Sticky Rice is delicious served with all your Asian Recipes. This white rice is a staple side dish that we love to serve with Easy Crockpot Pepper Beef Steak Recipe, Garlic Butter Steak Bites, Crockpot Sweet and Sour Meatballs, Hoisin Chicken, Crab Rangoon recipe, Instant Pot Orange Chicken, Sheet Pan Chicken and Veggies and Easy Chicken Stir Fry Recipe.
We have even made these small grains of rice with the addition of vegetables. For added flavor mix in minced garlic, carrots, sliced mushrooms and diced tomatoes. When serving top with fresh cilantro, fresh jalapeños, peanuts and green onions.
Sweet Uses for Sticky Rice
The same cooked sticky rice works beautifully in dessert applications — this is where sticky rice is arguably most famous worldwide.
Mango Sticky Rice — the most beloved Thai dessert and one of the most searched sticky rice recipes globally. For dessert applications, cook the rice in plain water instead of the chicken broth, butter, and sesame oil used in this recipe — then combine with a simple coconut milk and sugar sauce and serve alongside fresh sliced ripe mango.
Sweet Coconut Rice Balls — roll cooled sticky rice into small balls and coat in toasted sesame seeds or shredded coconut for a simple no-bake dessert that the kids love to help make.
Rice Pudding Alternative — stir coconut milk and a tablespoon of sugar into warm leftover sticky rice for an instant creamy rice pudding with an Asian-inspired twist.
Frequently Asked Questions
You will need to make this recipe with short grain glutinous rice, also called sweet rice.
The two secrets are a full 4–6 hour soak so every grain hydrates evenly before cooking and the covered 5–10 minute rest after removing from heat — the soak prevents a hard undercooked center and the rest allows the residual steam to finish the outer layers gently for a perfectly uniform texture throughout.
True sticky rice requires glutinous rice — regular long grain white rice cannot be made into authentic sticky rice because the starch composition is fundamentally different. Sushi rice is also not a true substitute; while it’s stickier than long grain rice, it doesn’t achieve the same chewy, clingy texture as real glutinous rice. If a recipe calls for sticky rice, it’s worth seeking out glutinous rice specifically rather than substituting.
Always soak for a minimum of 4 hours and ideally 6 hours — overnight soaking gives the most evenly hydrated grains and the best finished texture. Never skip or significantly shorten the soak as this is the step that determines whether the rice cooks properly all the way through.
Cooking time will vary, but the rice will take about 15 minutes to cook, until the water has been absorbed. You will be able to flake the rice with a fork and it should be tender.
Refrigerate any leftover rice in an airtight container for up to 7 days. Sticky rice hardens noticeably faster than regular rice once it cools, so leftovers are best reheated rather than eaten cold. To reheat, sprinkle the rice with a little water, cover, and microwave in 30-second intervals, or steam for a few minutes, until soft and pliable again.
Yes — cool completely, then freeze in an airtight container or freezer bag for up to 2 months. Thaw overnight in the refrigerator, then reheat with a sprinkle of water as described above to soften it back up.

More Easy Rice Recipes


We love to hear from you. If you make this recipe, please leave us a comment or a star review.

Sticky Rice Recipe
Ingredients
- 2 cups glutinous rice sweet rice
- 2 ¼ cups chicken broth
- 1 tablespoon butter
- 1 teaspoon sesame oil
- ¼ teaspoon salt
See how we calculate recipe costs.
Instructions
- Rinse the rice until water runs clear, then soak for 4-6 hours.
- Drain the rice and add to a pot with the chicken broth, butter, sesame oil, and salt.
- Bring to a boil, then reduce heat to low, cover, and simmer for 15 minutes.
- Remove from heat and let stand, covered, for 5-10 minutes.
- Fluff with a fork and serve.

This is my new favorite side dish! It was easy, delicious, and went with everything we were serving.
Easy instructions and the recipe turned out perfectly!
5 star
Your the best. I don’t know how many times you saved me for dinner. Keep them coming!!!
Delicious and easy to make!