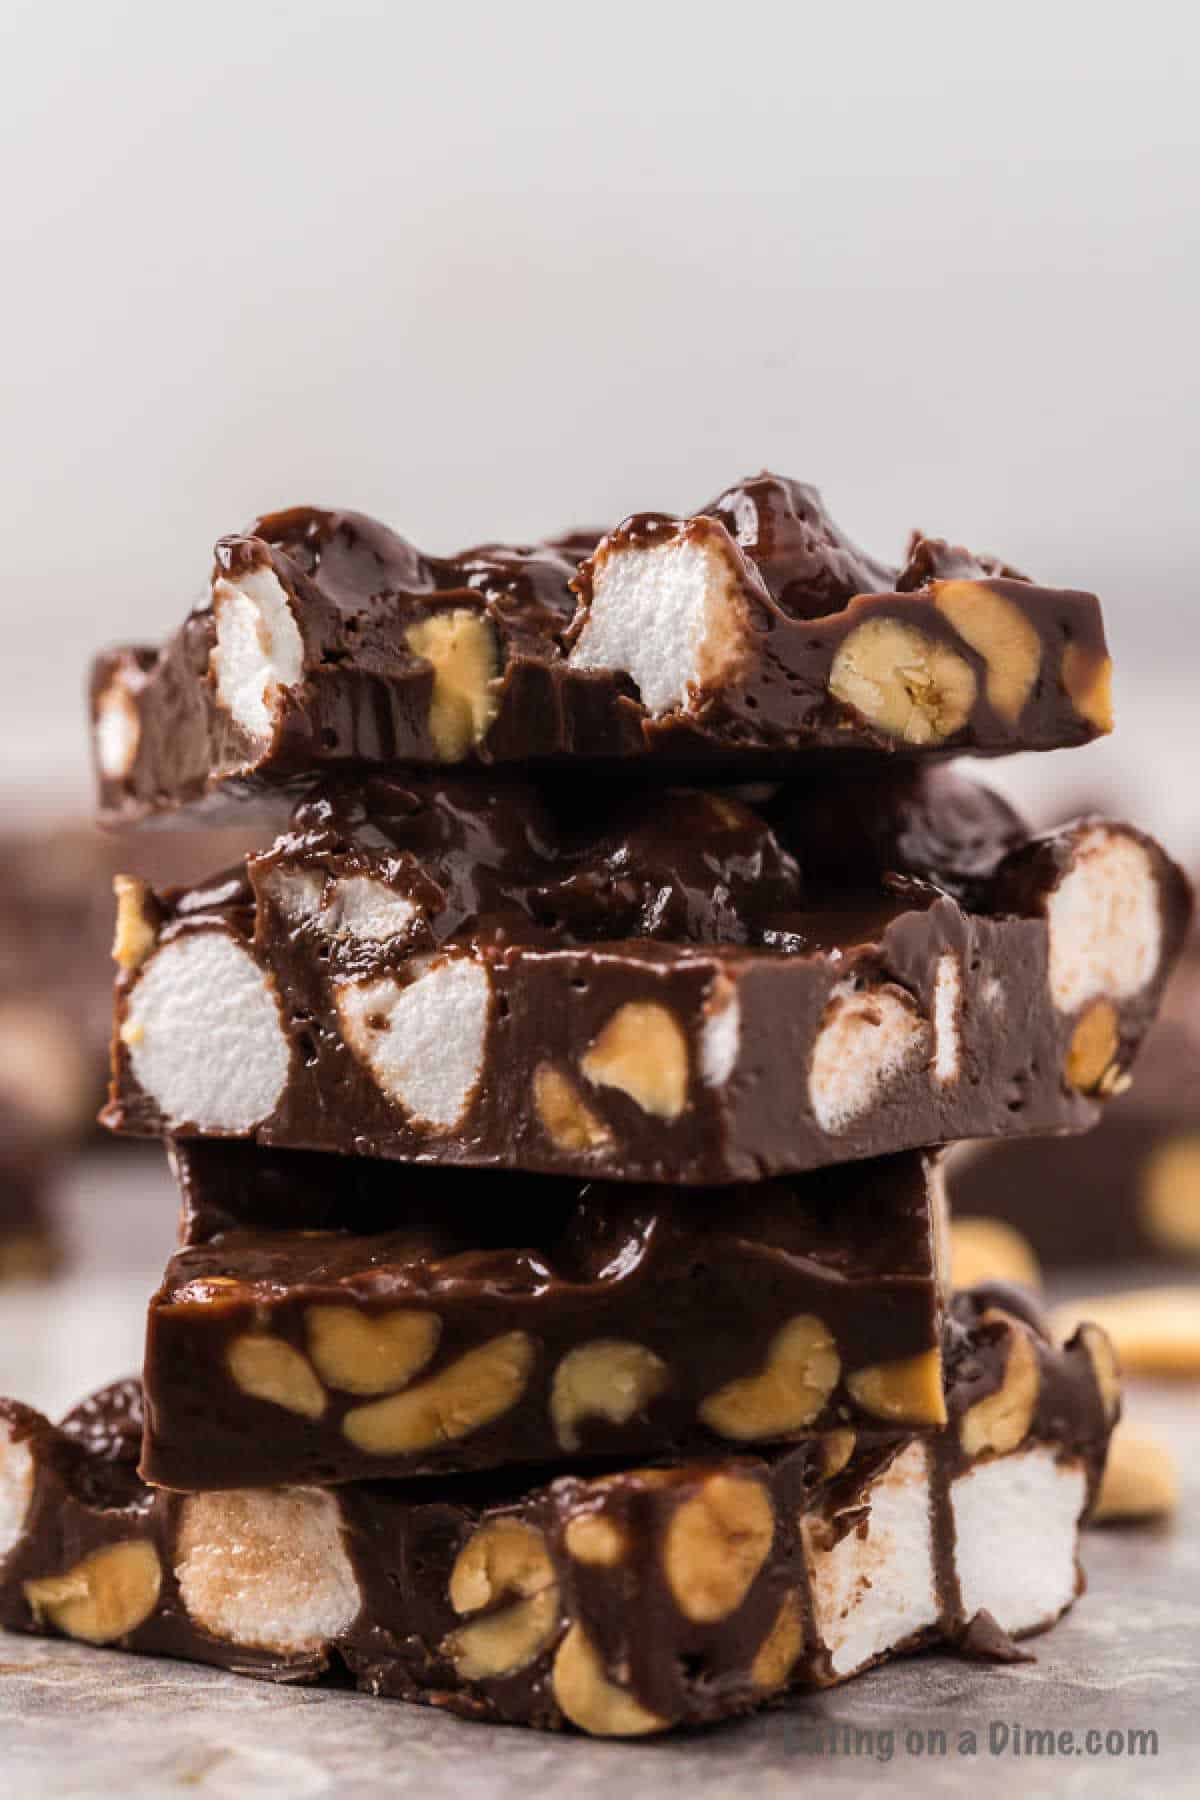
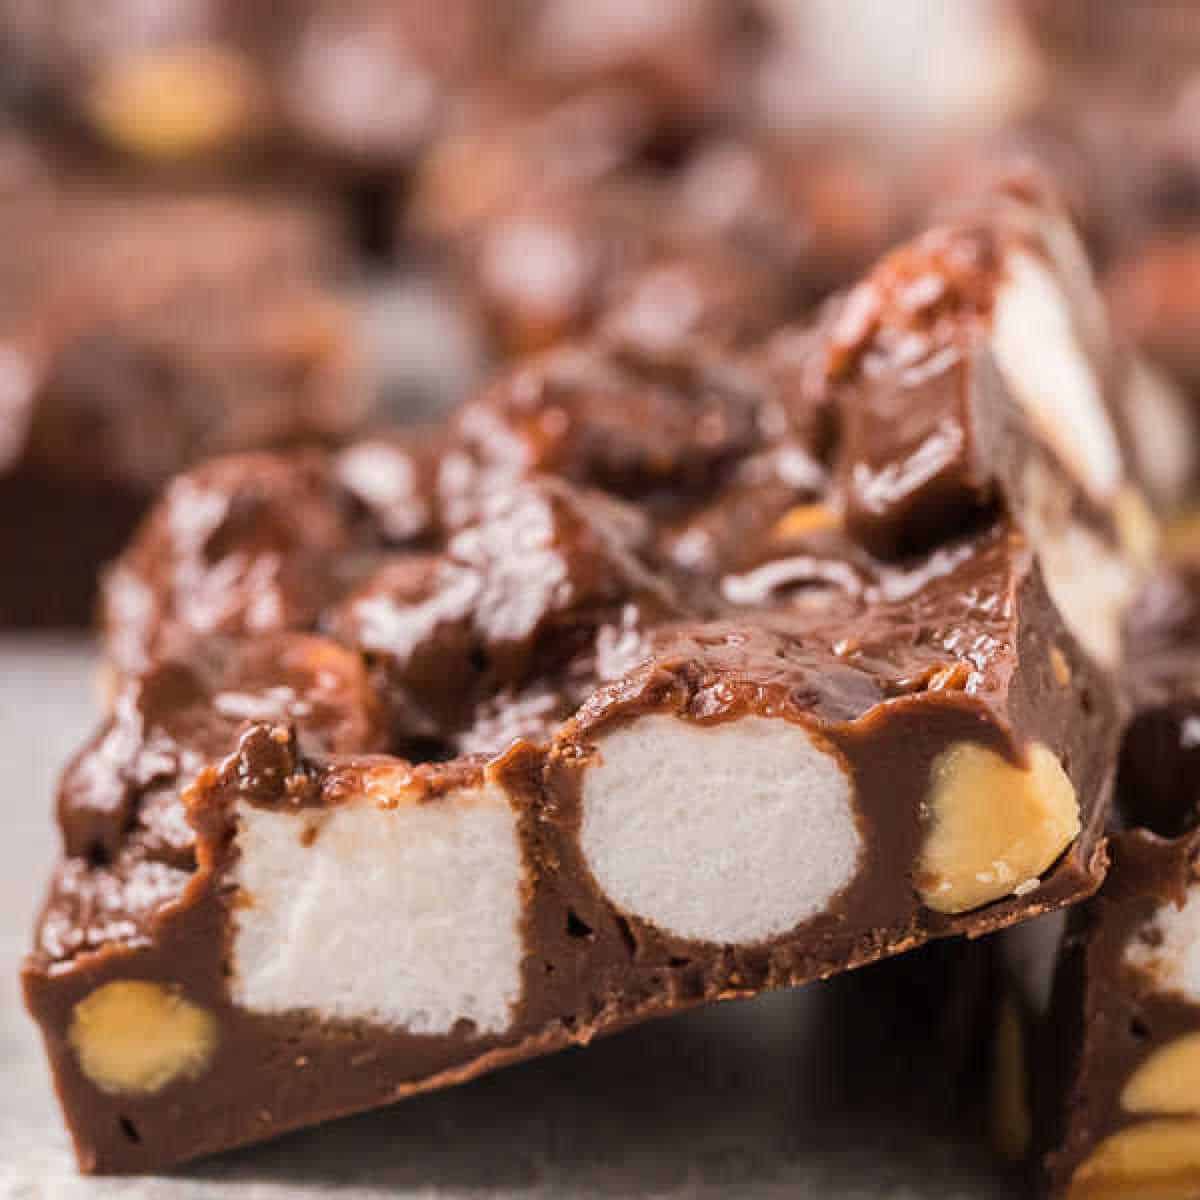
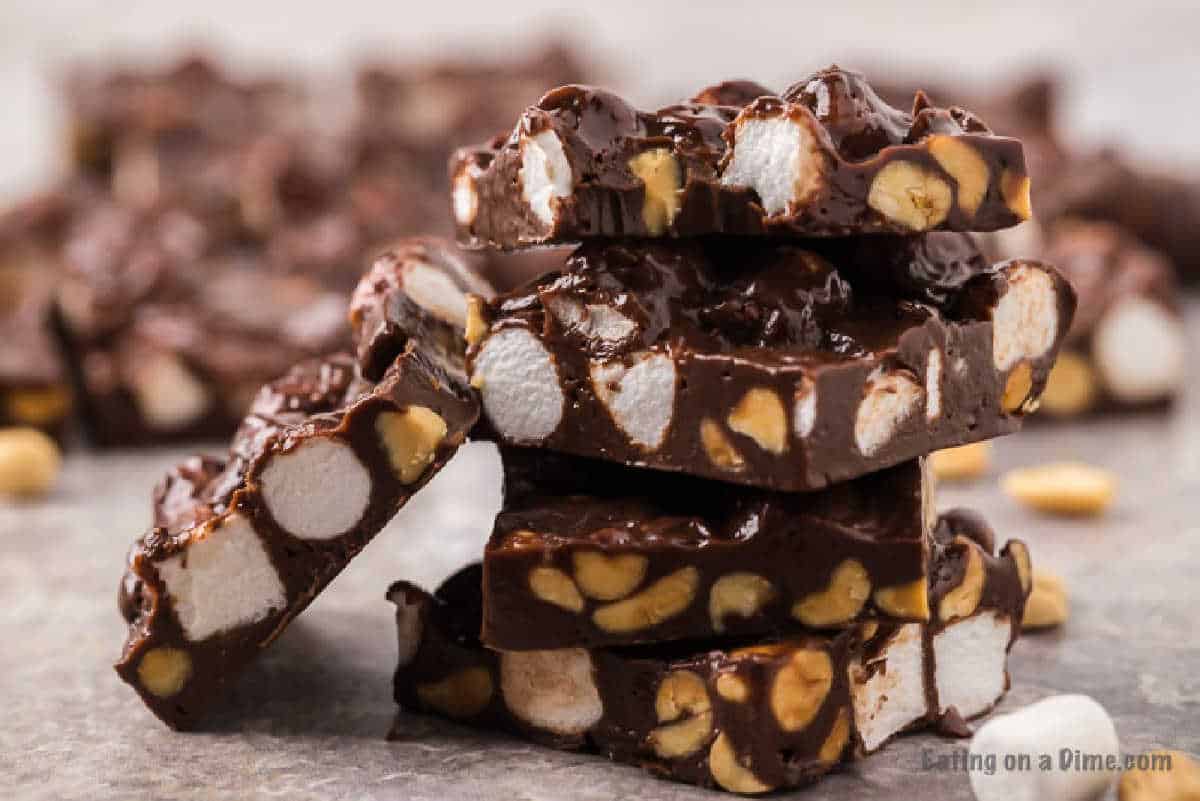
Easy rocky road fudge recipe is so simple with only 4 ingredients. Enjoy homemade fudge with this decadent treat with very little work. It is loaded with creamy chocolate, marshmallows and nuts.
Easy Rocky Road Fudge Recipe
Homemade fudge is actually very easy to make. This recipe for Rocky Road Fudge does not require any fancy gadgets and cooks in the microwave.
I don’t consider myself a baker and it was very easy for me. The results were so creamy and decadent. The most difficult part of this recipe is waiting for the fudge to set so you can eat it.
The kids loved all of the marshmallows and peanuts. It is definitely a crowd pleaser.
If you love Rocky Road ice cream, this is definitely a must try recipe.
Why is it called Rocky Road Fudge?
The name originates from the Great Depression era. William Dryer took marshmallows and cut them up and added them with walnuts to chocolate ice cream.
The stock market crashed so he fittingly named the ice cream “Rocky Road” to help encourage people and give them hope.
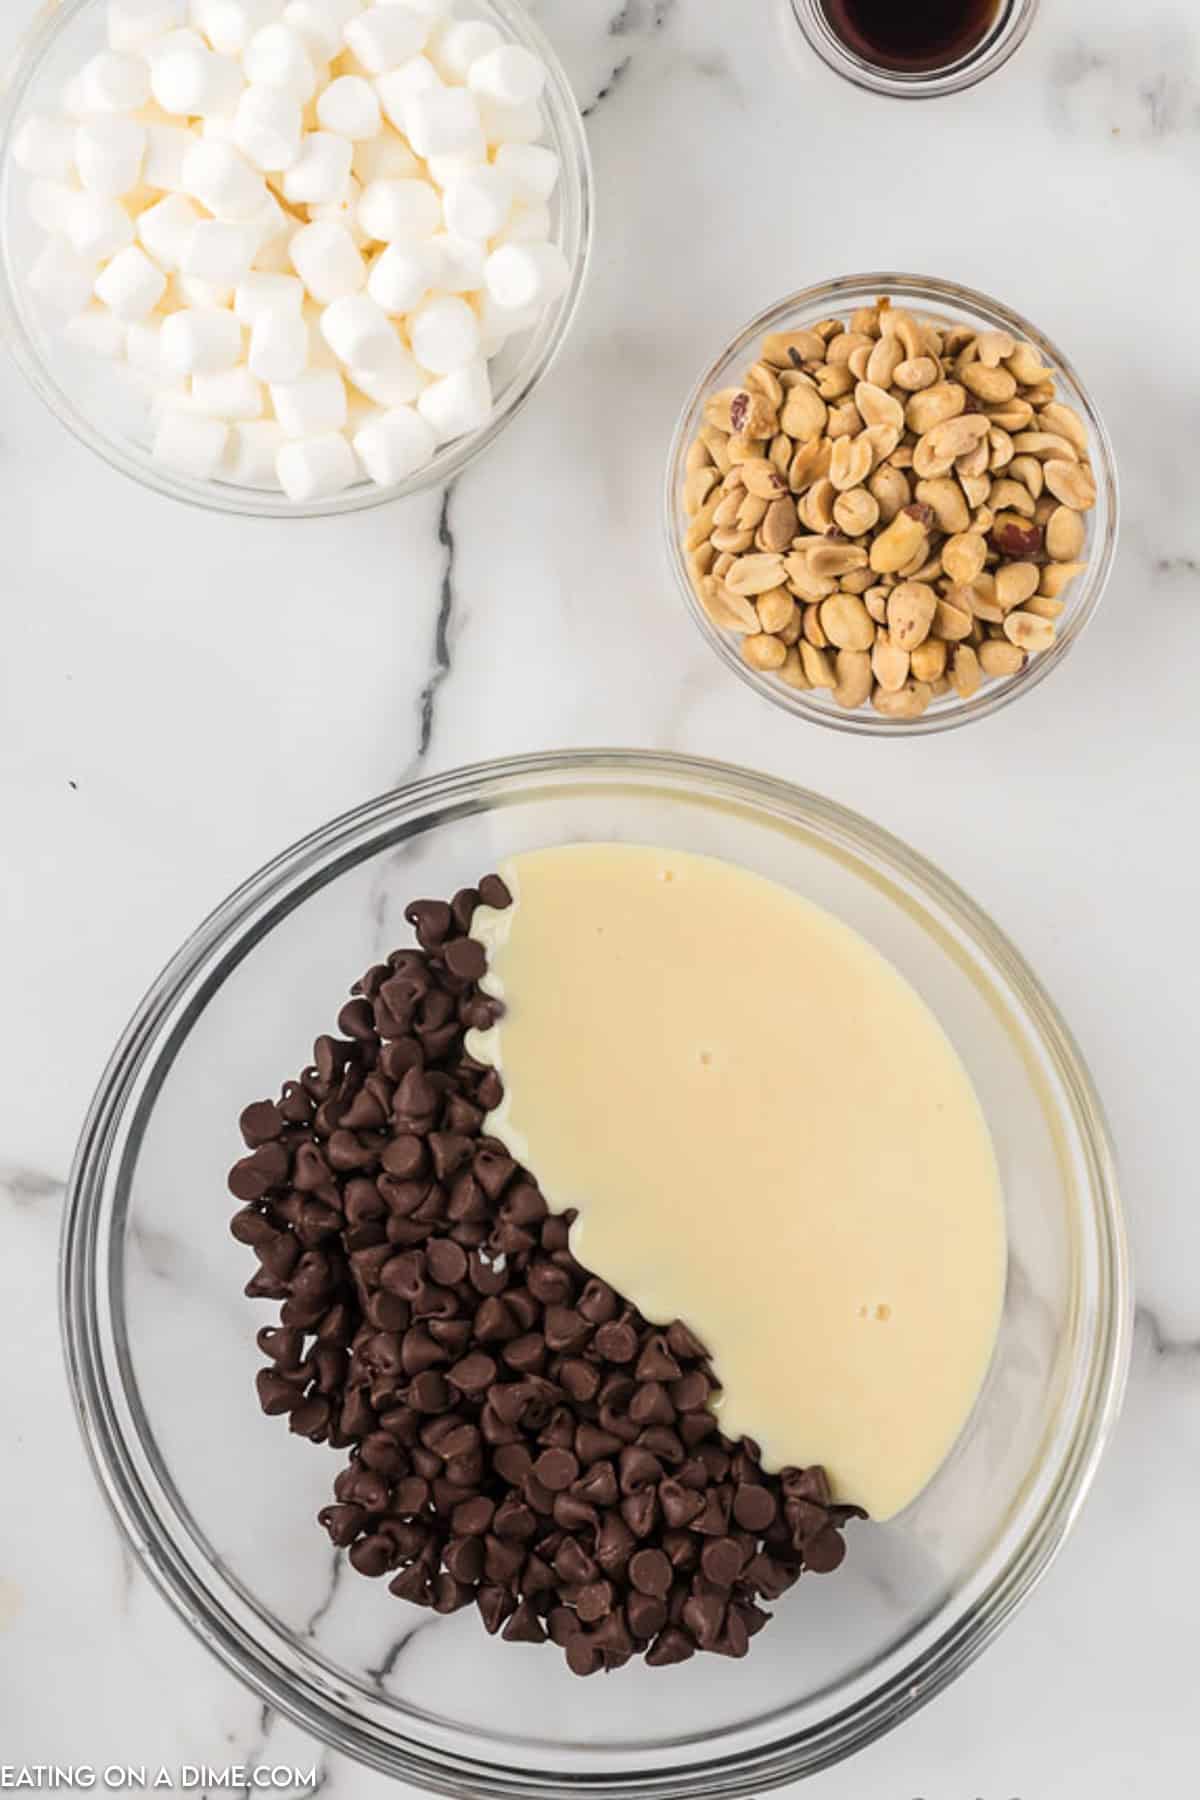
Ingredients:
- Semi-sweet chocolate chips
- Sweetened Condensed Milk – This ingredient is very important for the fudge coming together like it should and having the right consistency. Please don’t try to substitute it for something else. Evaporated milk is not the same. If you don’t have any on hand, you can use a homemade sweetened condensed milk.
- Miniature Marshmallows – You can cut up regular size marshmallows and use those instead. It will still turnout delicious.
- Salted Peanuts – Traditionally, peanuts are used in rocky road fudge. However, walnuts and almonds make delicious substitutions.
How to make Rocky road fudge
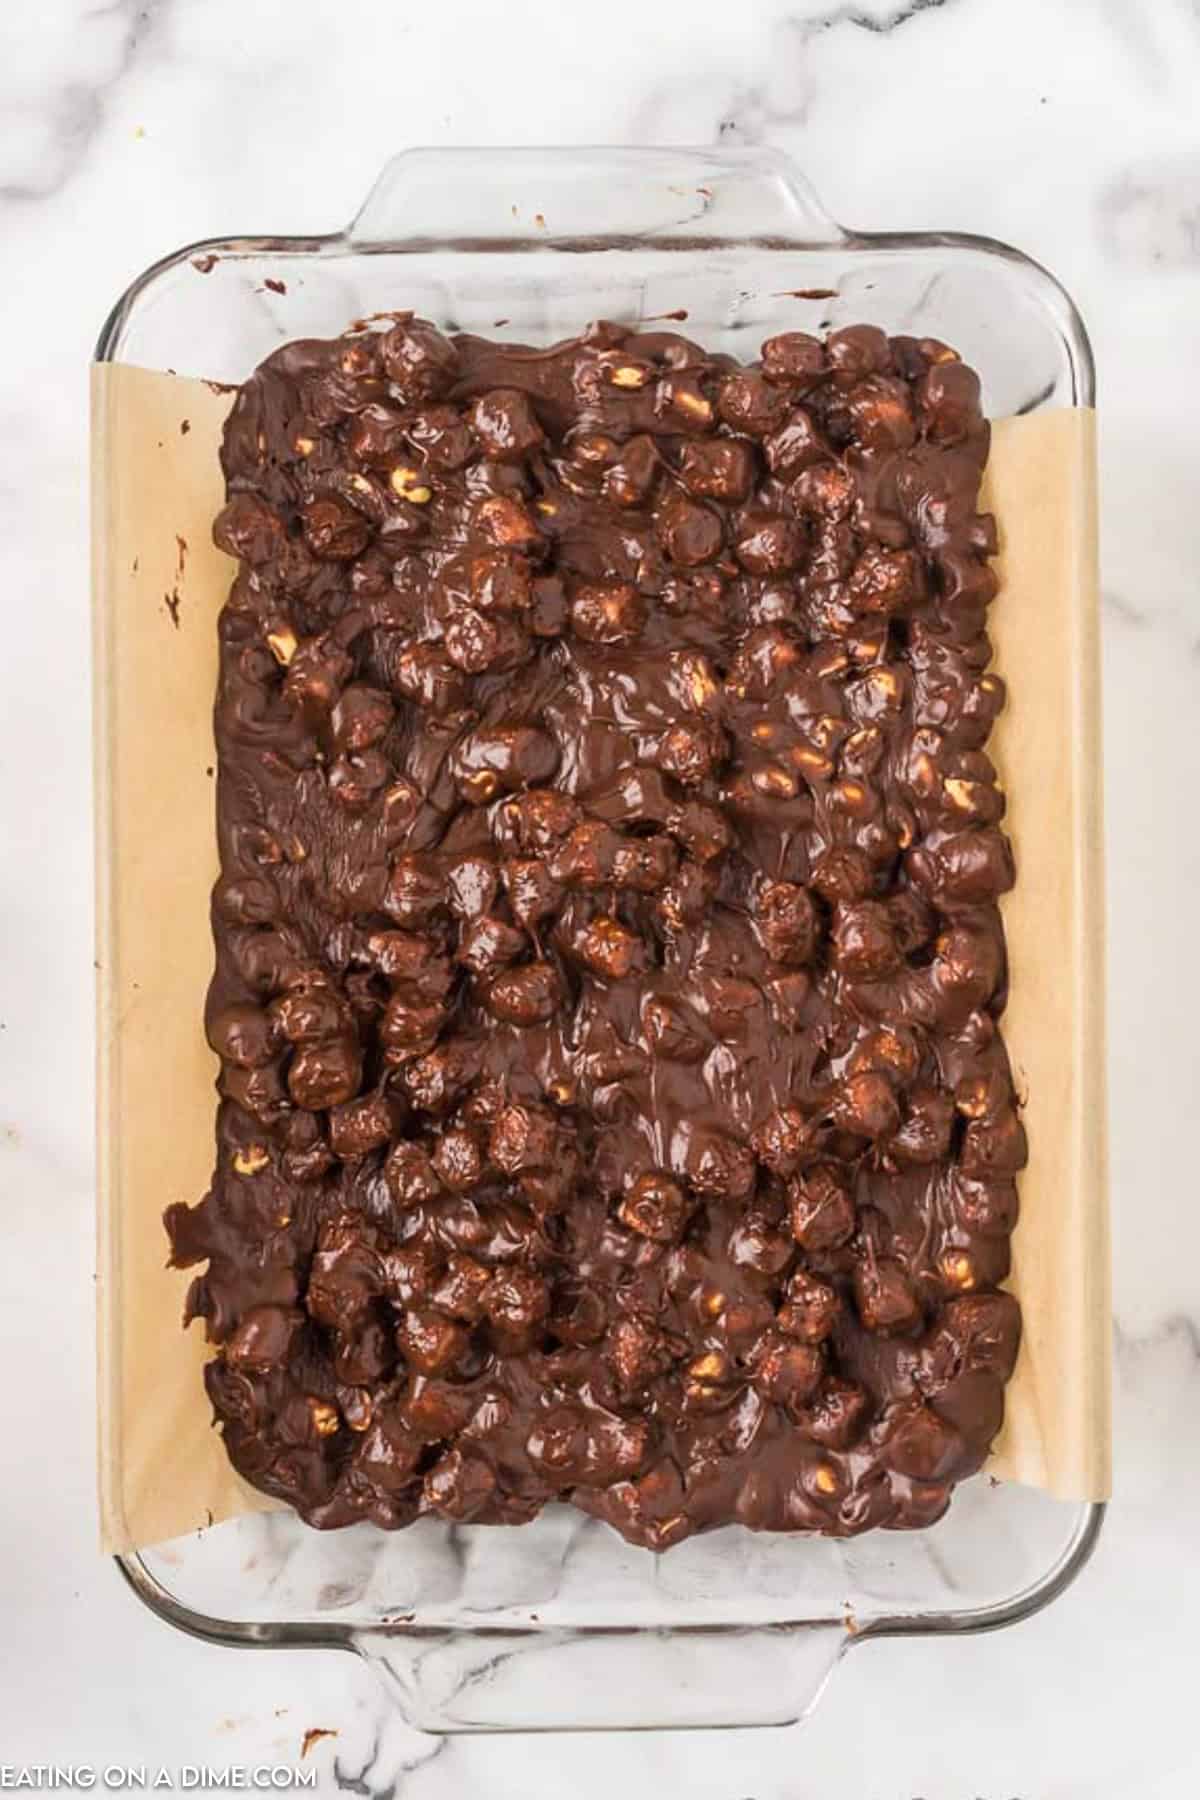
- First, prepare your pan. You will need to use a 9X13 baking pan with foil or parchment paper. Then spray it with cooking spray. This will help the chocolate fudge easily come out of the pan later.
- Second, get out a microwave safe bowl. Add the sweetened condensed milk and chocolate to the bowl.
- Microwave the chocolate. Place the bowl in the microwave and heat in 30 second intervals using medium heat. You will need to stir after each interval to combine chocolate chips until the mixture is completely melted.
Microwave times vary but it took mine 90 seconds. It is important to stir constantly in intervals.
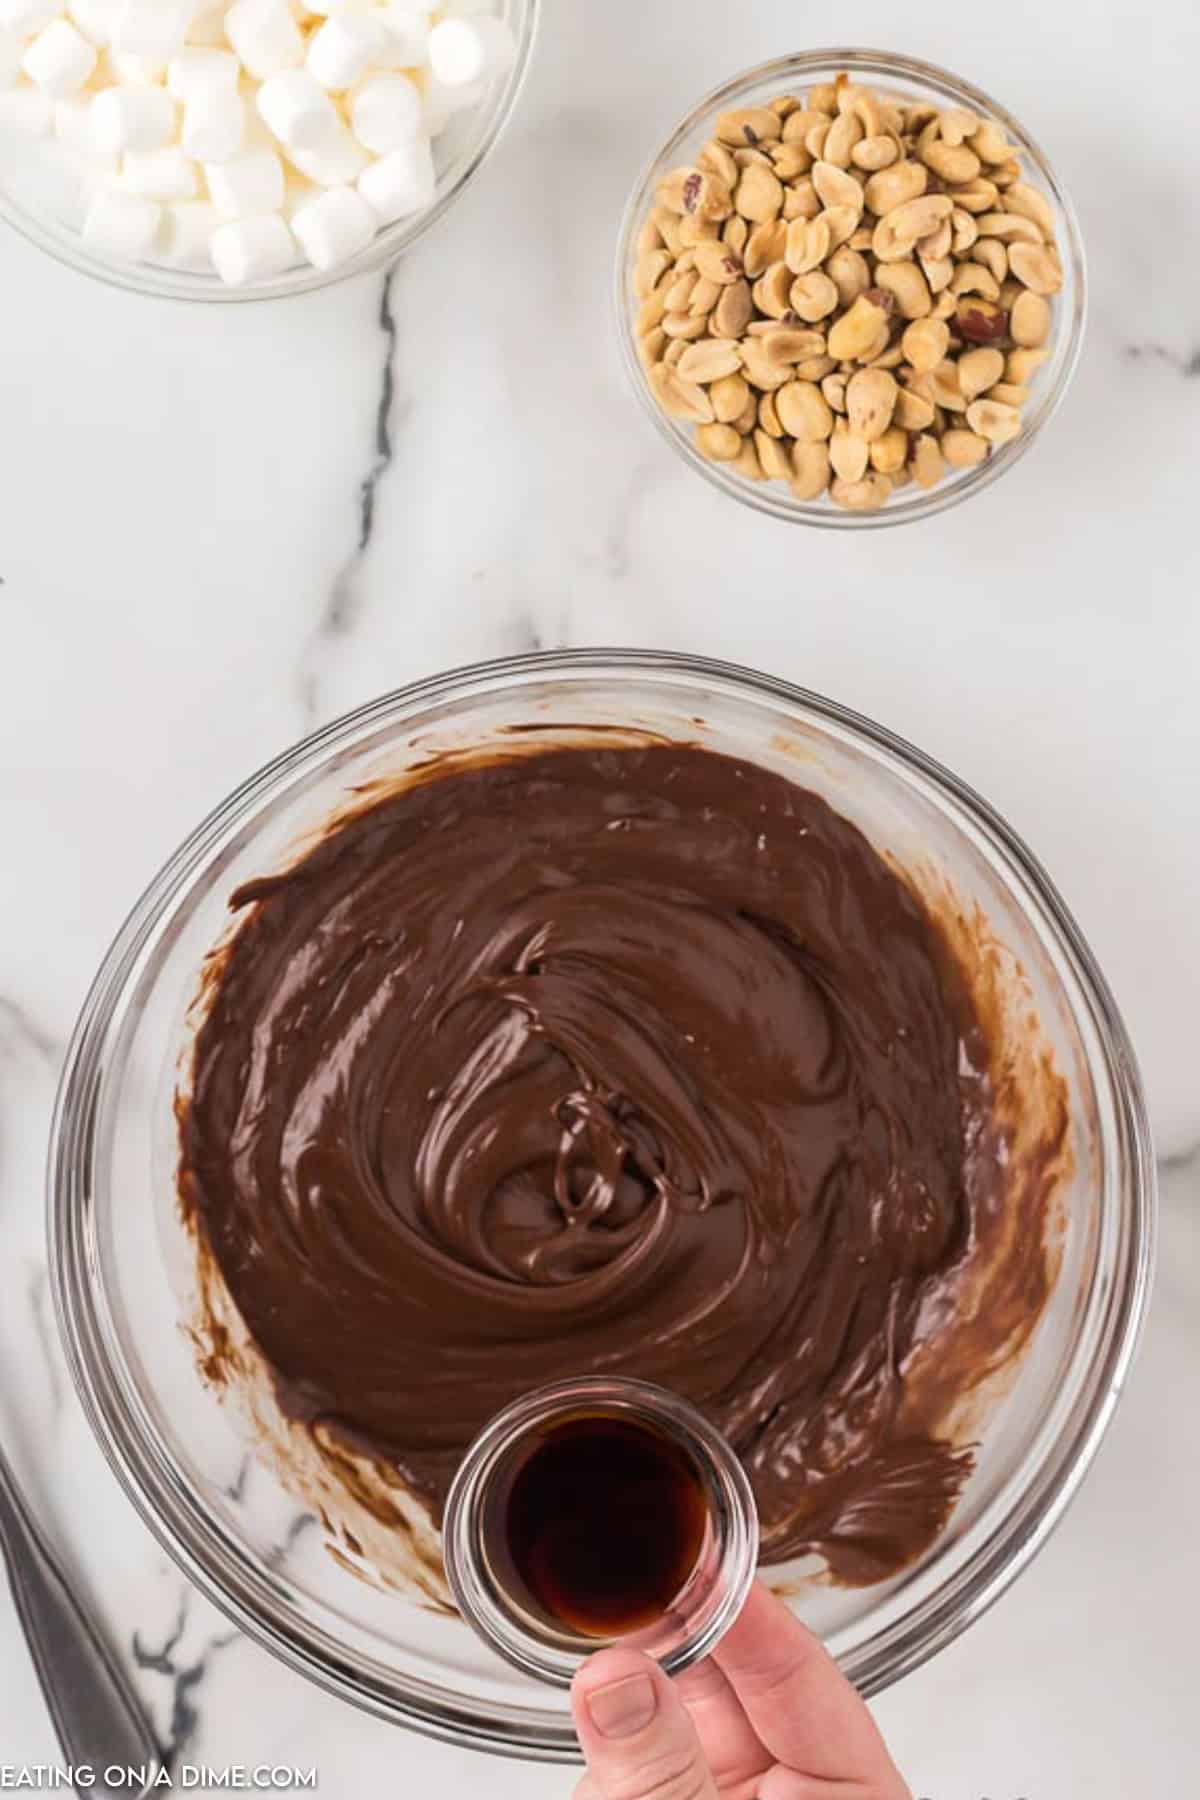
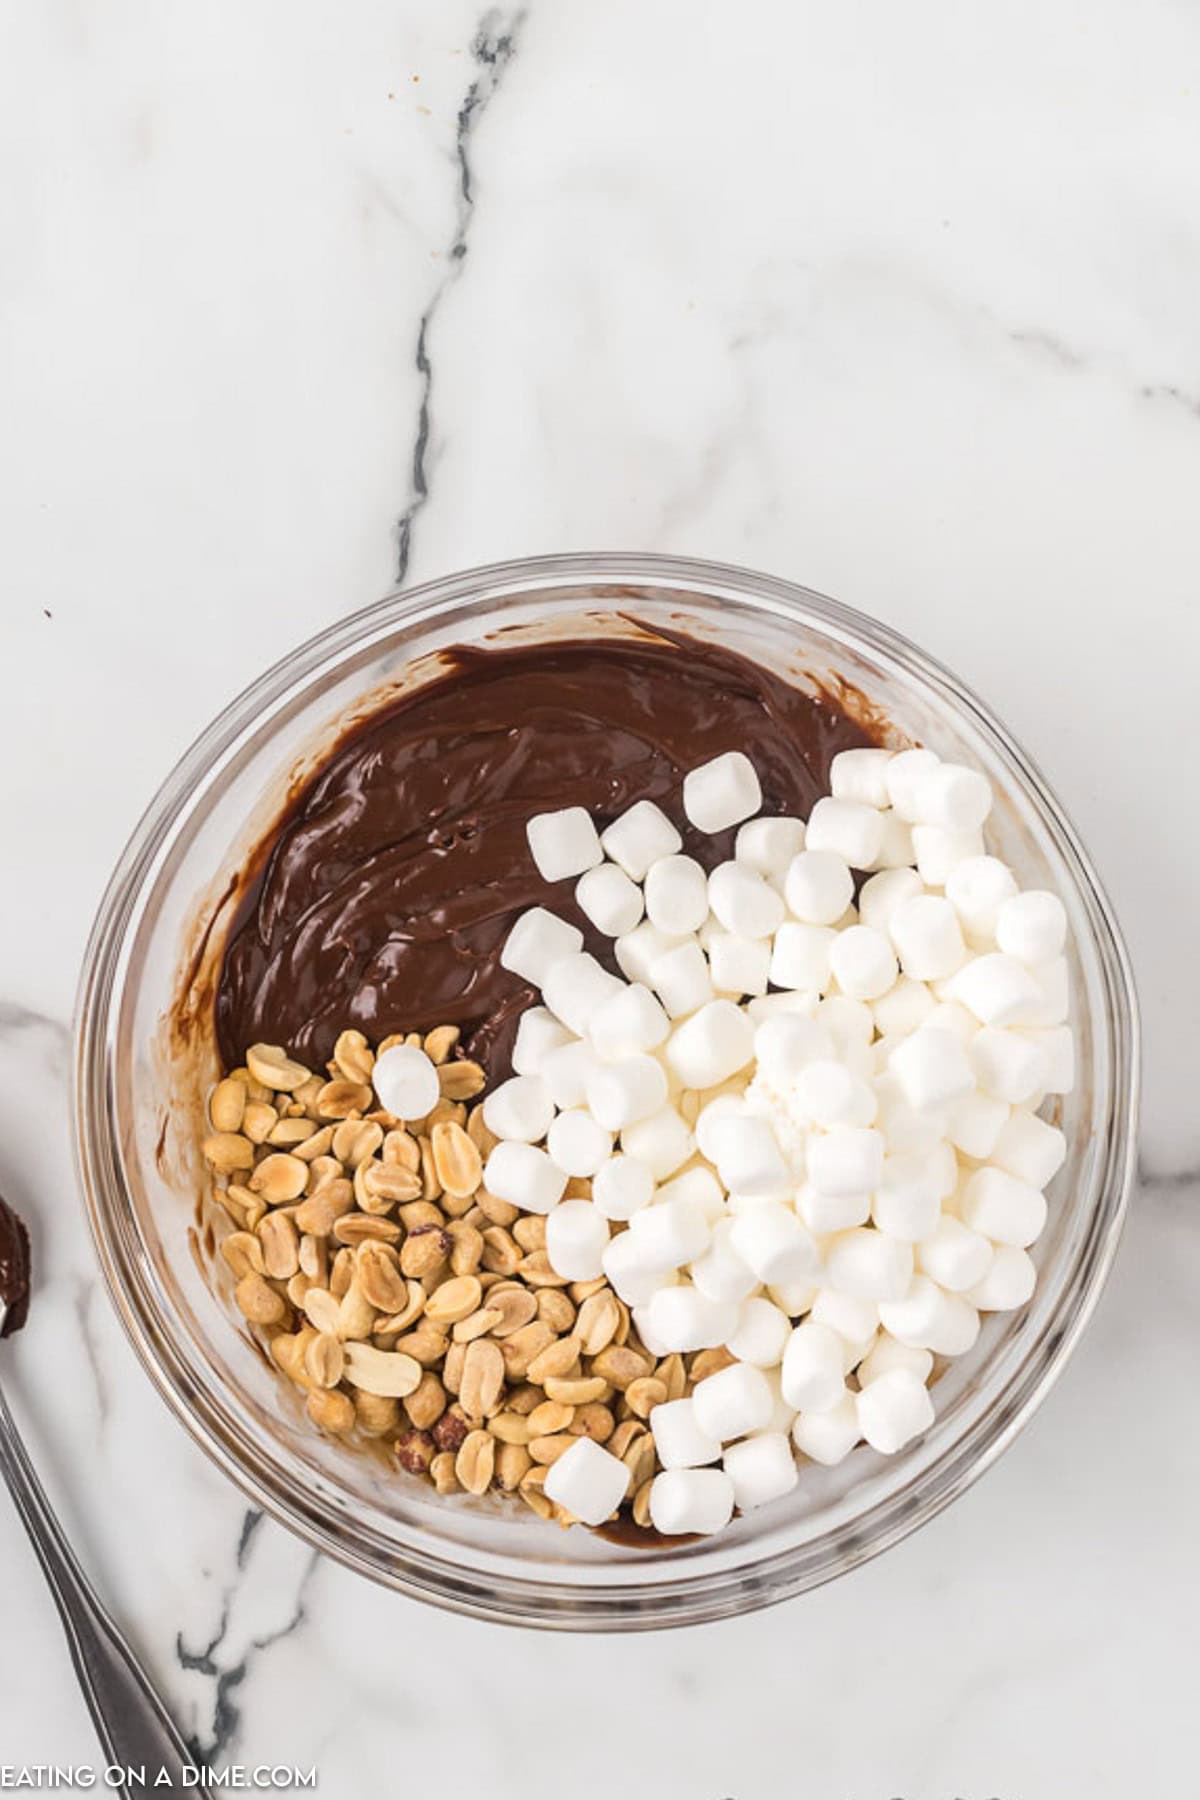
- Add the nuts and marshmallows. Then stir it all together. This is optional but you can also use a teaspoon of vanilla extract. Stir in the vanilla to the chocolate mixture before adding the nuts and marshmallows if you plan to add this.
- Finally, pour this mixture into the baking dish. Spread out the mixture to get it as smooth as possible. Then put in the fridge until it is firm.
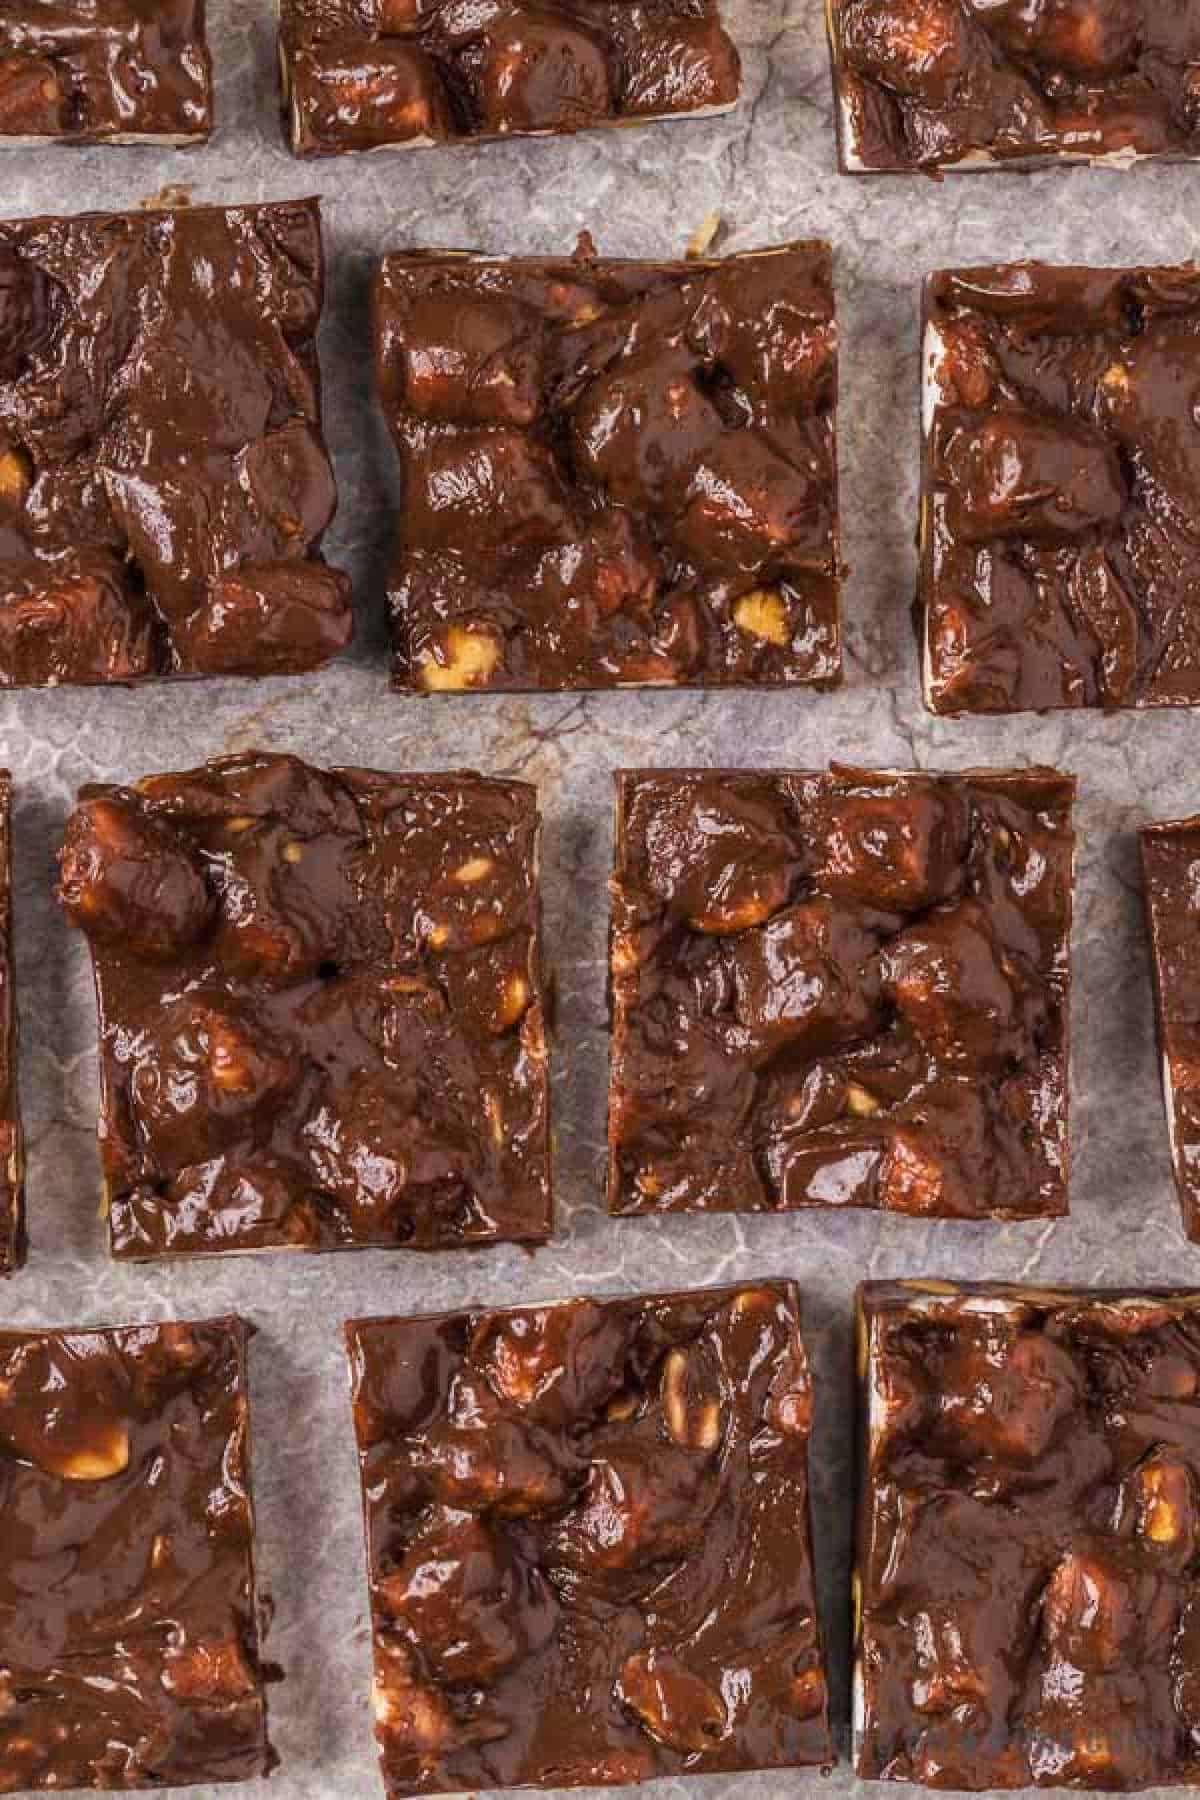
- Once the fudge is firm, carefully lift the foil out of the pan and cut into pieces. It is really decadent so I usually cut the fudge into small pieces.
How to store fudge:
Store any leftovers in an air tight container in the refrigerator for up to 1 week. I like to put wax paper in between the layers of fudge. This helps to prevent it from sticking.
Can you freeze fudge?
- Yes, you can. We freeze fudge frequently around the holidays.
- Simply put the fudge inside an airtight container.
- Separate the fudge with parchment paper. This makes it easy to grab a few squares of fudge without them sticking to each other.
- The fudge can also be frozen up to a month.
- When you are ready to eat, allow to sit at room temperature until completely thawed.
- See can you freeze fudge for freezing tips.

Tips:
- Microwave in intervals. Don’t get in a hurry and microwave the chocolate for the full amount of time. You risk burning your chocolate and then it will be useless.
- Toasting the nuts. It is not necessary but you can toast the nuts before adding to the fudge. It really enhances the flavor.
Print this rocky road fudge recipe:

Rocky Road Fudge Recipe
Ingredients
- 12 oz. Semi-sweet chocolate chips
- 14 oz Sweetened Condensed Milk
- 2 cups Miniature Marshmallows
- 1 cup Salted Peanuts
See how we calculate recipe costs.
Instructions
- Line a 9X13 baking pan with foil or parchment paper and then spray with a non stick cooking spray.
- Place the condensed milk and chocolate in a microwave safe bowl.
- Heat in 30 second intervals in the microwave, stirring after each interval until the mixture is melted and well combined. Mine took approximately 90 seconds.
- Stir in the peanuts and miniature marshmallows.
- Pour the mixture into the prepared pan. Refrigerate until firm.
- Then carefully lift the foil out of the pan and cut into pieces

Looks really good,I just have to make it.
I hope you try it out Dottie and that you enjoy it!