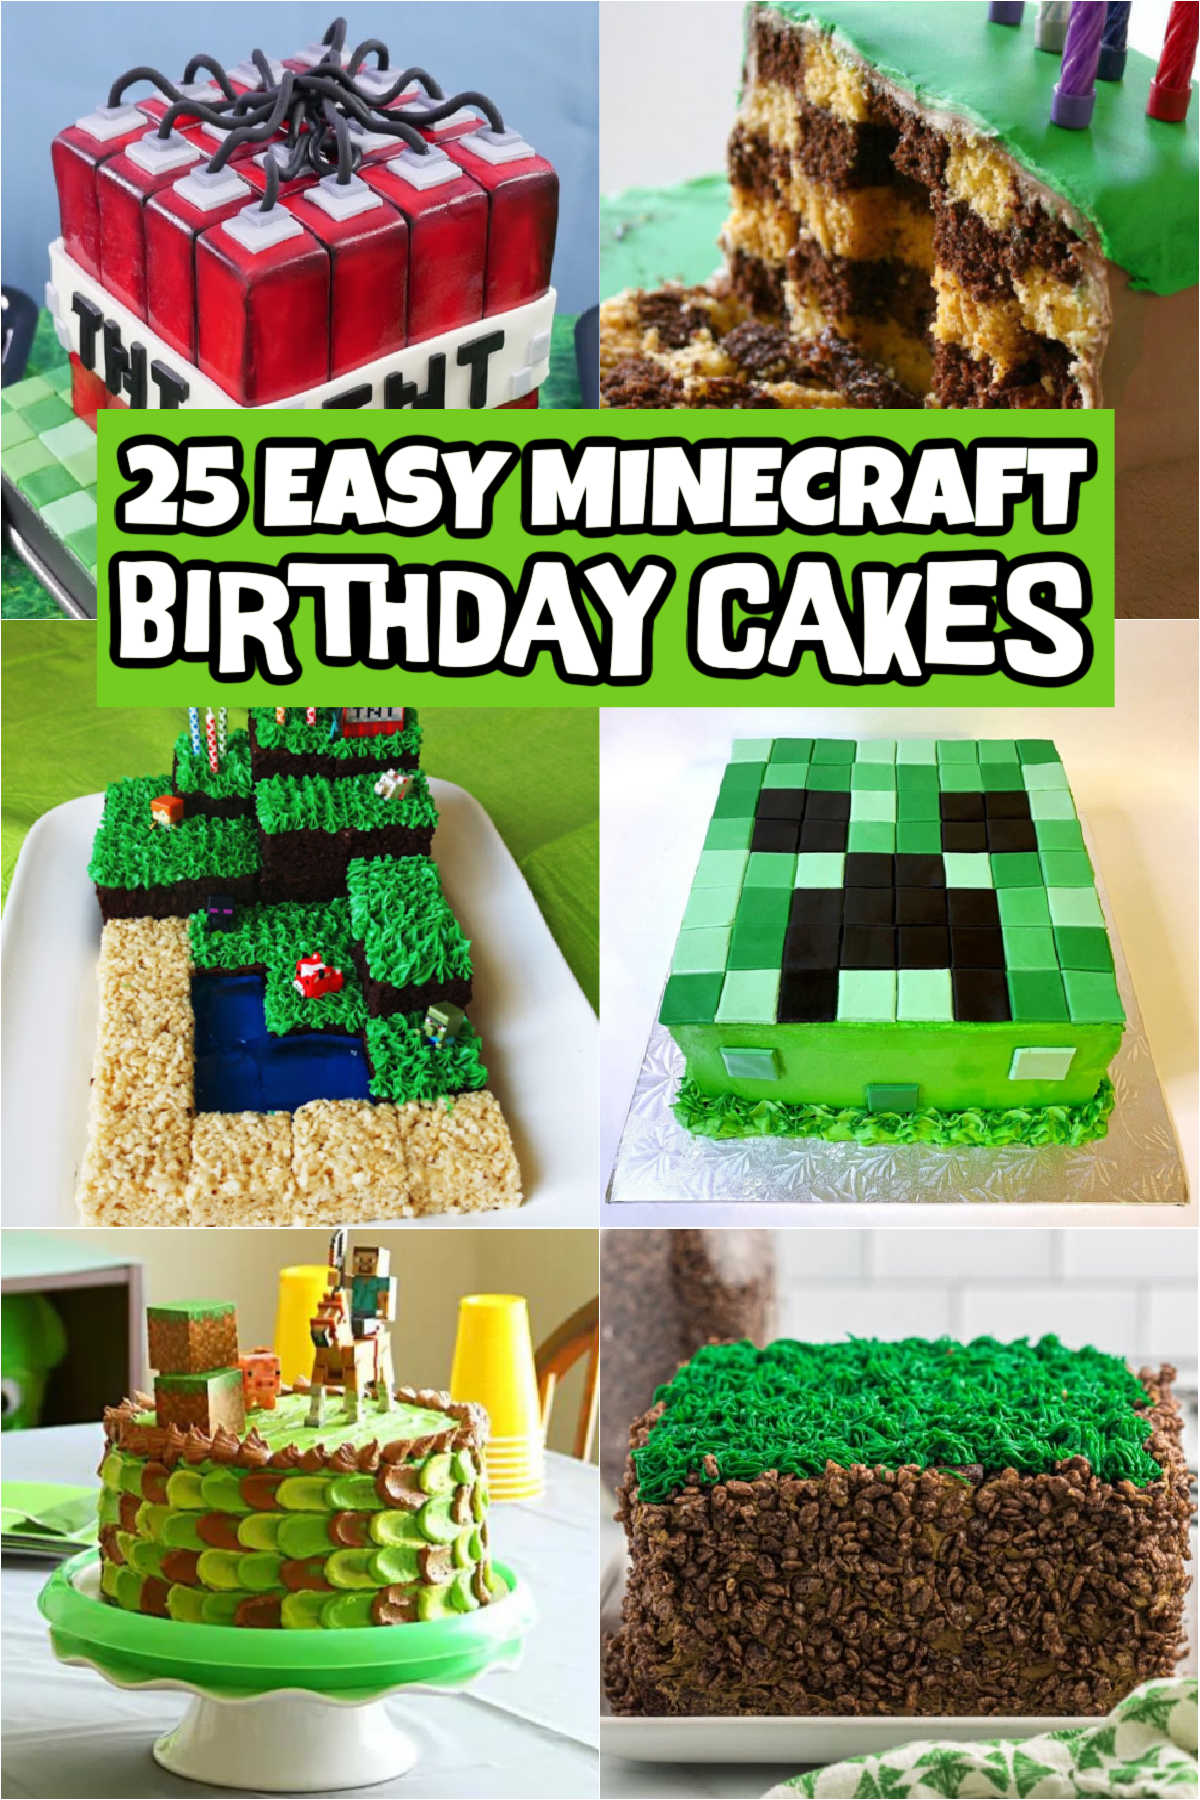
Are you looking to create the Best Minecraft Birthday Cakes? These 25 cakes are easy to make and will impress your kids.
If your kids are into Minecraft, then these birthday cakes are for you. These cakes are creative, delicious, and are made with easy steps. Your kids will be impressed with how the cake turned out.
Skip the bakery and make one of these cakes recipes that taste better and are budget friendly.
Easy Minecraft Birthday Cakes
If your kids are requesting a Minecraft Party this year, these themed cake recipe are for you. These Minecraft Themed Birthday Cake add the perfect addition to your celebration and your guests will sure to be impressed.
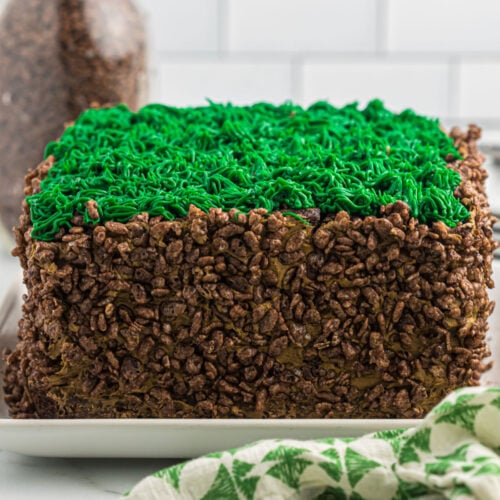
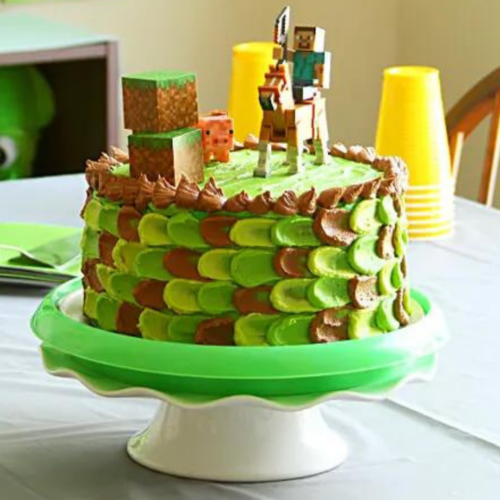
1. Minecraft Birthday Cake
If you kids love the popular video game, then this Minecraft Cake design is for you.
Minecraft Birthday Cake
Fans of Minecraft will love this 3-layered Minecraft Grass Block Cake that looks like the grass cube from the game! It's made of cake mixes, Cocoa Krispies cereal, frosting, and more!
Minecraft Birthday Cake
2. Minecraft Cake Pops
The green frosting that is added to the cake pops is perfect for you next party.
Minecraft Cake Pops
These Minecraft cake pops are so easy to make and the perfect addition to any Minecraft birthday party! This easy recipe makes enough that you can even save some in the freezer for later!
Minecraft Cake Pops
3. Minecraft Cake
Make this square cake for the perfect addition to your themed birthday party.
Minecraft Cake
Learn how to make this easy and delicious two-layer chocolate cake that's also easy to decorate for your favorite Minecraft fan.
Minecraft Cake
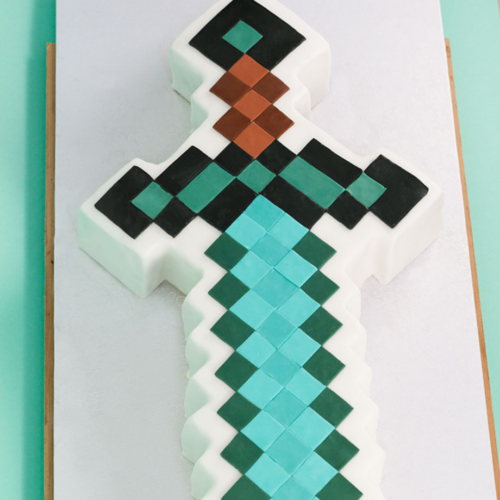
4. Minecraft Sword Cake
Make this sword cake with white fondant for a delicious Minecraft theme cakes.
Minecraft Sword Cake
This Minecraft Sword Cake is filled with chocolate cake, chocolate Italian meringue buttercream, and covered with chocolate ganache. All chocolate! Yummy!
Minecraft Sword Cake
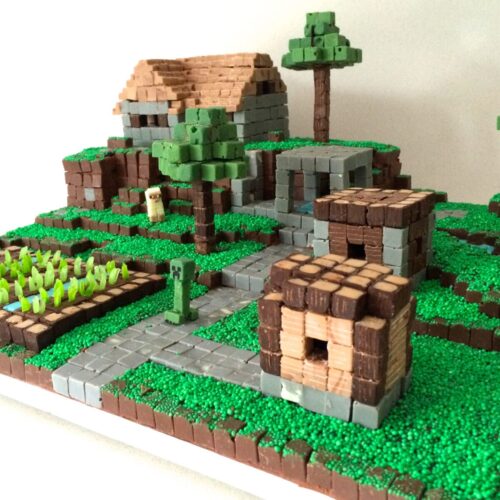
5. Minecraft Cake Village
Make this impressive Minecraft Cake Village for a Pinterest worthy cake. You are sure impress your kids and they might even give you some tips.
Minecraft Cake Village
Epic Minecraft cake village with no fondant, just frosting, chocolate, and sprinkles. This is a really fun cake to make!
Minecraft Cake Village
6. Minecraft Round Cake
All the kids to help decorate the top of the cake with Minecraft characters for a fun cake idea.
Minecraft Round Cake
Surprise a Minecraft fan with this beautiful three-layer birthday cake decorated with buttercream petals in Minecraft colors.
Minecraft Round Cake
7. 3D Minecraft Fondant Cake
You will be impress how easy this cake is to make.
3D Minecraft Fondant Cake
It takes 1,280 tiny fondant squares to make this 3D Minecraft logo. If you have more cake mix, buttercream, and fondant, you can make small squares.
3D Minecraft Fondant Cake
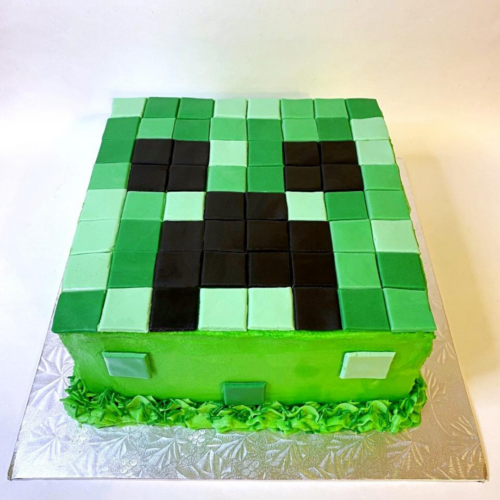
8. Minecraft Creeper Cake
Make this creeper cake with different shades of green for the perfect creeper face.
Minecraft Creeper Cake
This detailed yet quick-to-make Minecraft Creeper Cake is perfect for those who want less fondant and more cake and buttercream.
Minecraft Creeper Cake
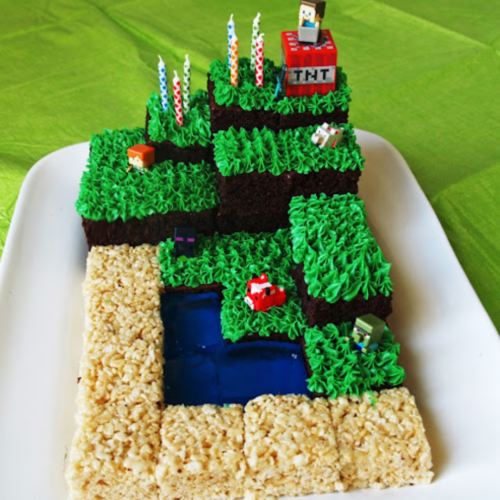
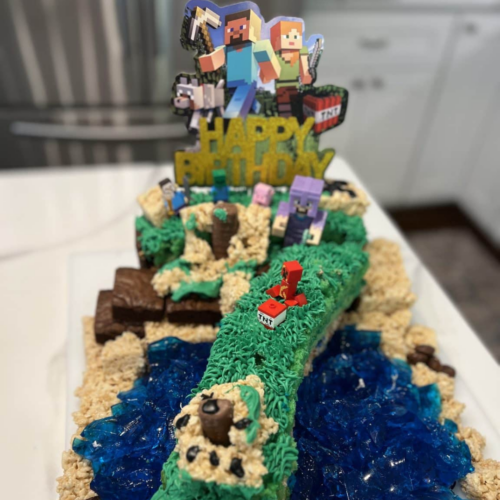
9. Minecraft Landscape Cake
I love how this cake is made with a cake and Rice Krispie Treats.
Minecraft Landscape Cake
Make an immersive cake landscape with Rice Krispies for sand blocks, Jell-O for the water, devil's food for the cake, and more!
Minecraft Landscape Cake
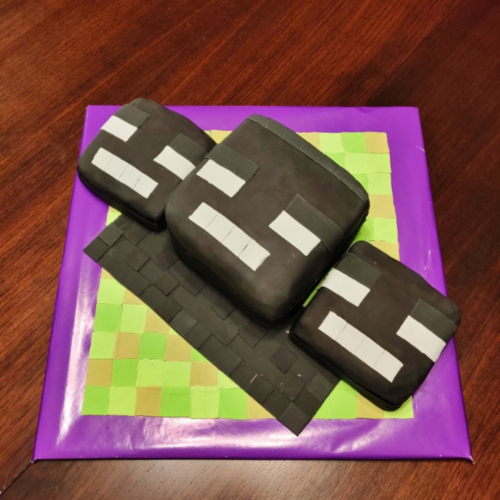
10. Minecraft Wither Birthday Cake
This cake made with a colorful cake on the inside.
Minecraft Wither Birthday Cake
This Minecraft Wither Cake tastes like Skittles and is as colorful on the inside! It can be tedious to make, but it's not difficult to make.
Minecraft Wither Birthday Cake
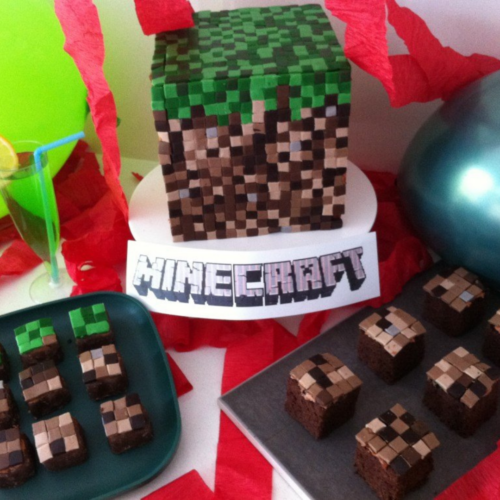
11. Checkered Dirt Block Minecraft Cake
This cake is sure to impress your family and friends with the checkered look.
Checkered Dirt Block Minecraft Cake
A fabulous cake made of sponge cakes, fondant, buttercream, icing, and sugar syrup, that will let you be creative with ready-made or homemade ingredients.
Checkered Dirt Block Minecraft Cake
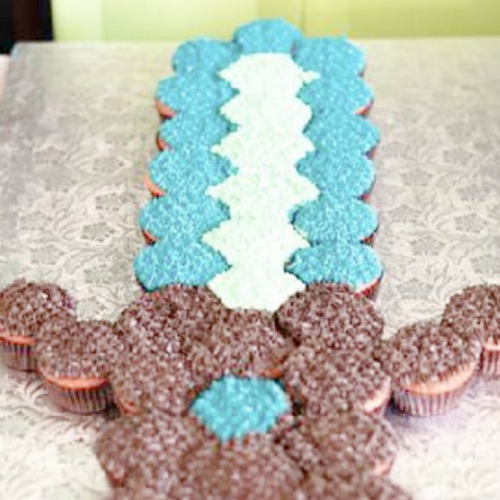
12. Diamond Sword Pull-Apart Cupcake Cake
Make this cake with cupcake to easily serve.
Diamond Sword Pull-Apart Cupcake Cake
Looking for another easy Minecraft cake idea without fondant? This is a cool alternative to a traditional birthday cake with the added bonus that no cutting is required.
Diamond Sword Pull-Apart Cupcake Cake
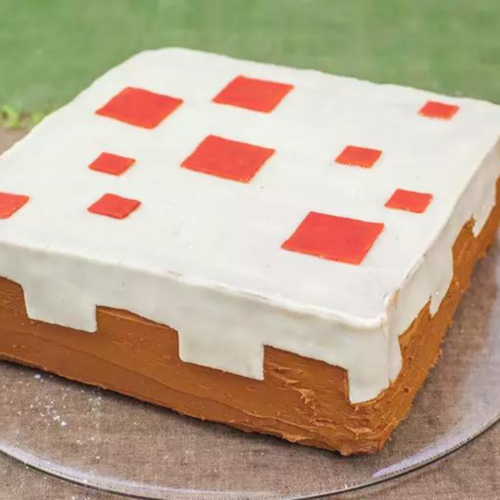
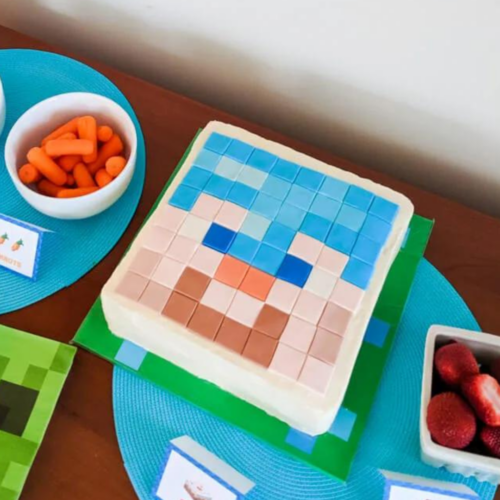
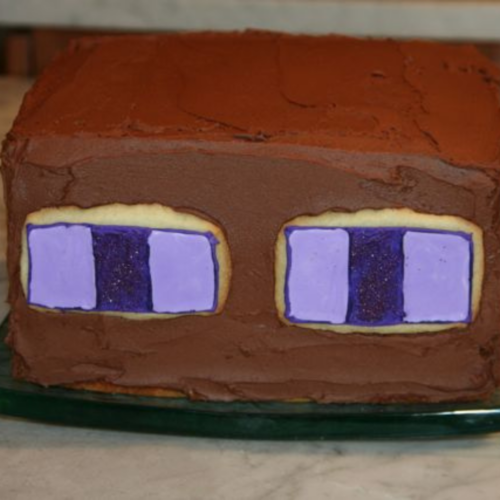
13. Minecraft Steve in Diamond Armor Cake
I love how this cake is easily made into a Minecraft Steve Cake.
Minecraft Steve in Diamond Armor Cake
This easy Minecraft birthday cake is so simple to DIY because it’s a buttercream cake topped with colored fondant squares that look like Minecraft pixels.
Minecraft Steve in Diamond Armor Cake
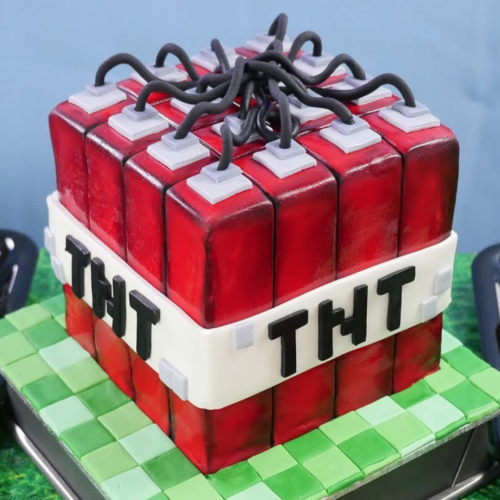
14. TNT Minecraft Birthday Cake
Make this Minecraft TNT Cake for the perfect birthday cake.
TNT Minecraft Birthday Cake
An easy, fun, and quick-to-make DIY tutorial to create a TNT Minecraft Cake that will be a bang-up hit!
TNT Minecraft Birthday Cake
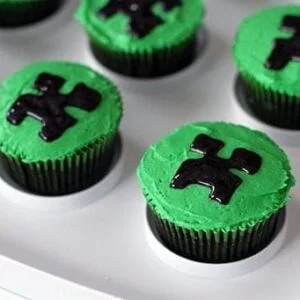
15. Minecraft Birthday Party Cupcakes
Serve these cupcakes to easily serve a crowd.
Minecraft Birthday Party Cupcakes
The best buttercream icing recipe ever for your Minecraft cupcake – sweet and salty perfect icing.
Minecraft Birthday Party Cupcakes
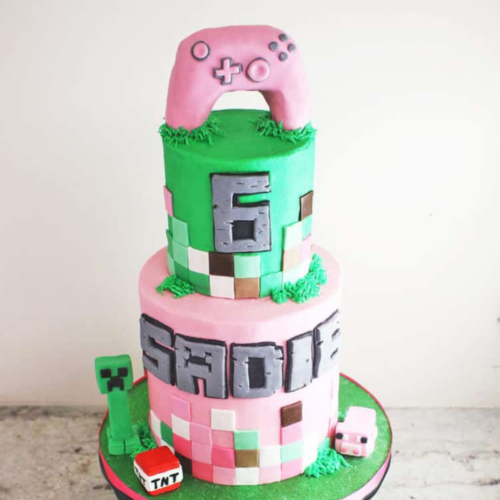
16. Pink Minecraft Birthday Cake
I love how this cake is made with fun pink and green colors.
Pink Minecraft Birthday Cake
With a pink Xbox Controller Cake topper, a creeper, TNT, a pig, and lots of pixels, it's perfect for any kid who loves Minecraft and marshmallow fondant.
Pink Minecraft Birthday Cake
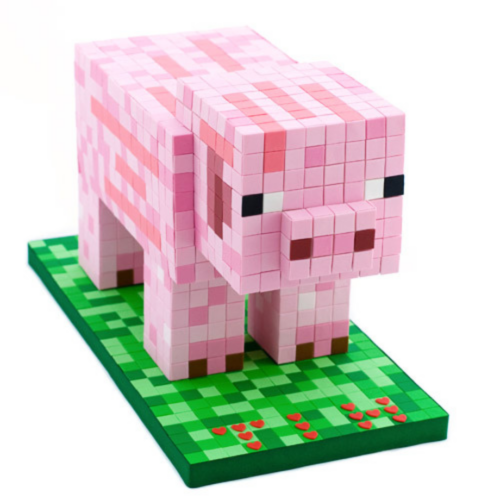
17. Minecraft Pig Cake
Start with a lemon cake to make this easy to make pig cake.
Minecraft Pig Cake
Inside is a lemon cake moistened with lemon syrup and filled with a gentle color of pink strawberry Swiss meringue buttercream to match the pig’s exterior.
Minecraft Pig Cake
18. Funfetti Minecraft Cake
This popular cake starts with a gluten free cake mix.
Funfetti Minecraft Cake
Funfetti cake is a popular choice for birthday cakes, and this Minecraft cake is made with gluten-free funfetti cake mix!
Funfetti Minecraft Cake
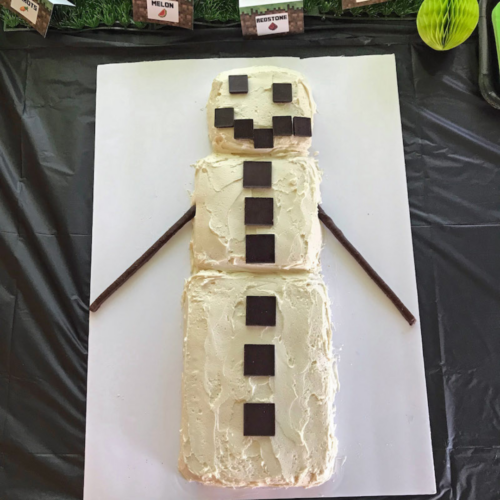
19. Minecraft Snow Golem
This cake is made with simple steps.
Minecraft Snow Golem
This awesome Minecraft birthday cake is easy to make and works for every Minecraft game player, either bedrock edition or java edition.
Minecraft Snow Golem
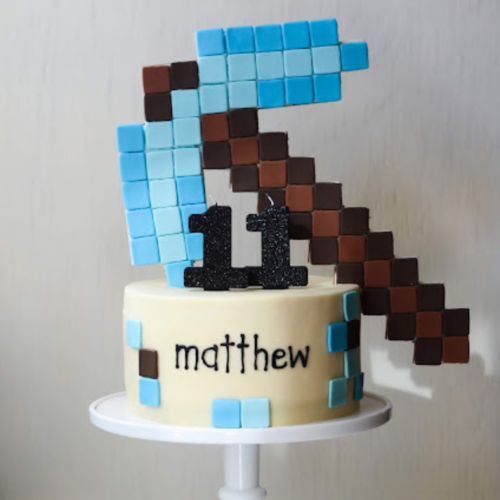
20. Minecraft Diamond Pickaxe
This one was one of my kids favorite cake and combines Jello, Whipped Cream and Cake.
Minecraft Diamond Pickaxe
Kiddos and celebrants will love the Jello, whipped cream, and cake combination in this Minecraft Pickaxe Cake!
Minecraft Diamond Pickaxe
21. Minecraft Slime Birthday Cake
This cake is made with only 4 ingredients.
Minecraft Slime Birthday Cake
This Minecraft Slime birthday cake made of only 4 ingredients is so easy to throw together and you’ll knock everyone's socks off and won’t even break a sweat doing it!
Minecraft Slime Birthday Cake
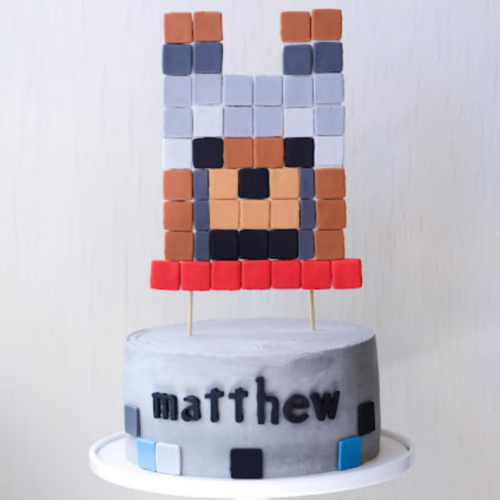
22. Minecraft Wolf Birthday Cake
Make cake and use fondant to make the squares for an impressive cake.
Minecraft Wolf Birthday Cake
It's easy to make the Minecraft Wolf head. Just use a small square cutter to cut out various colors of fondant, then secure the squares onto a cardboard cutout using frosting.
Minecraft Wolf Birthday Cake
23. Minecraft Number Cake
Have the kids help make this cake as they will know exactly where everything goes.
Minecraft Number Cake
For this cake, you can use brownies, chocolate bars, milk duds, Jello, rice crispy treats, and even Legos! The possibilities are endless, just like they apparently are in Minecraft, the game.
Minecraft Number Cake
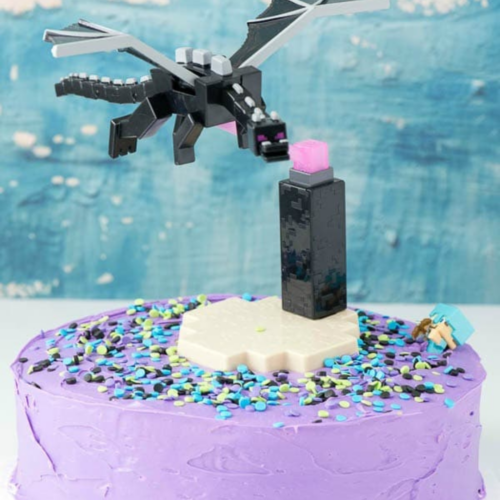
24. Minecraft Enderman Cake
This is one of the easiest Minecraft cake to make.
Minecraft Enderman Cake
For little ones who think the Enderman is one of the coolest characters in Minecraft, make them this easy Minecraft Enderman Cake covered with chocolate frosting.
Minecraft Enderman Cake
More Fun and Easy Cake Ideas


Thank you! I made this cake for my son’s birthday yesterday, and he loved it.
Thanks so much for this awesome recipe!! It came out great & my 10 year old son and his friends thought the same!!
HI Carrie, I have a question I am going to make this cake this weekend for my son’s 10th birthday party, Did you put the cake in the refrigerator before you applied the cinnamon? I just wanted to make sure I do it right!
I would.
Also, my kids pointed out that they thought the finished cake was too tall (what a thing to complain about!). They showed me the cake in the game – the one with the white frosting & red squares – and I have to agree with them.
So if ya only have 2 boxes of cake/2 layers, you’ll probably be ok 😉
How funny!
Thank you for posting this easy to follow, step by step tutorial! You helped me be The Hero for my little girls 8th birthday.
In preparing the red squares for the topping, I used a small package of red fondant that was left over from something from Christmas. Worked great. But as my kids helped me roll it out with powdered sugar and sampled the scraps, I wondered if an ‘Air Head’ or ‘Laughy Taffy’ candy would work just as well…
Woohoo! I’m so happy!
I have easy recipe for barbie. Somewhat time consuming but beautiful. Also made with 3 cake mixes, icing of choice and food coloring. No cutting shapes required. Let me know if you would like a picture and steps.
I would love to know how you did it Lorey.
Wanted to clarify…did you use a whole cake box for one 8×8 pan even though box says it makes 2 8×8?
Yes, I did. That way it was really full.
These instructions were a piece of cake to execute! (Pun intended). My 12 year old loved it and it cost us about $10. Thank you for sharing!!
Thank you for sharing! I’m so glad it worked for you!
I loved all of your tips for the cakes, I pride myself on being old school any trying to almost every thing diy so all of your advice is music to my ears. am so glad I found your page.
Thanks so much Taisha!
Hi! I noticed the green crinkled paper that you put on the table for grass. It looks great and so do both cakes! Here’s a frugal decor tip: I found some Easter grass a couple of months ago on clearance for 10 for $1.00, so naturally I HAD to buy some. I thought I might use it as gift basket filler, but when my son decided on a Minecraft party for his 13th birthday (I am thrilled he still wants a party) I used the grass as decor. I bought brown plastic tablecloths for a dollar and scattered the Easter grass on the top so that the tables resembled grass blocks. It turned out really cute.
I also made a grass block cake, but didn’t buy any special pans or anything. I just used the 8×8 pyrex baking dishes I already own, put a piece of waxed paper on the bottom before pouring in the cake mix (on sale at Kroger for 10 for $10), and they turned out great! For those who can’t purchase special cake decorating bags, tips, etc., I have had success with snipping a tiny hole in the corner of a sturdy sandwich bag (and even the corner of a powdered sugar bag when I ran out of sandwich bags) and piping icing out of it. If you get the hole small enough, the icing will come out in little strands like grass. You could probably even poke several holes in the corner with a large needle to replicate the grass tip. I also had an idea for the red squares: you could cut them out of fruit leather if you wanted, and they would probably turn out cute.
Thanks for the frugal tips! It truly baffles me when people equate quality with price, thus paying $75 or $100 for a cake that probably cost $5 or $10. In my town, some people seem to want to say, “Oh, I ordered my cake from ___________(I won’t say the name of the local overpriced bakery)” to convey some degree of prestige”.
Oh that is a great tip! I love it. Yes, I agree…. there is no need to pay so much for a birthday cake!