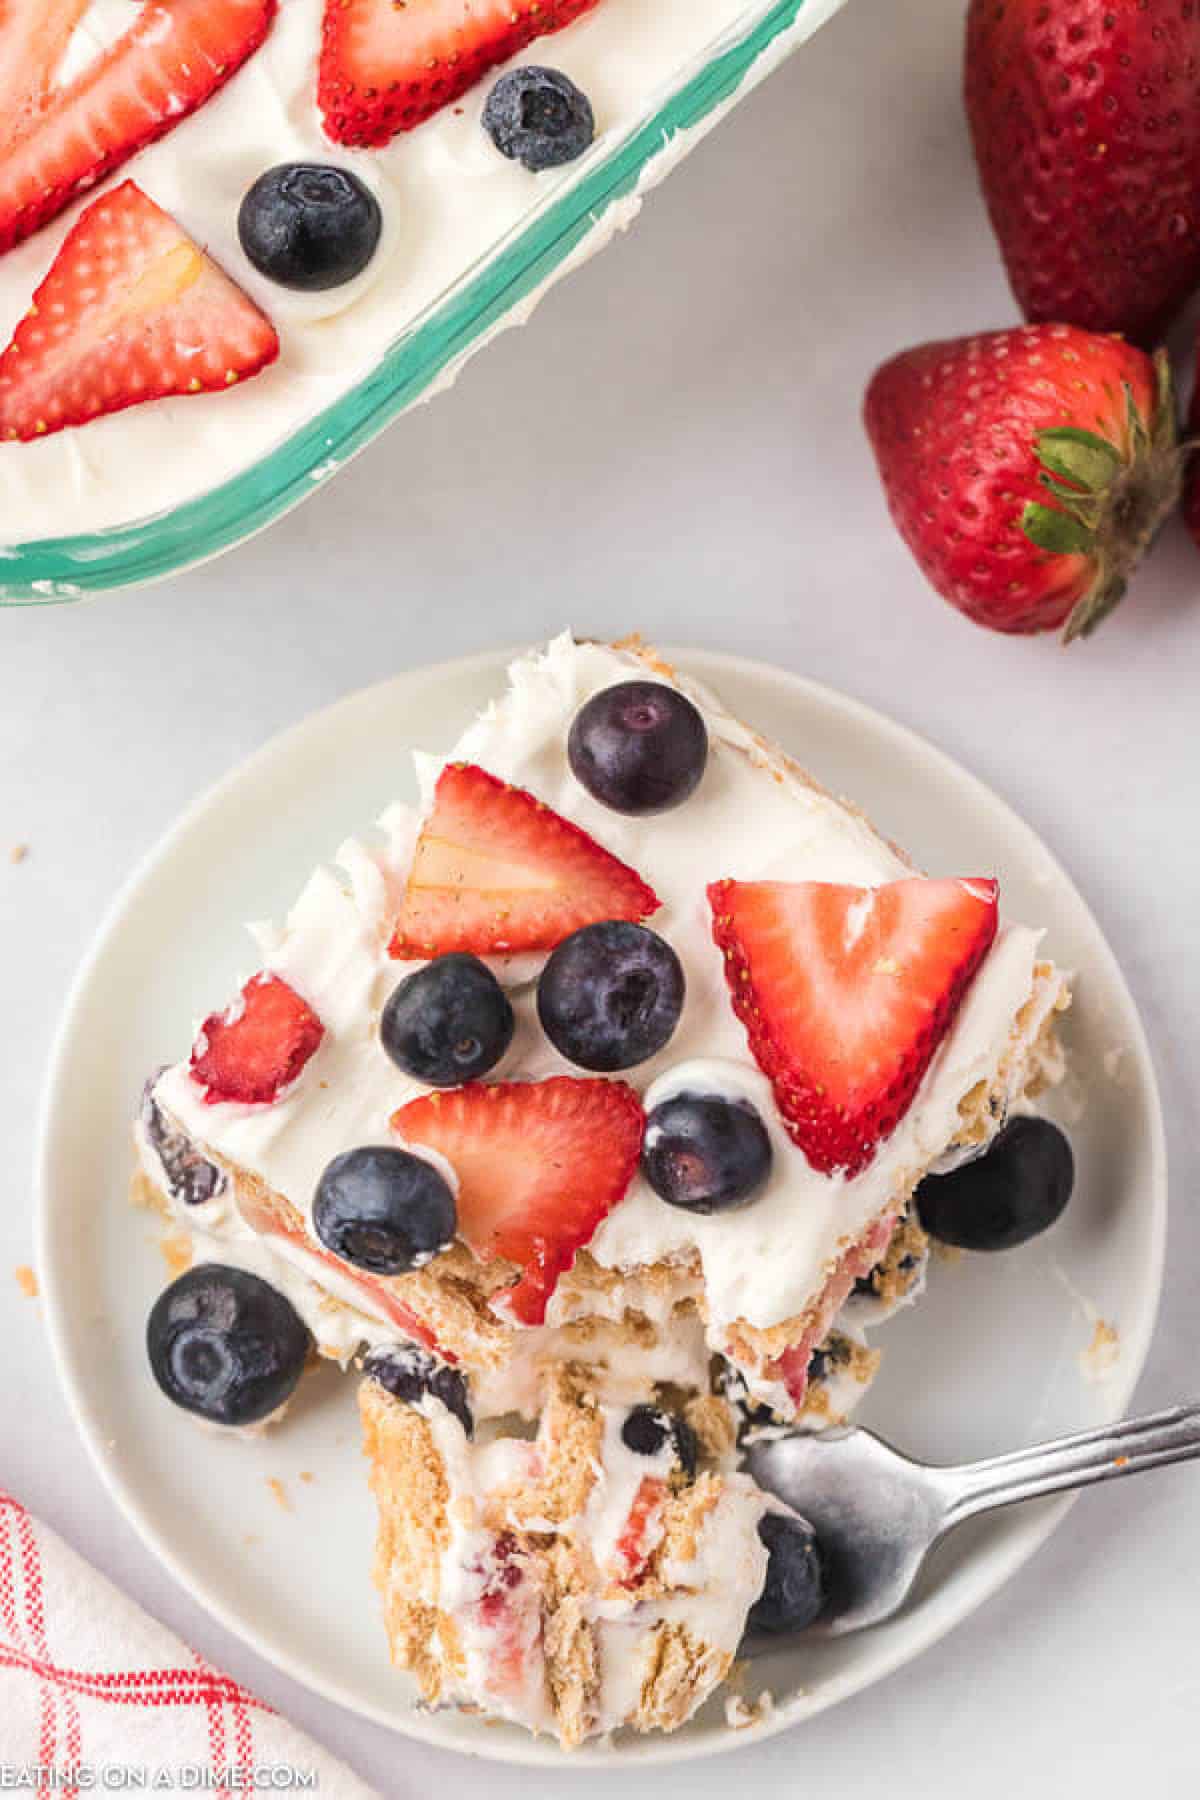
4th of July Icebox Cake is an easy no bake dessert made with layers of creamy filling, graham crackers, strawberries, and blueberries. This patriotic dessert is perfect for summer parties, cookouts, Memorial Day, and Fourth of July celebrations because it can be made ahead and feeds a crowd easily.
If you need a simple red, white, and blue dessert for hot summer days, this family-tested icebox cake is always a favorite.
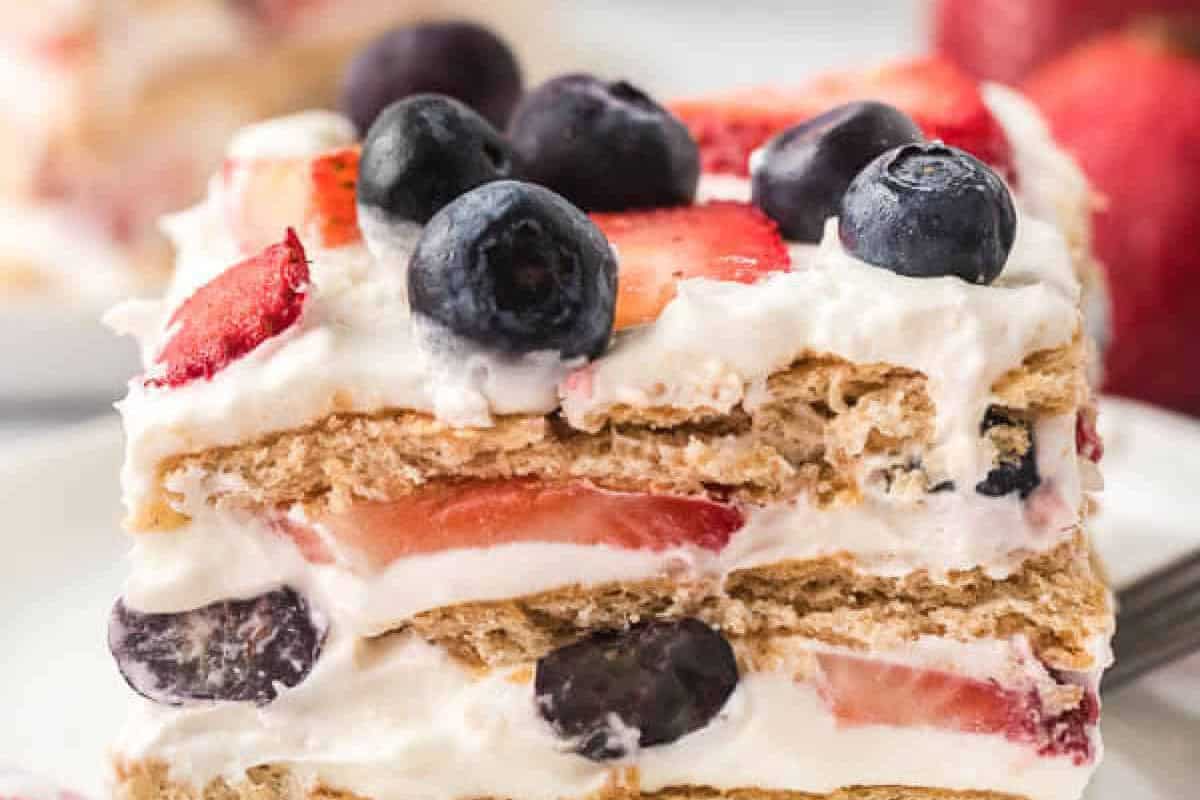
Delicious layers of strawberries and blueberries with cream cheese and graham crackers combine for one of our favorite desserts. This often makes an appearance at our annual Memorial Day cookout and 4th of July celebration just like my easy 4th of July cookies. Everyone always asks about it and looks forward to it year after year.
It is perfect for hot Summer days when you want something sweet but not too heavy. The whipped cream and cream cheese make this dish so creamy and one bite is never enough. This is one of our favorite Memorial Day Food Ideas and Memorial Day Desserts.
What is an Icebox Cake?
An icebox cake is an easy no bake dessert made by layering creamy filling with graham crackers, cookies, or wafers. As the dessert chills in the refrigerator, the layers soften into a cake-like texture.
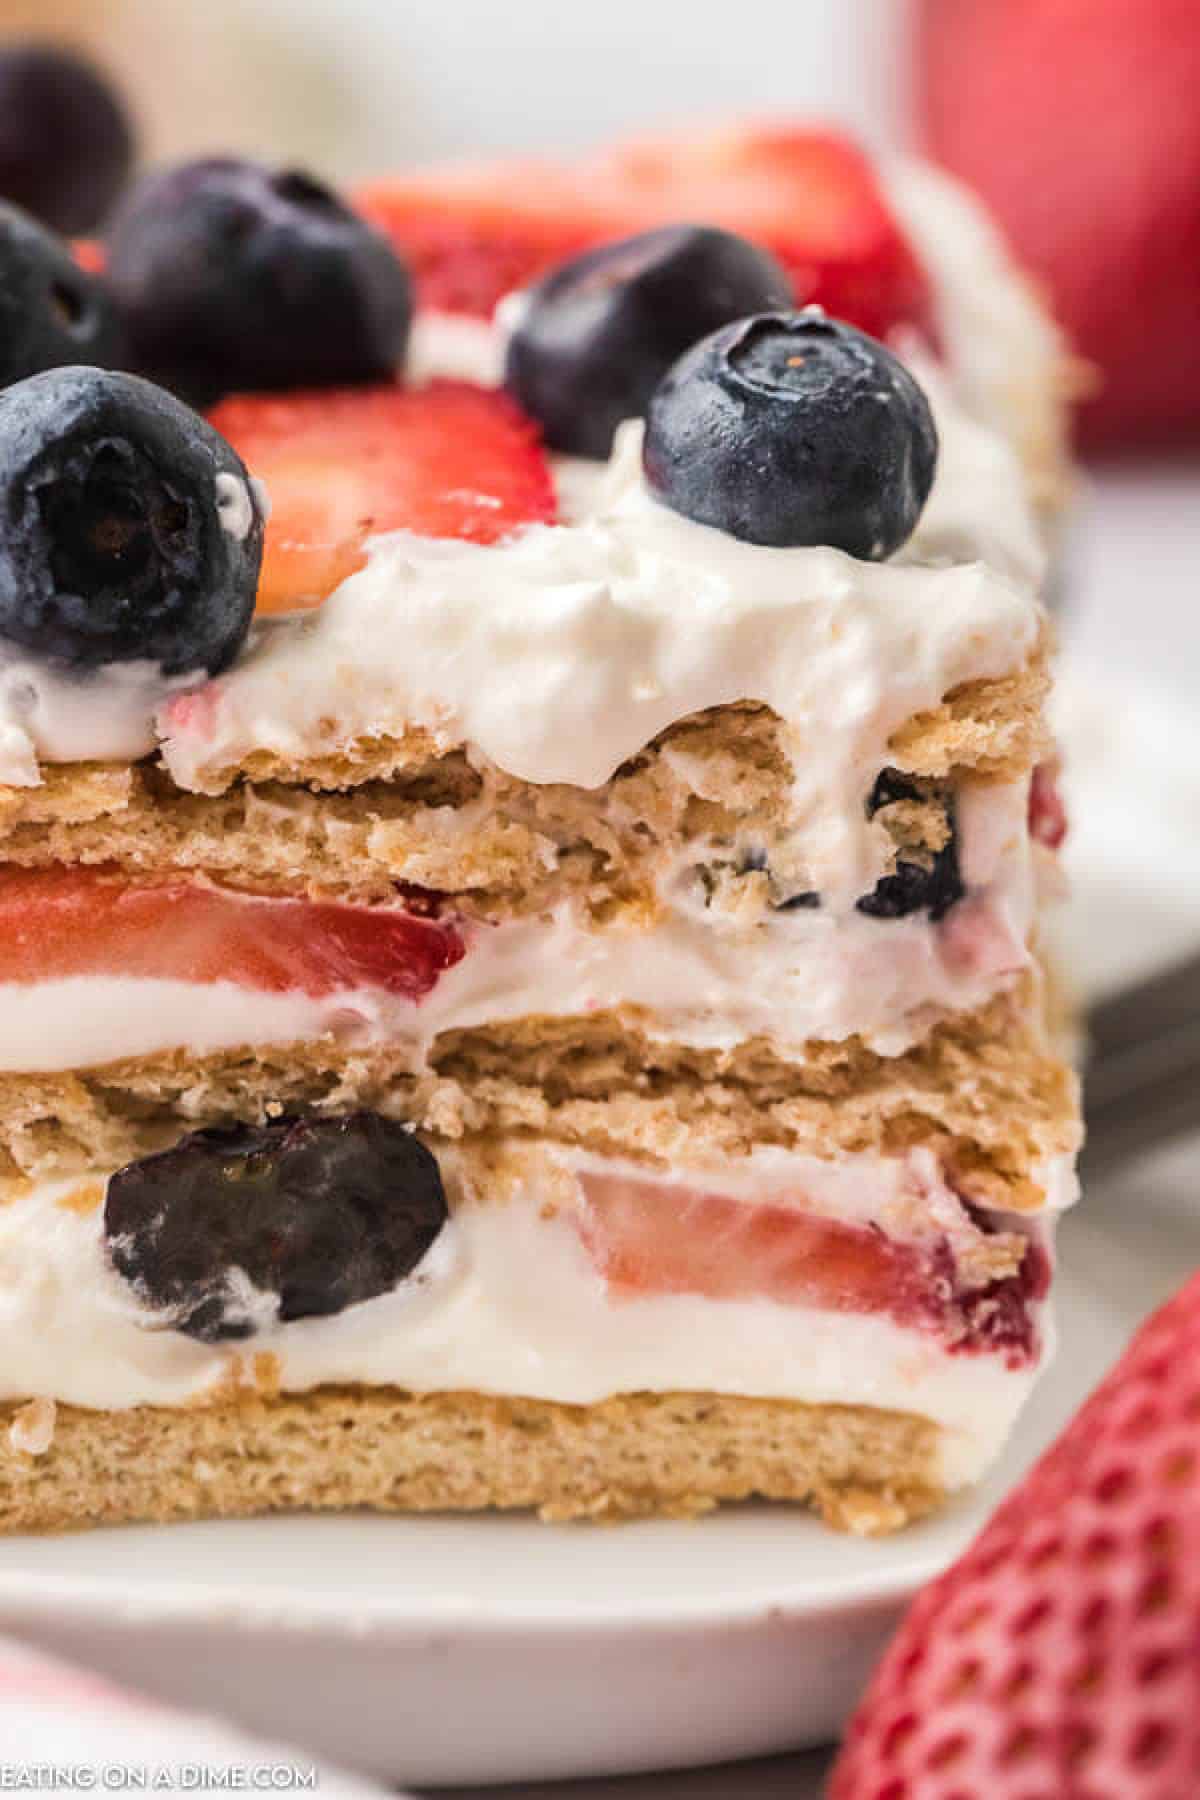
This patriotic berry icebox cake combines cream cheese, whipped cream, strawberries, blueberries, and graham crackers for an easy summer dessert everyone loves.
Ingredients

- Cream Cheese – Start with softened cream cheese for a creamy texture
- Heavy Whipping Cream – You can also use whipped topping
- Graham Crackers – Try vanilla wafers, shortbread cookies, or even layers of sponge cake.
- Fresh Fruit – For the best red, white and blue dessert we like using Fresh Blueberries and Fresh Strawberries. Raspberries and blackberries are another great option.
Scroll down to the recipe card below this post for ingredient quantities and full instructions.
How to Make 4th of July Icebox Cake
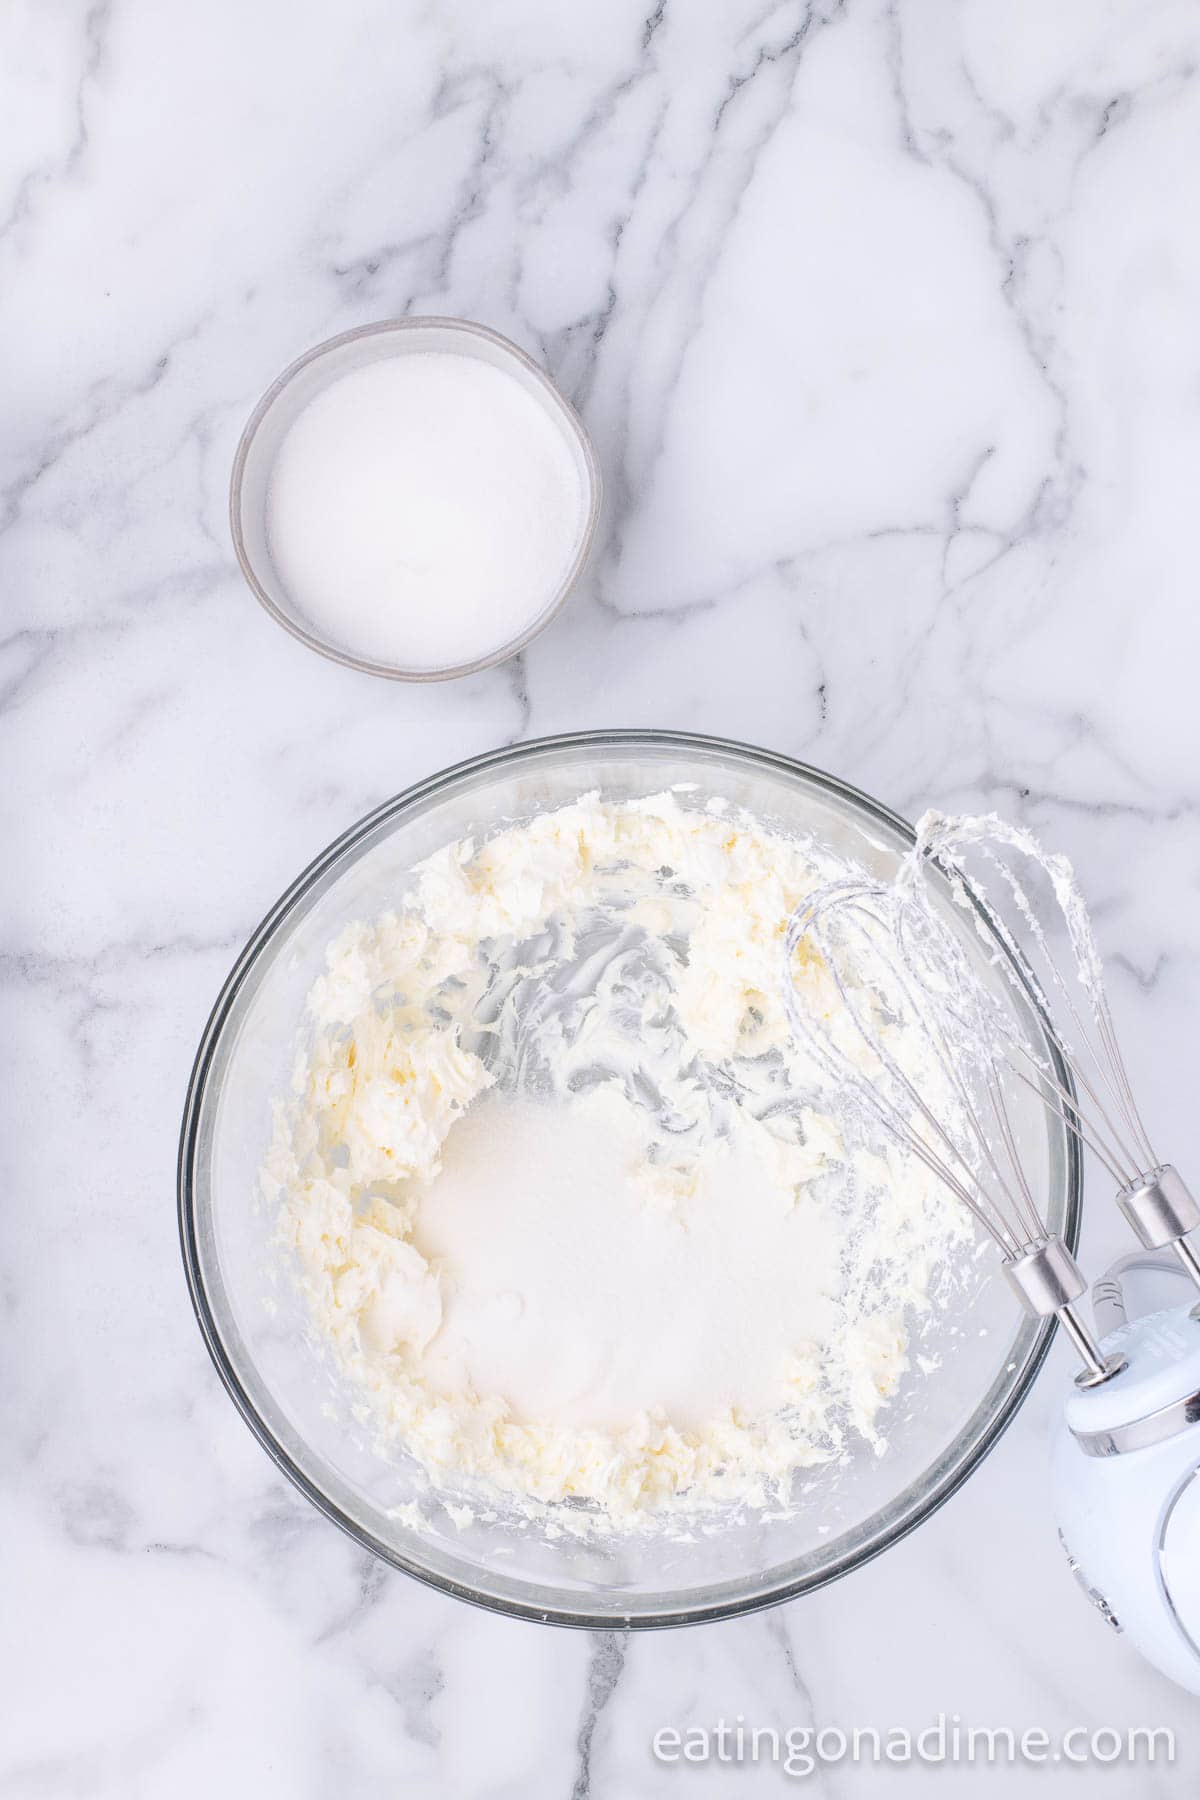
Step 1 – Combine cream cheese and sugars – First, get out a large mixing bowl. Mix the cream cheese and sugar together with electric mixer or whisk together by hand. Cream this until smooth.
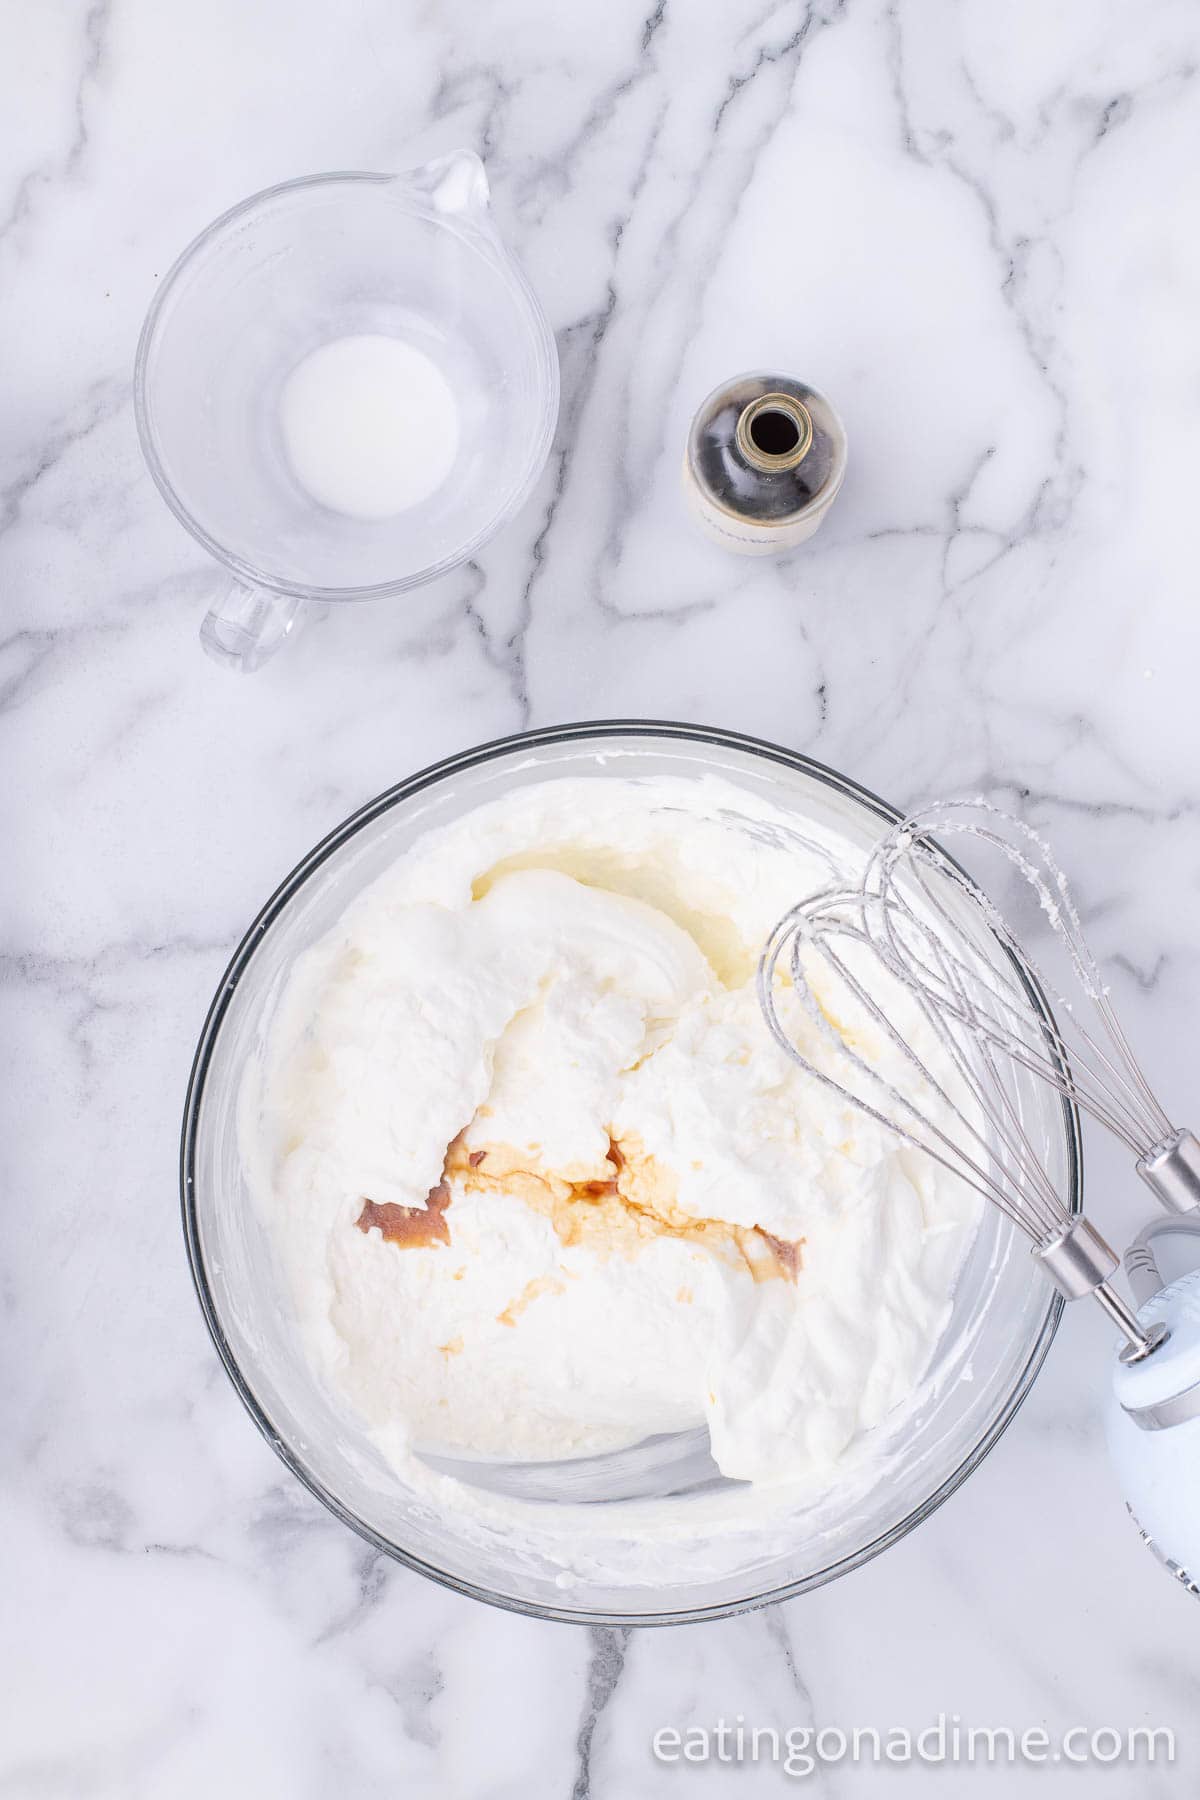
Step 2 – Add cream and vanilla – Second, add the heavy cream and vanilla extract. Beat this mixture until it thickens and forms peaks with the whisk attachment. Set this aside for later.
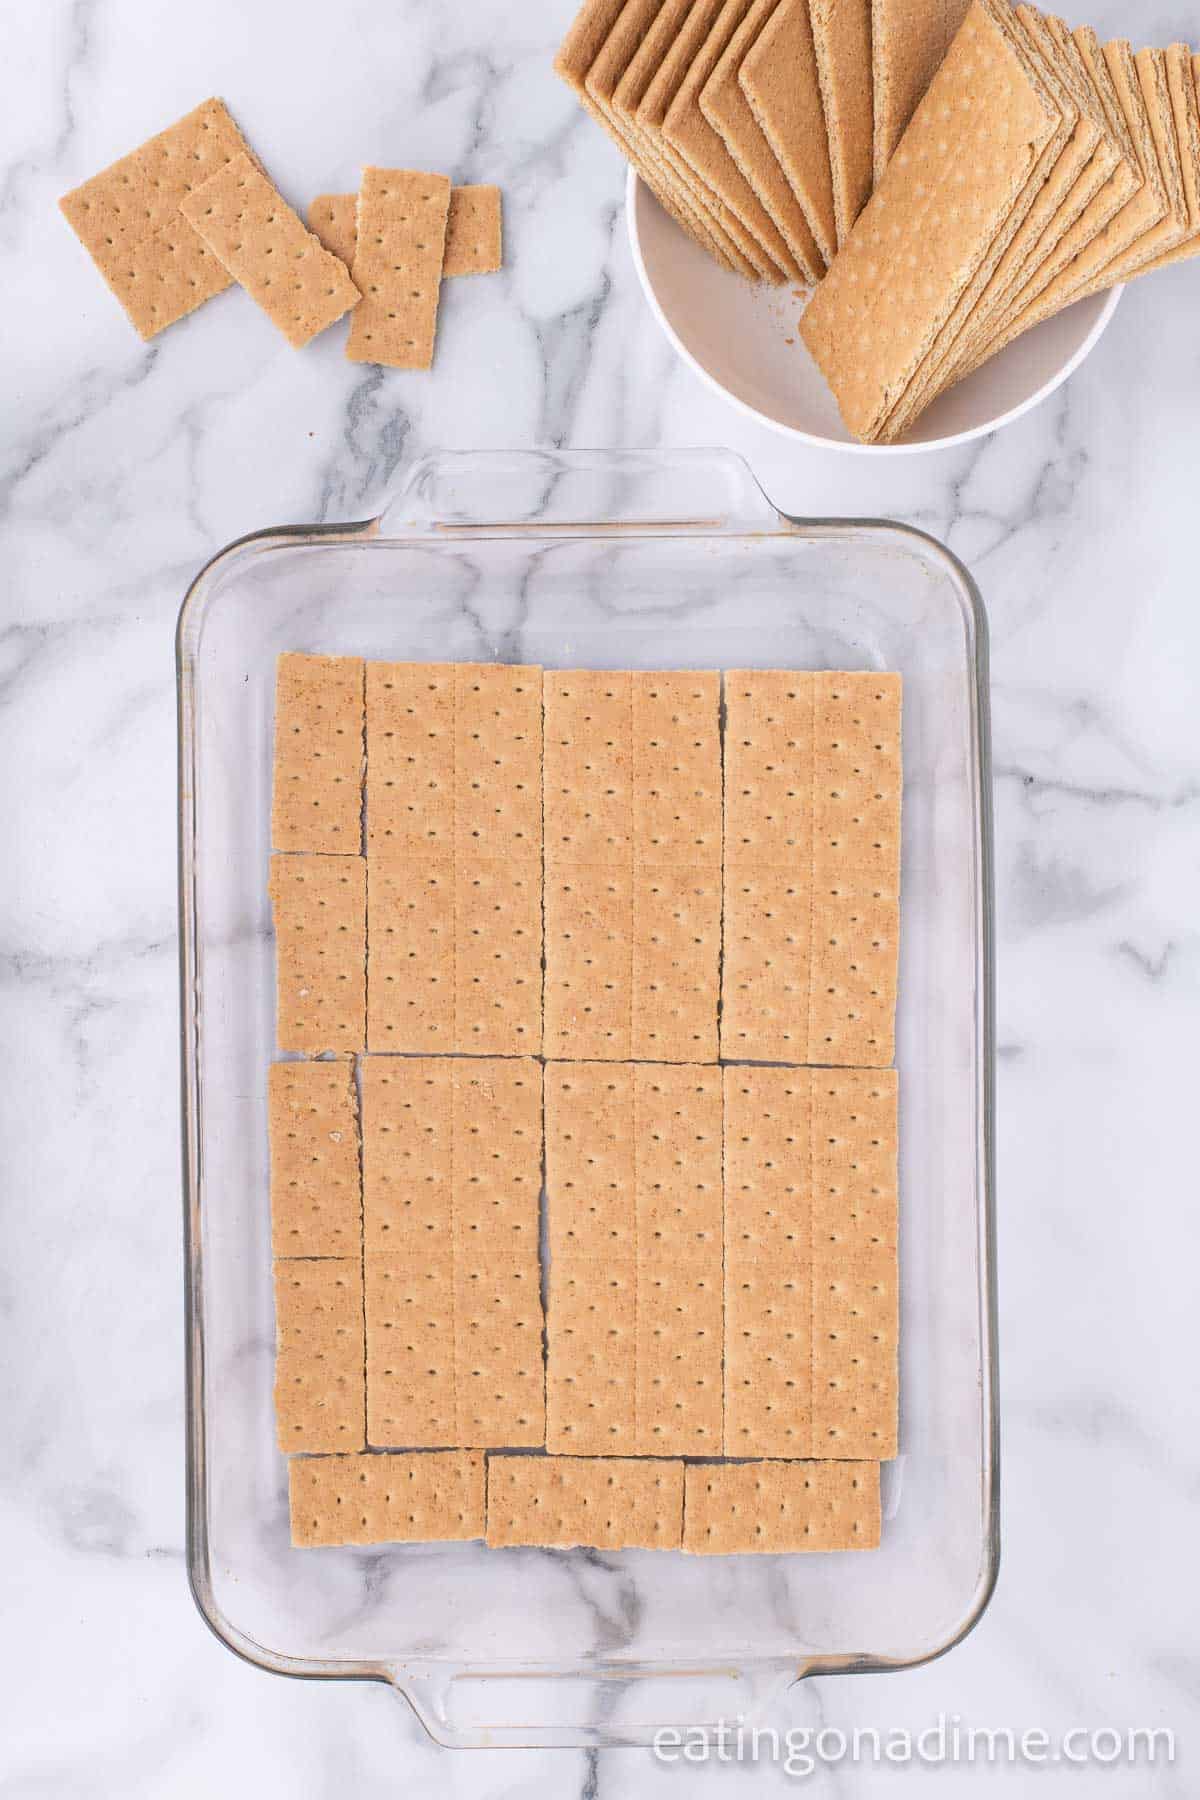
Step 3 – Add Graham Crackers – You will need a 9×13 pan. Line graham crackers on the bottom of the pan in a single layer.
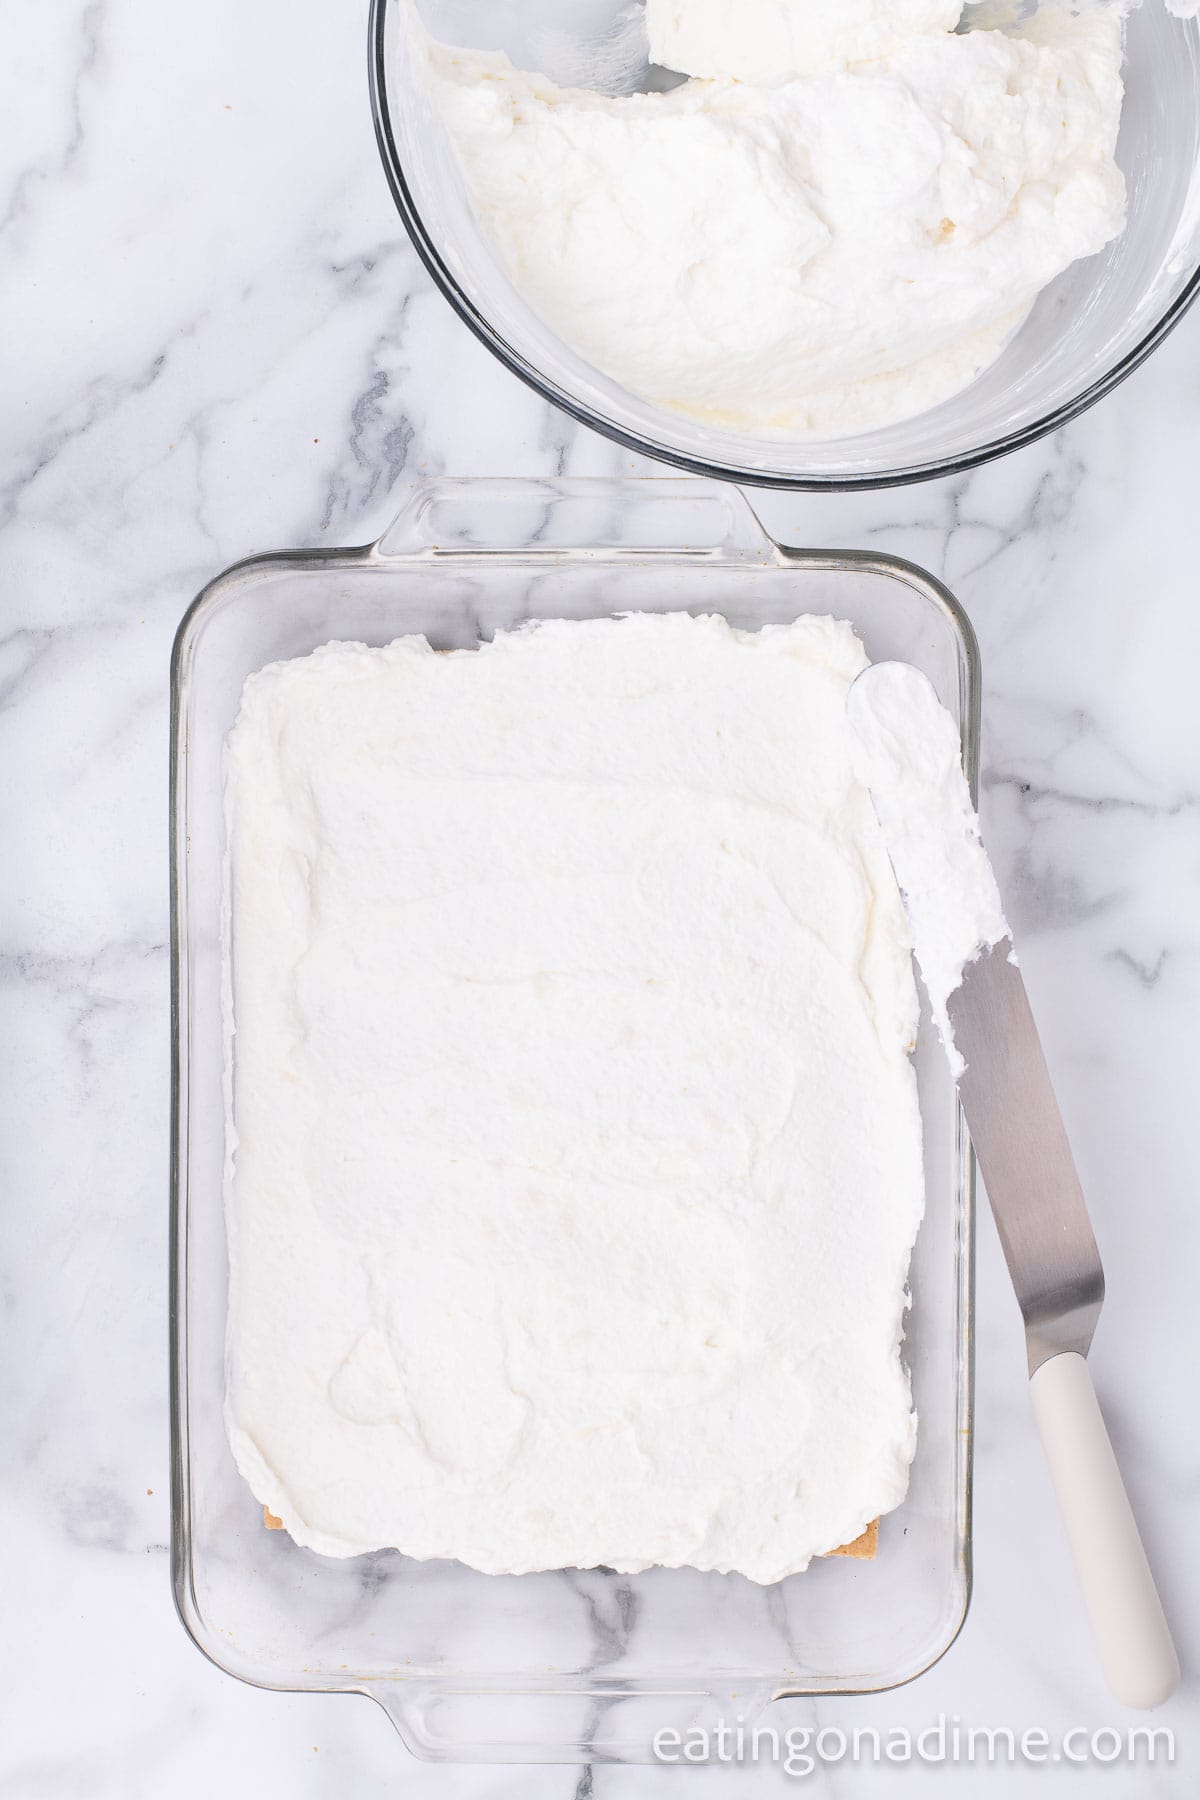
Step 4 – Top with cream cheese – Now add part of the cream cheese mixture all over the graham crackers. Be careful spreading and make sure to do so gently. You can use a spatula or back of a spoon to help spread it out.
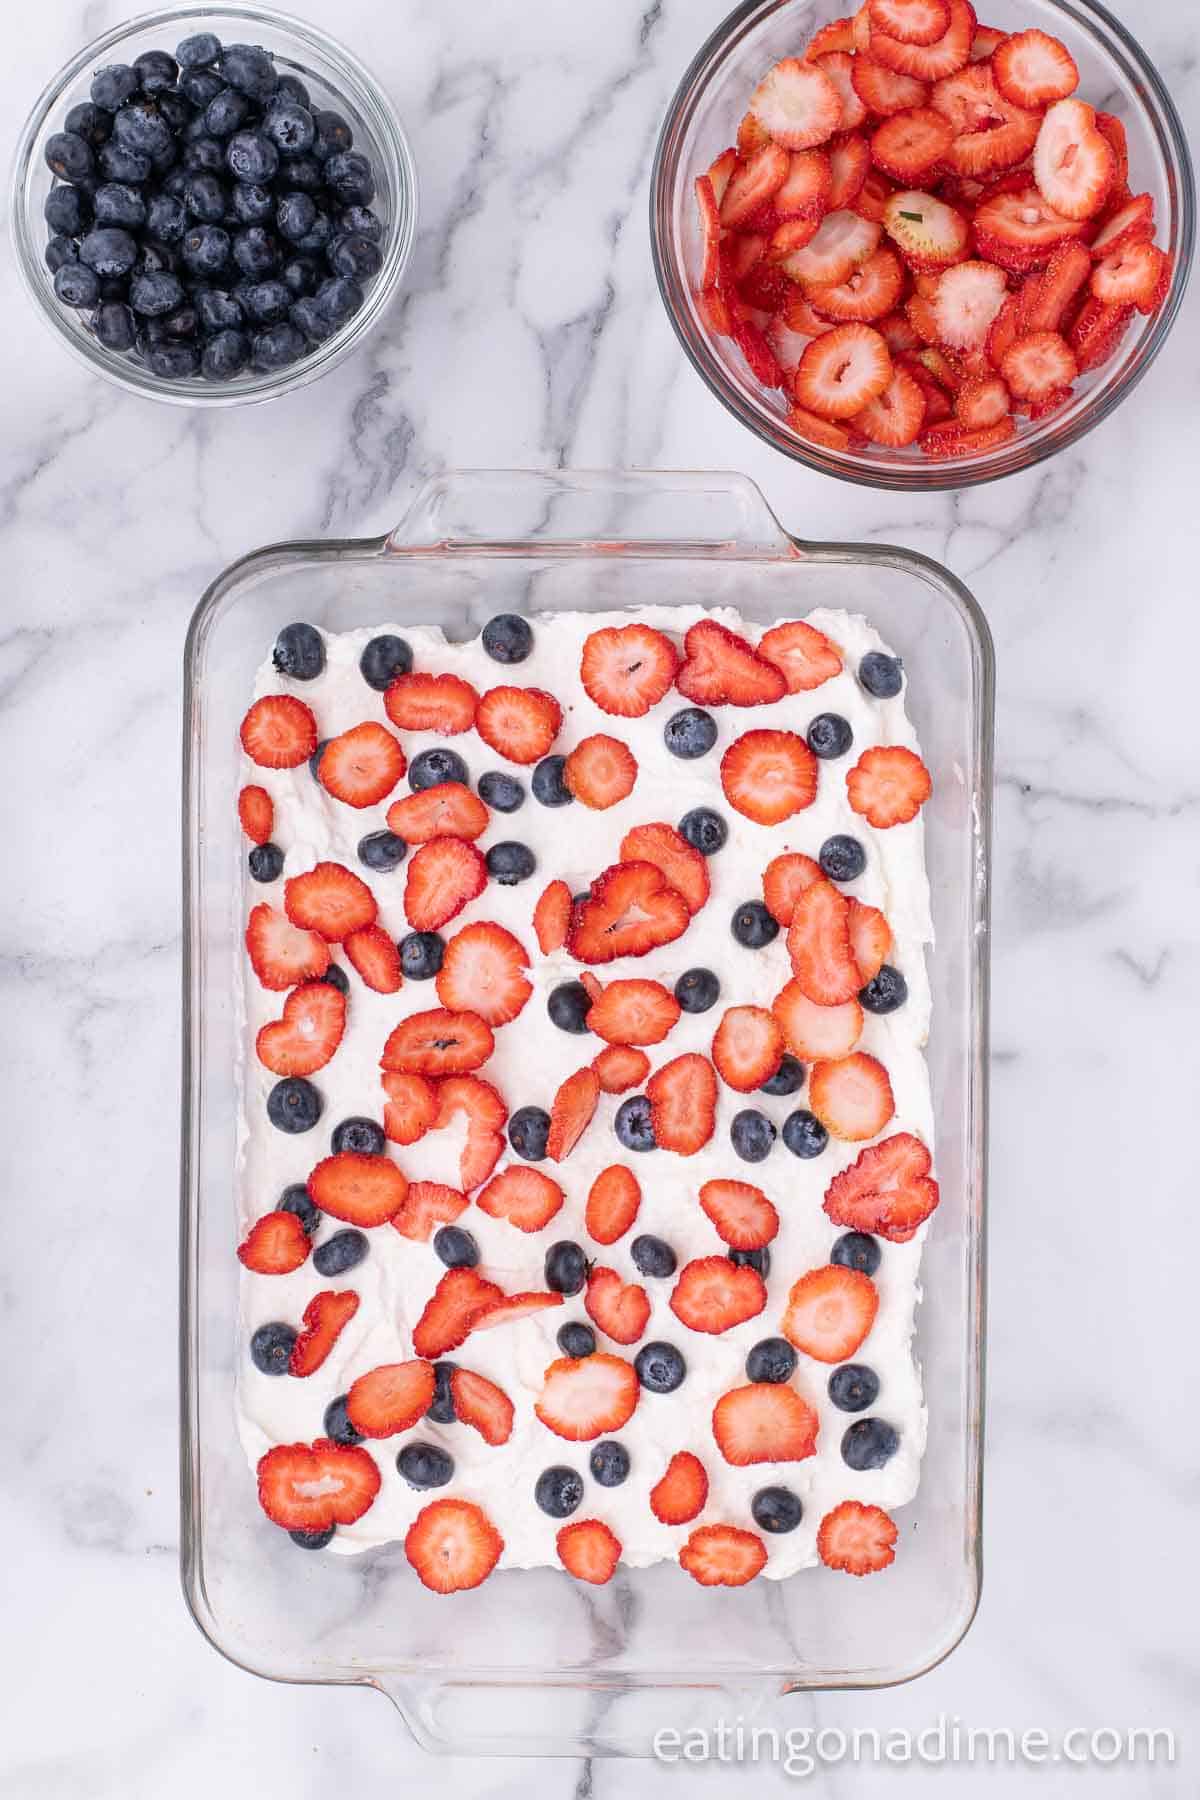
Step 5 – Top with Berries – Once the mixture is spread out, add a portion of the blueberries and strawberries.
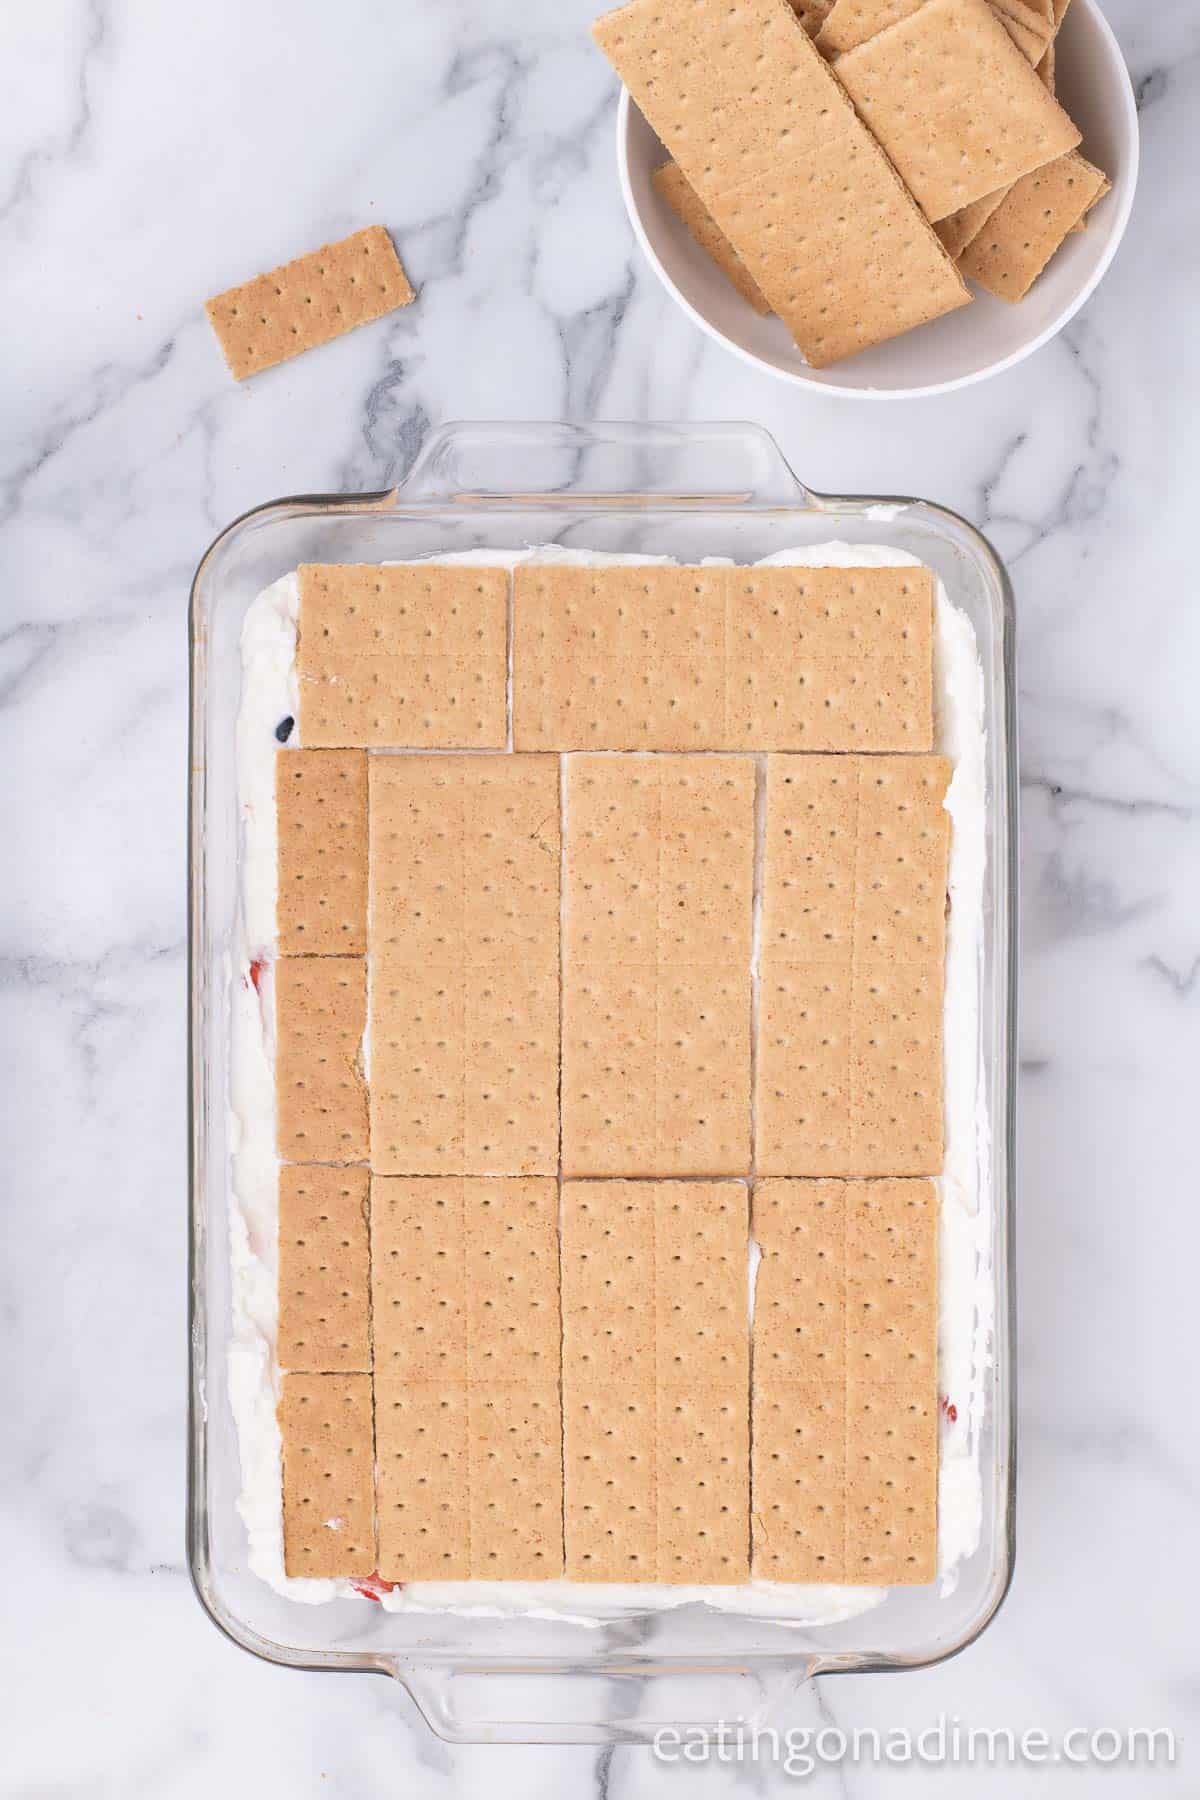
Step 6 – Final layer of graham crackers – Keep repeating the layers two more times.
Step 7 – Top with more berries – Finally, on the top layer, add strawberries and blueberries all over. You can sprinkle them or make a pattern on top. Just make it your own! Let the kids help decorate and see what fun ideas they come up with.
Step 8 – Rest Cake – Put the cake in the fridge covered in plastic wrap. Let it set for a couple of hours. Normally, 2 to 4 hours will do the trick. You just want the layers to settle into each other for the best flavor.
Tips for Success
- Pan Size – Make sure you have a nice 9×13 pan. If you are taking this to a potluck or cookout. The disposable pans are so handy because you can just toss it.
- Rest Overnight – While 2-4 hours in the fridge is sufficient, I prefer to make this cake the night before. I think the extra time really allows all the flavors to come together and chill.
- Mixing Ingredients – You can use a hand mixer. But I prefer my stand mixer to cream the sugar and cream cheese together. Mix until stiff peaks form in a large bowl.
- Knife – To easily cut the icebox cake, we recommend using a serrated knife so the slices have clean lines.
Variations and Substitutions
- Cream Layer – You can easily change the cream layer to a instant pudding mixture. Mix vanilla pudding mix or cheesecake pudding mix as directed on the package with beaters for a delicious layer.
- Cookies – You can layer the cake with vanilla wafers instead of graham crackers.
- Lemon Zest – Feel free to add in lemon zest or lemon juice to the cream layer for a light and refreshing taste.
Frequently Asked Questions
This Fourth of July cake needs to be kept in the refrigerator covered with plastic wrap. It will stay fresh for 3 to 4 days.
We prefer to make this dessert the night before serving. This allows for the graham crackers to softened and everything sets perfectly together. You can let cake rest for 2-4 hours or overnight.
We do not recommend placing this cake in the freezer. When it thaw the texture of the crust and berries will be mushy.
Yes. You can make this dessert instead of homemade whipped cream. Fold the Cool Whip into the softened cream cheese and sugar mixture until smooth, then layer as directed with the graham crackers and berries.
More Easy Icebox Cakes
More 4th of July Desserts


This 4th of July Icebox Cake is one of our favorite make-ahead summer desserts because it is simple, creamy, and always a crowd favorite. If you try this patriotic dessert recipe, please leave a comment or star rating.
We love hearing how your family enjoyed it and your tips may help other readers too.

4th of July Icebox Cake
Ingredients
- 1 8- ounce package cream cheese
- 3 ½ cups heavy whipping cream
- ¾ cups sugar
- 1 tablespoon vanilla
- 1 14- ounce box graham crackers
- 2 cups blueberries divided
- 3 cups strawberries thinly sliced divided
See how we calculate recipe costs.
Instructions
- In a large mixing bowl, beat together 8 ounces cream cheese and ¾ cup sugar until smooth and creamy.
- Add 3 ½ cups heavy whipping cream and 1 tablespoon vanilla extract, then continue beating until the mixture thickens and soft peaks form. Set aside.
- Place a single layer of graham crackers from the 14-ounce box in the bottom of a 9×13-inch pan.
- Spread one-third of the cream cheese mixture evenly over the graham crackers.
- Top with ½ cup blueberries and 1 cup thinly sliced strawberries.
- Repeat the layering process two more times using the remaining graham crackers, cream cheese mixture, blueberries, and strawberries.
- For the top layer, decorate with the remaining blueberries and strawberries as desired.
- Refrigerate for 2–4 hours before serving to allow the layers to soften and set together.

I swear I’ve been looking for this recipe for the last 15 years! I haven’t tried it yet, I just made it, but I already know it is going to be so delicious. I was looking for a beautiful Fourth of July dessert that did not require Jell-O pudding, but rather simple homemade ingredients. I can already tell I will be making this for years to come! Thank you!
I’m so glad you enjoyed it! Thank you for sharing!