This post may contain affiliate links. If you make a purchase through links on our site, we may earn a commission.
Make Homemade Pita with only 5 simple ingredients in the oven or stovetop! Soft, puff-perfect pita bread that can be used for Gyros or Pizza Dough.
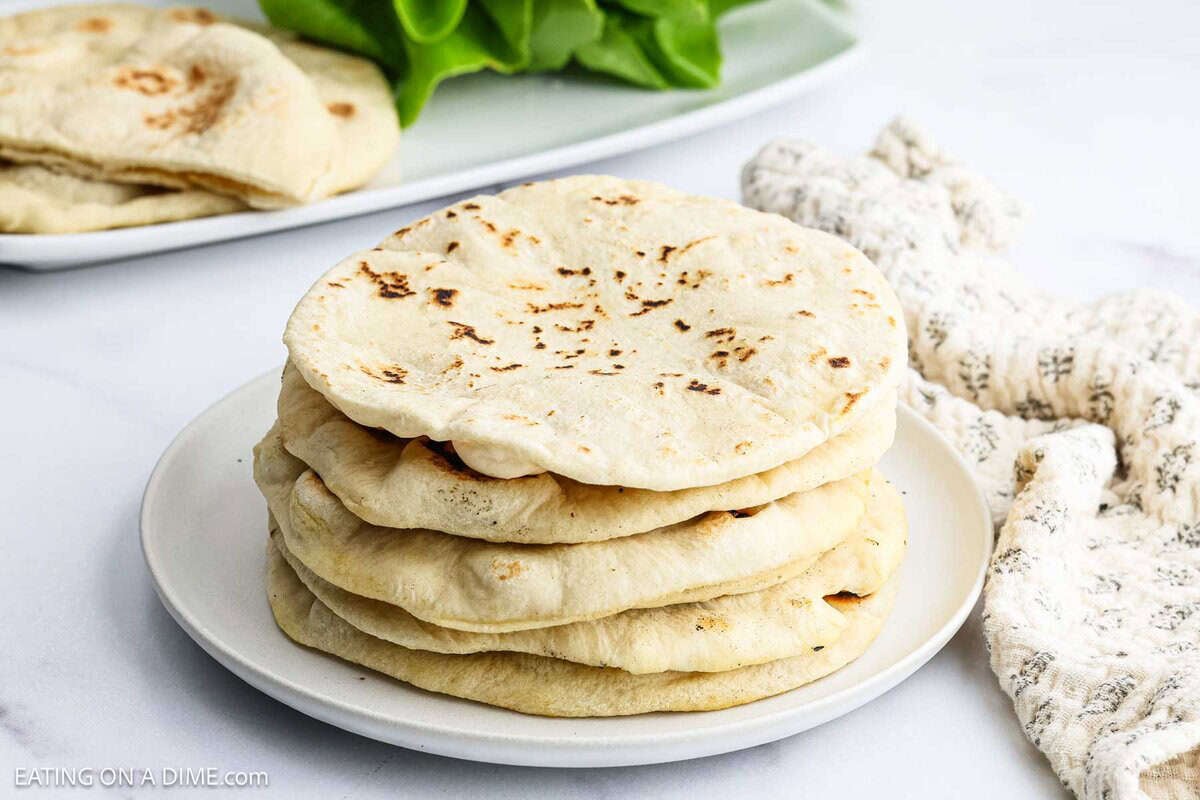
Made from scratch Pita Bread taste so much better that store bought! You can easily control the ingredients and use them in a variety of ways. The smell of these pita bread baking in the oven or cooking on the stovetop is amazing!
Step-by-step recipe, tips, and storage hacks are all included to make these foolproof! Skip the store bought pita bread and see how easy it is to make homemade! If you like this recipe, you should try our Indian Fry Bread Recipe.
What's in this post: Homemade Pita Bread
Why Make Pita Bread at Home
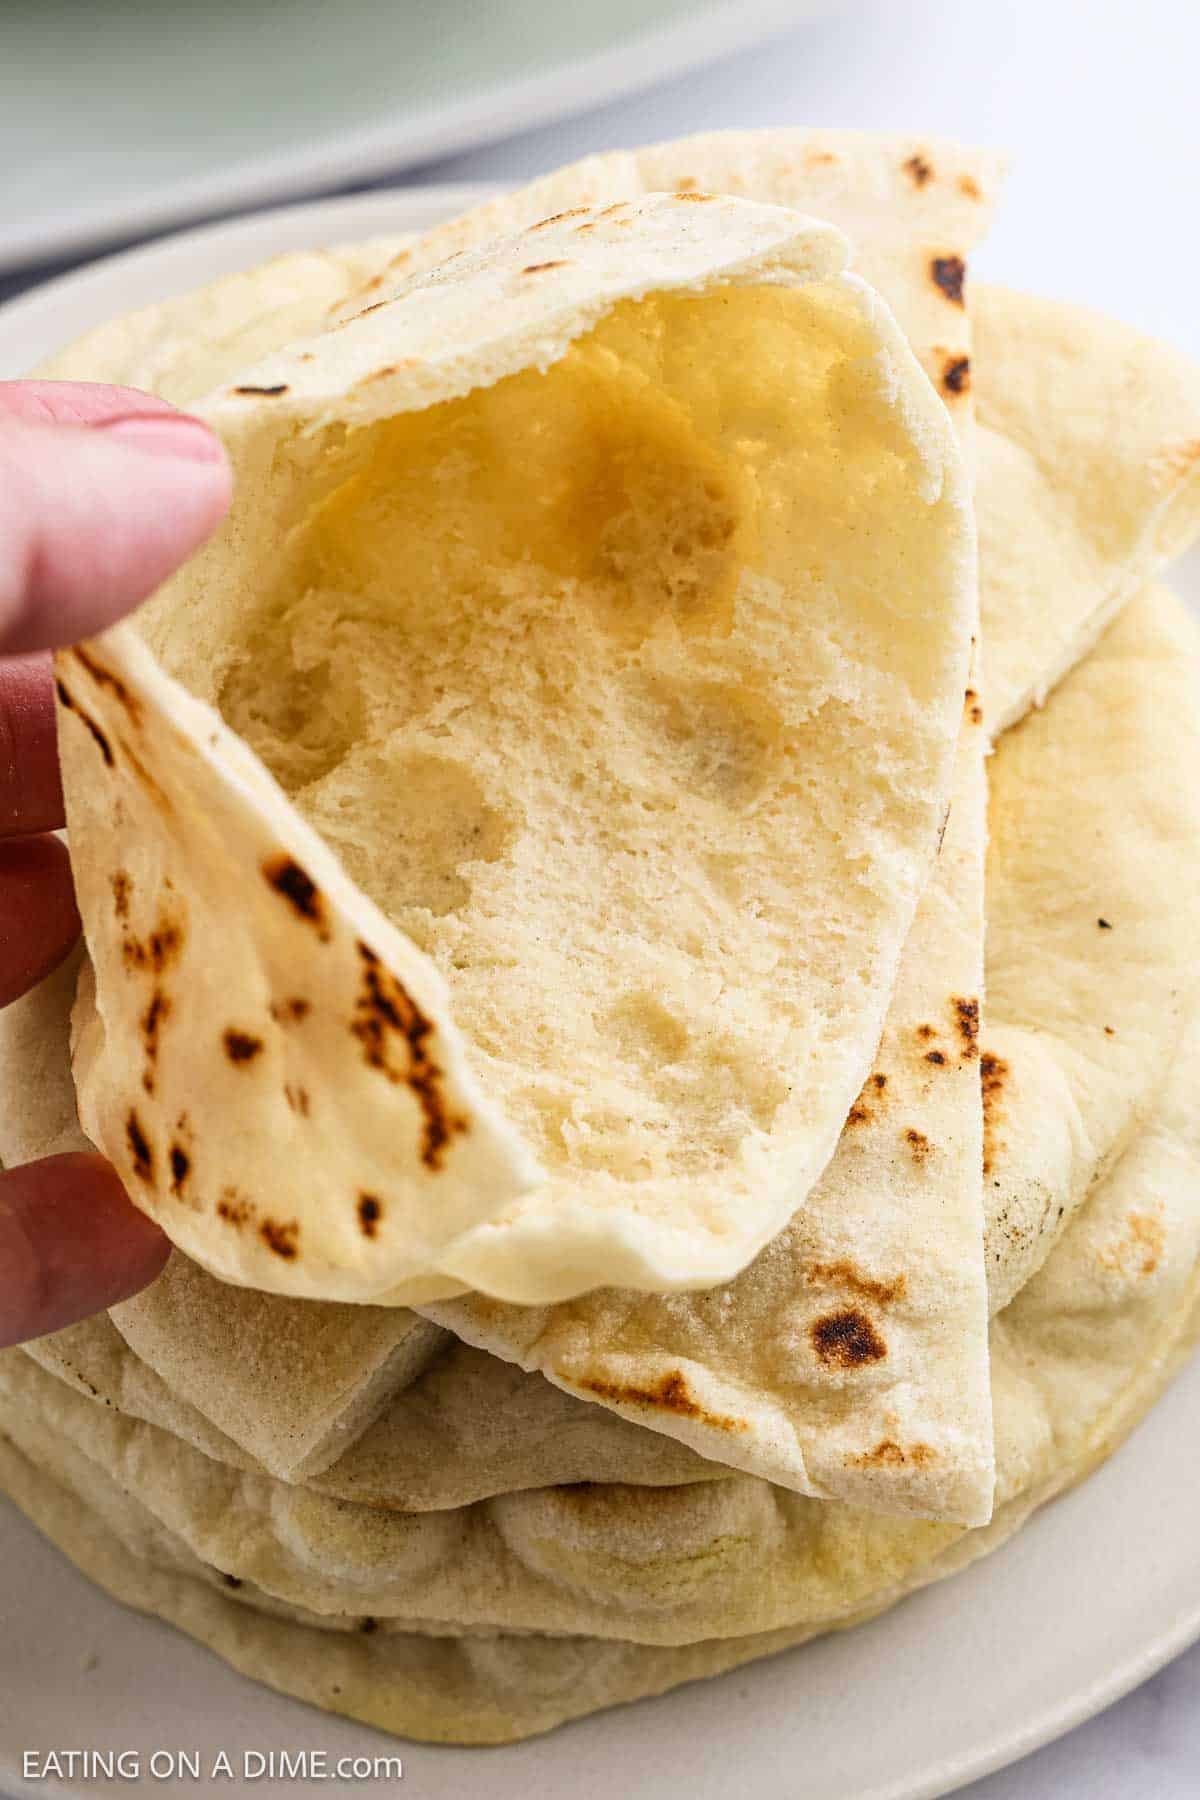
Making Pita Bread home has never been easier. Once the dough hits the high heat the fresh pitas balloon into pillowy pockets to serve in many ways.
With only flour, yeast, water, oil, and salt, you’ll turn pantry staples into stackable flatbreads for gyros, sandwiches, or scooping hummus. The dough doubles as pizza crust in a pinch.
Ingredients
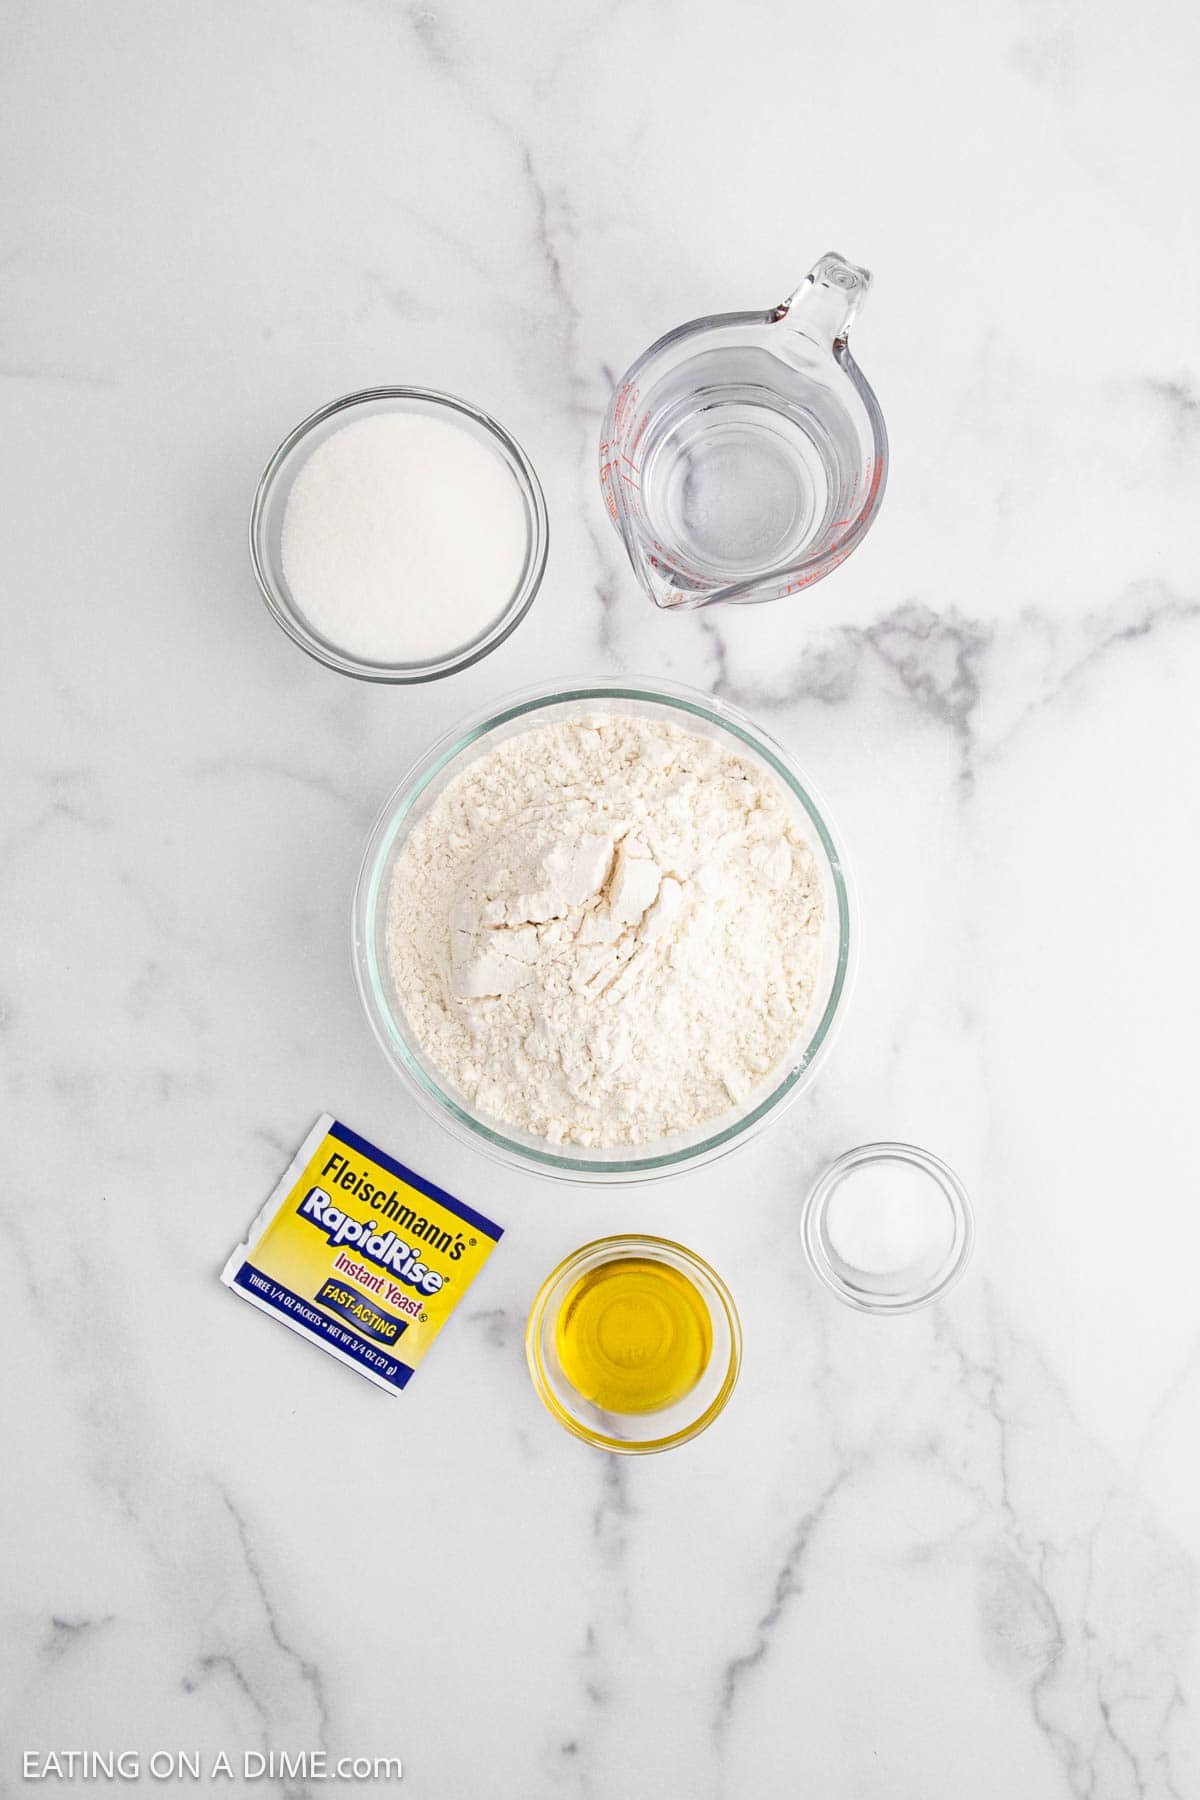
- Water – Yeast needs to be mixed with lukewarm water
- Instant Yeast – Yeast is needed to make the pita pocket
- Flour – Use all purpose flour
- Salt – Brings the ingredients together
- Extra Virgin Olive Oil – This keeps the pita bread from drying out
Scroll to the recipe card for the full recipe
How to Make Homemade Pita Bread

Step 1 – Whisk together the water, sugar and yeast in a large mixing bowl until combined and the sugar is dissolved. Stir in the salt and oil.
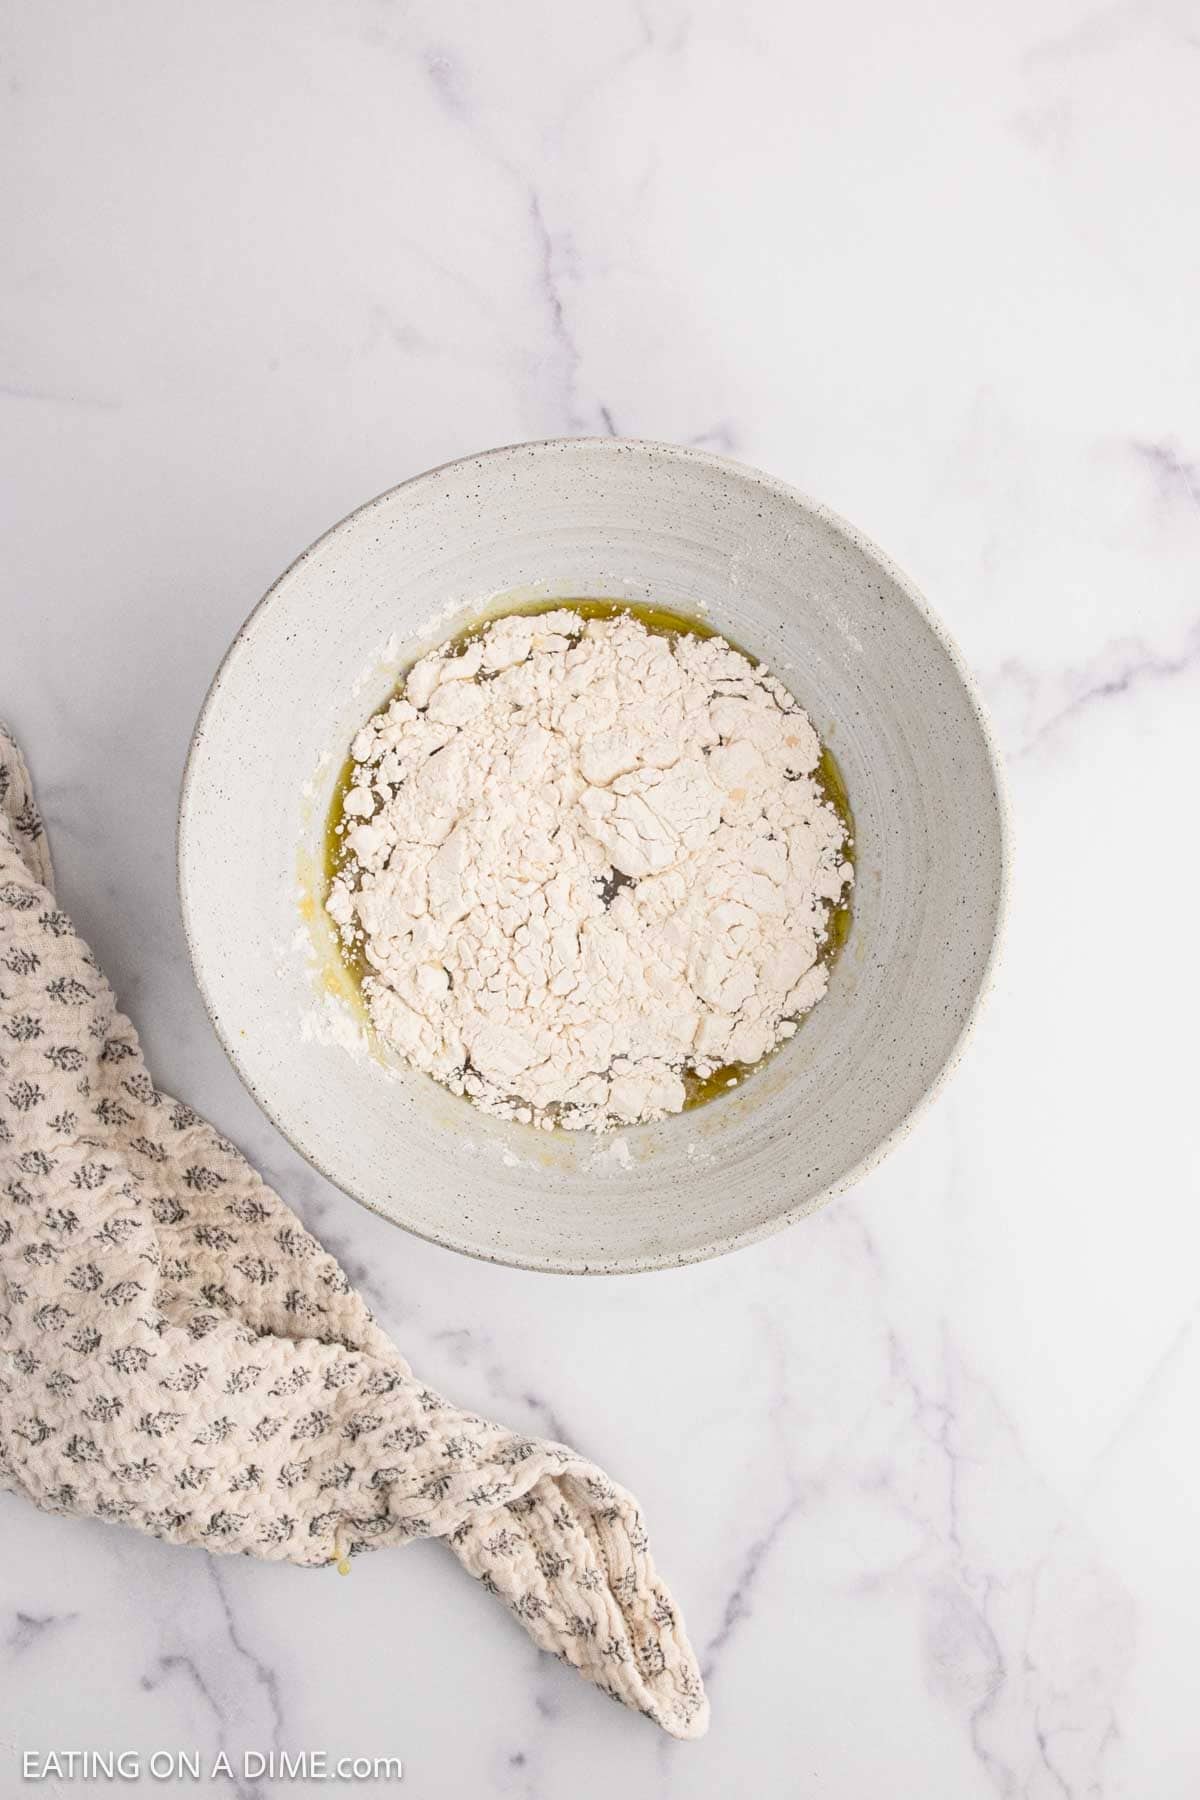
Step 2 – Add the flour into the mixture ½ cup at a time until all is combined and it has reached a dough consistency (you may not need all the flour) with a wooden spoon.
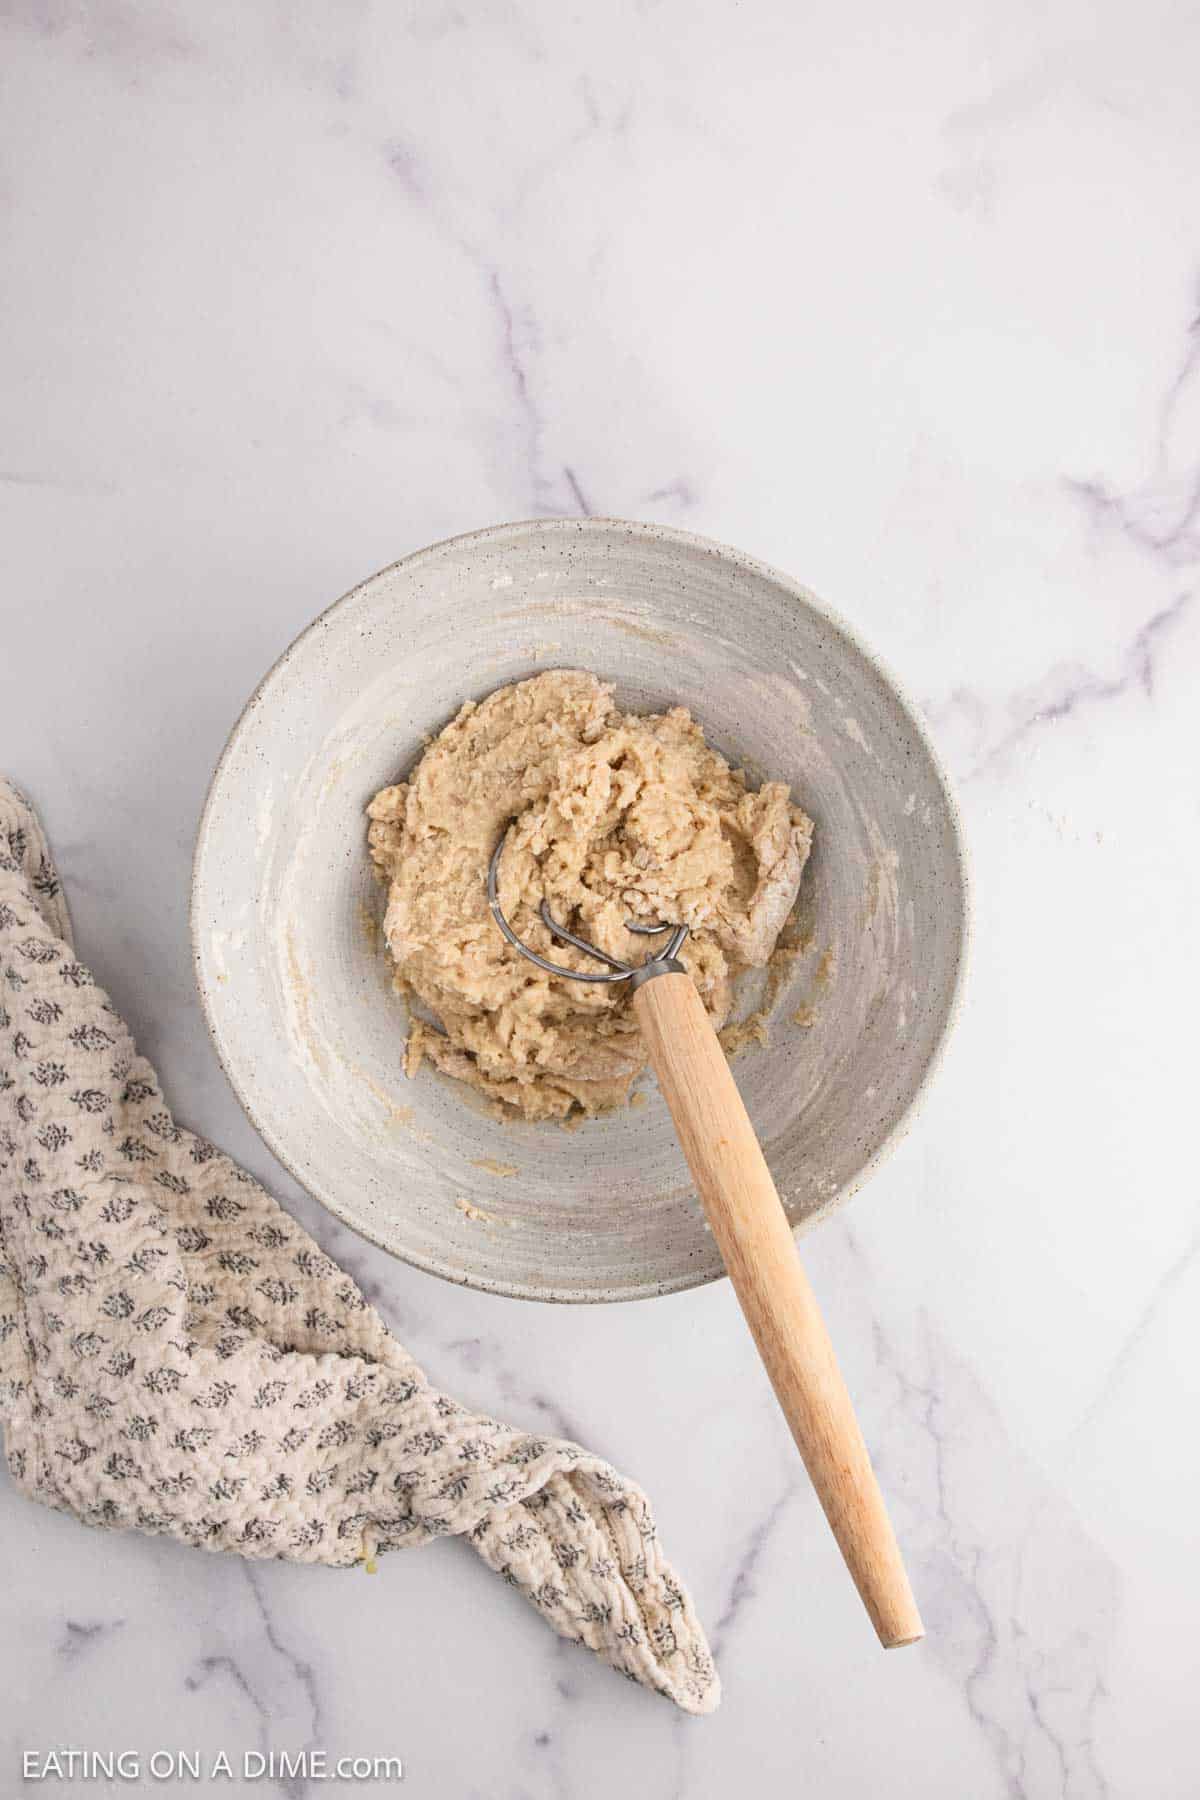
Step 3 – The dough will be wet and that’s normal. Gently dust the dough with flour and carefully knead the dough inside the bowl to incorporate all the dough together.
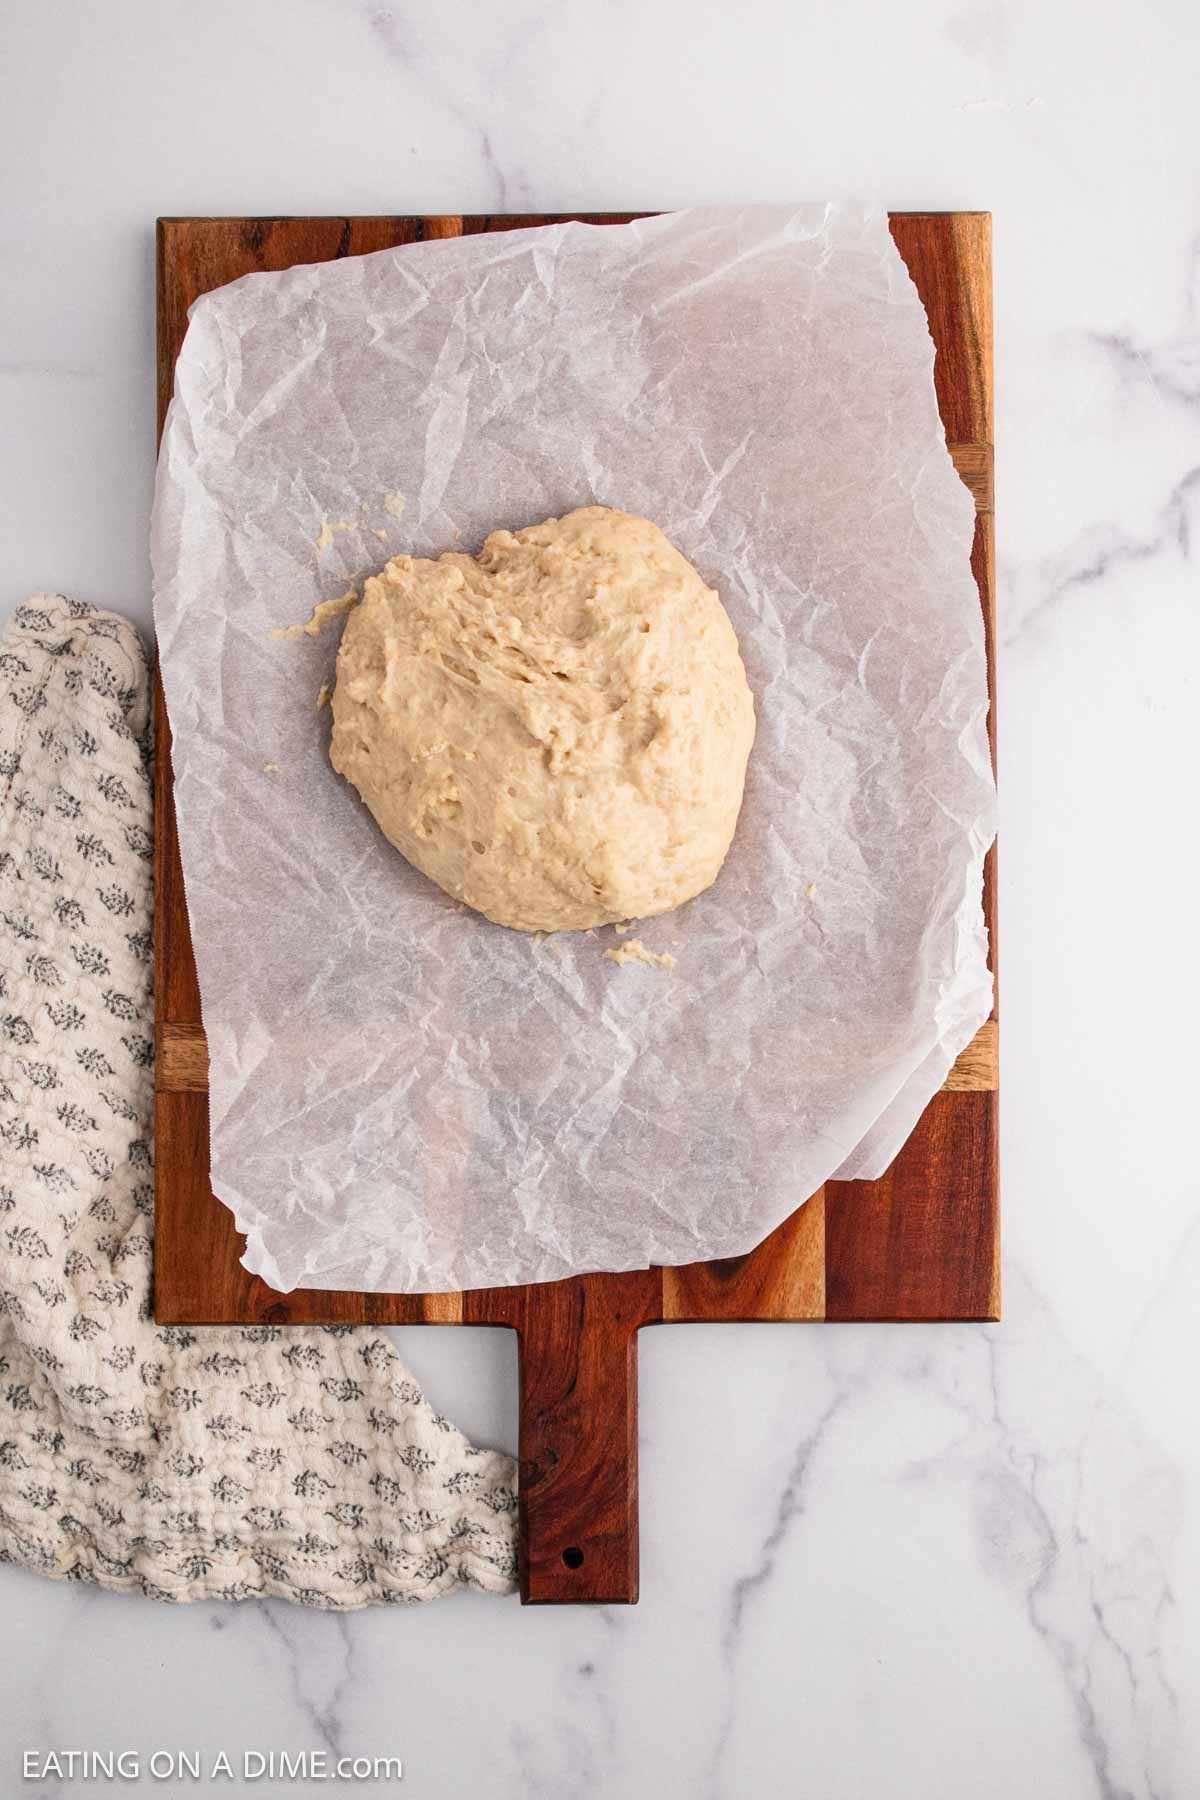
Step 4 – Remove the dough from the bowl and knead on a clean work surface for a few minutes. Let the dough rest for 10 minutes and then knead again for a few more minutes.
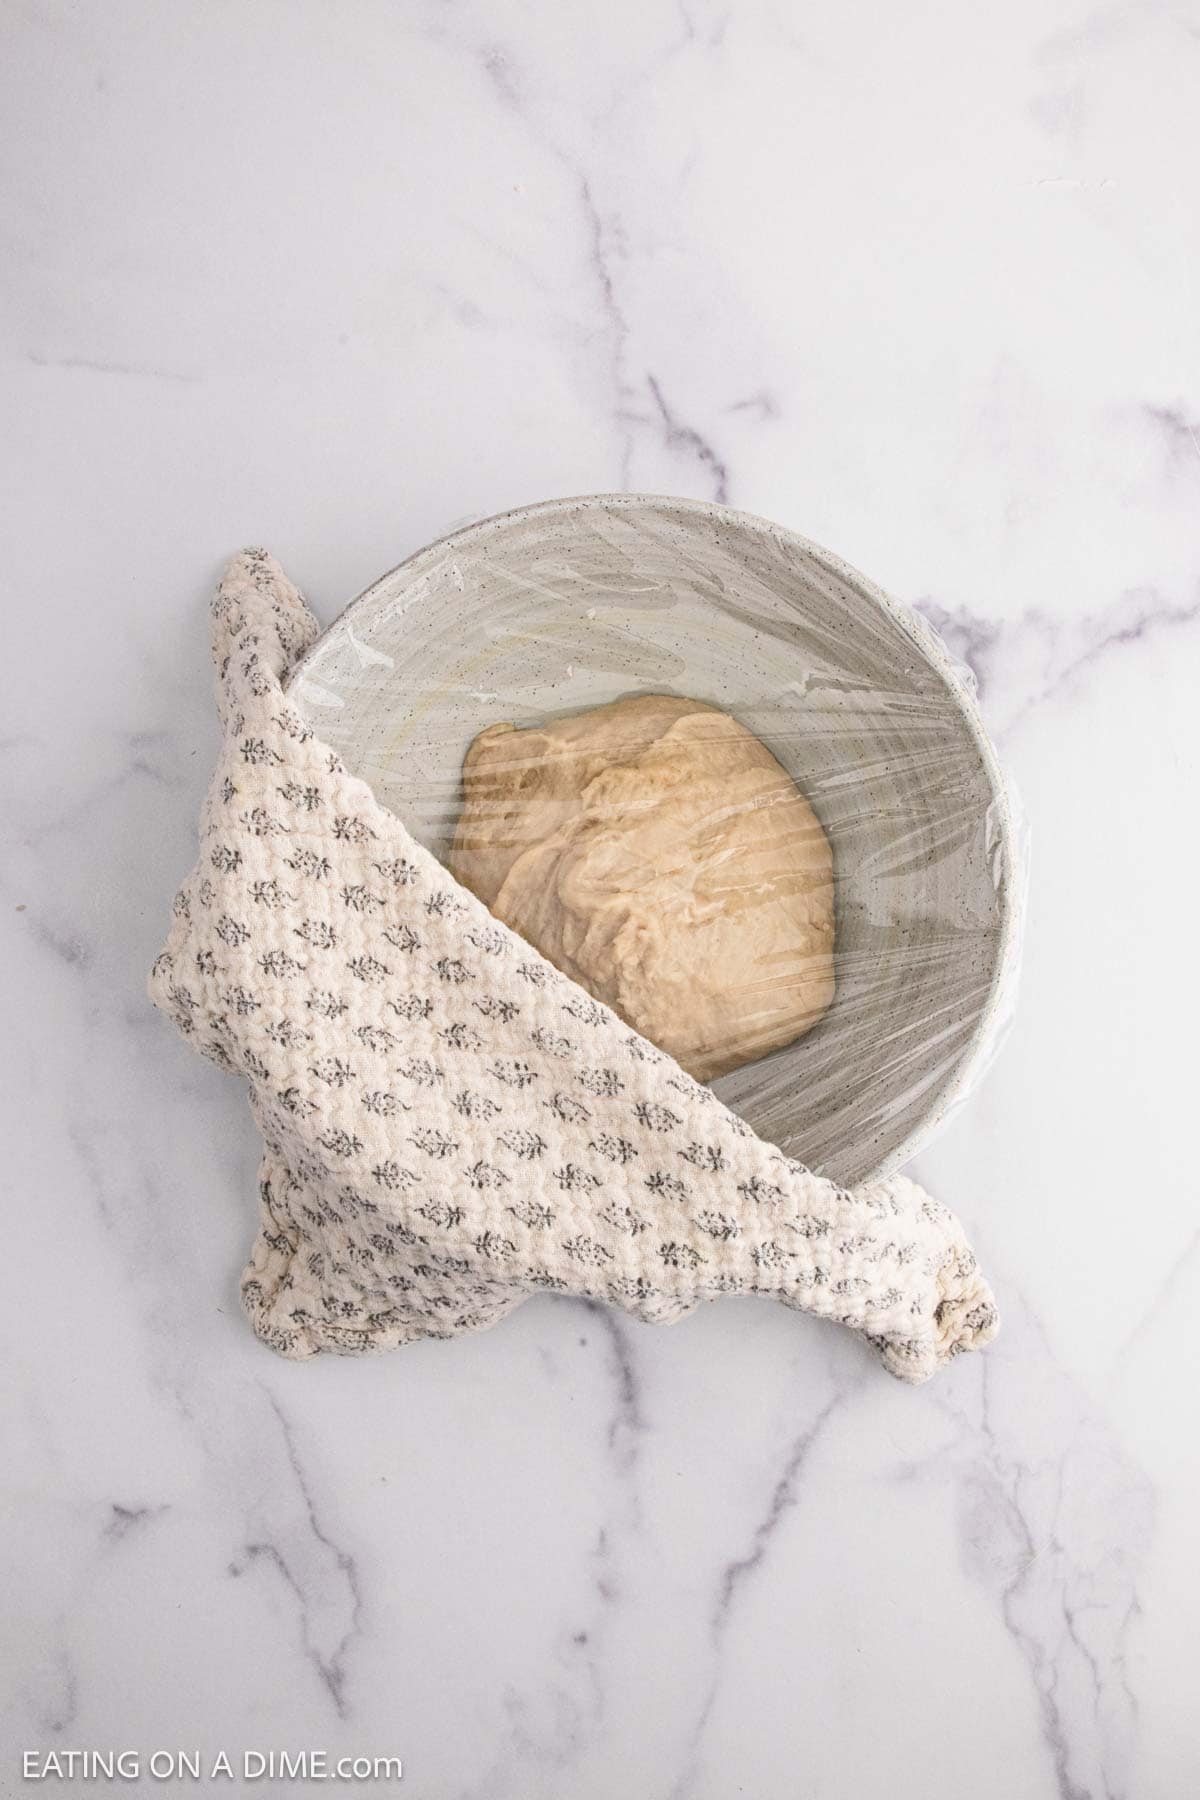
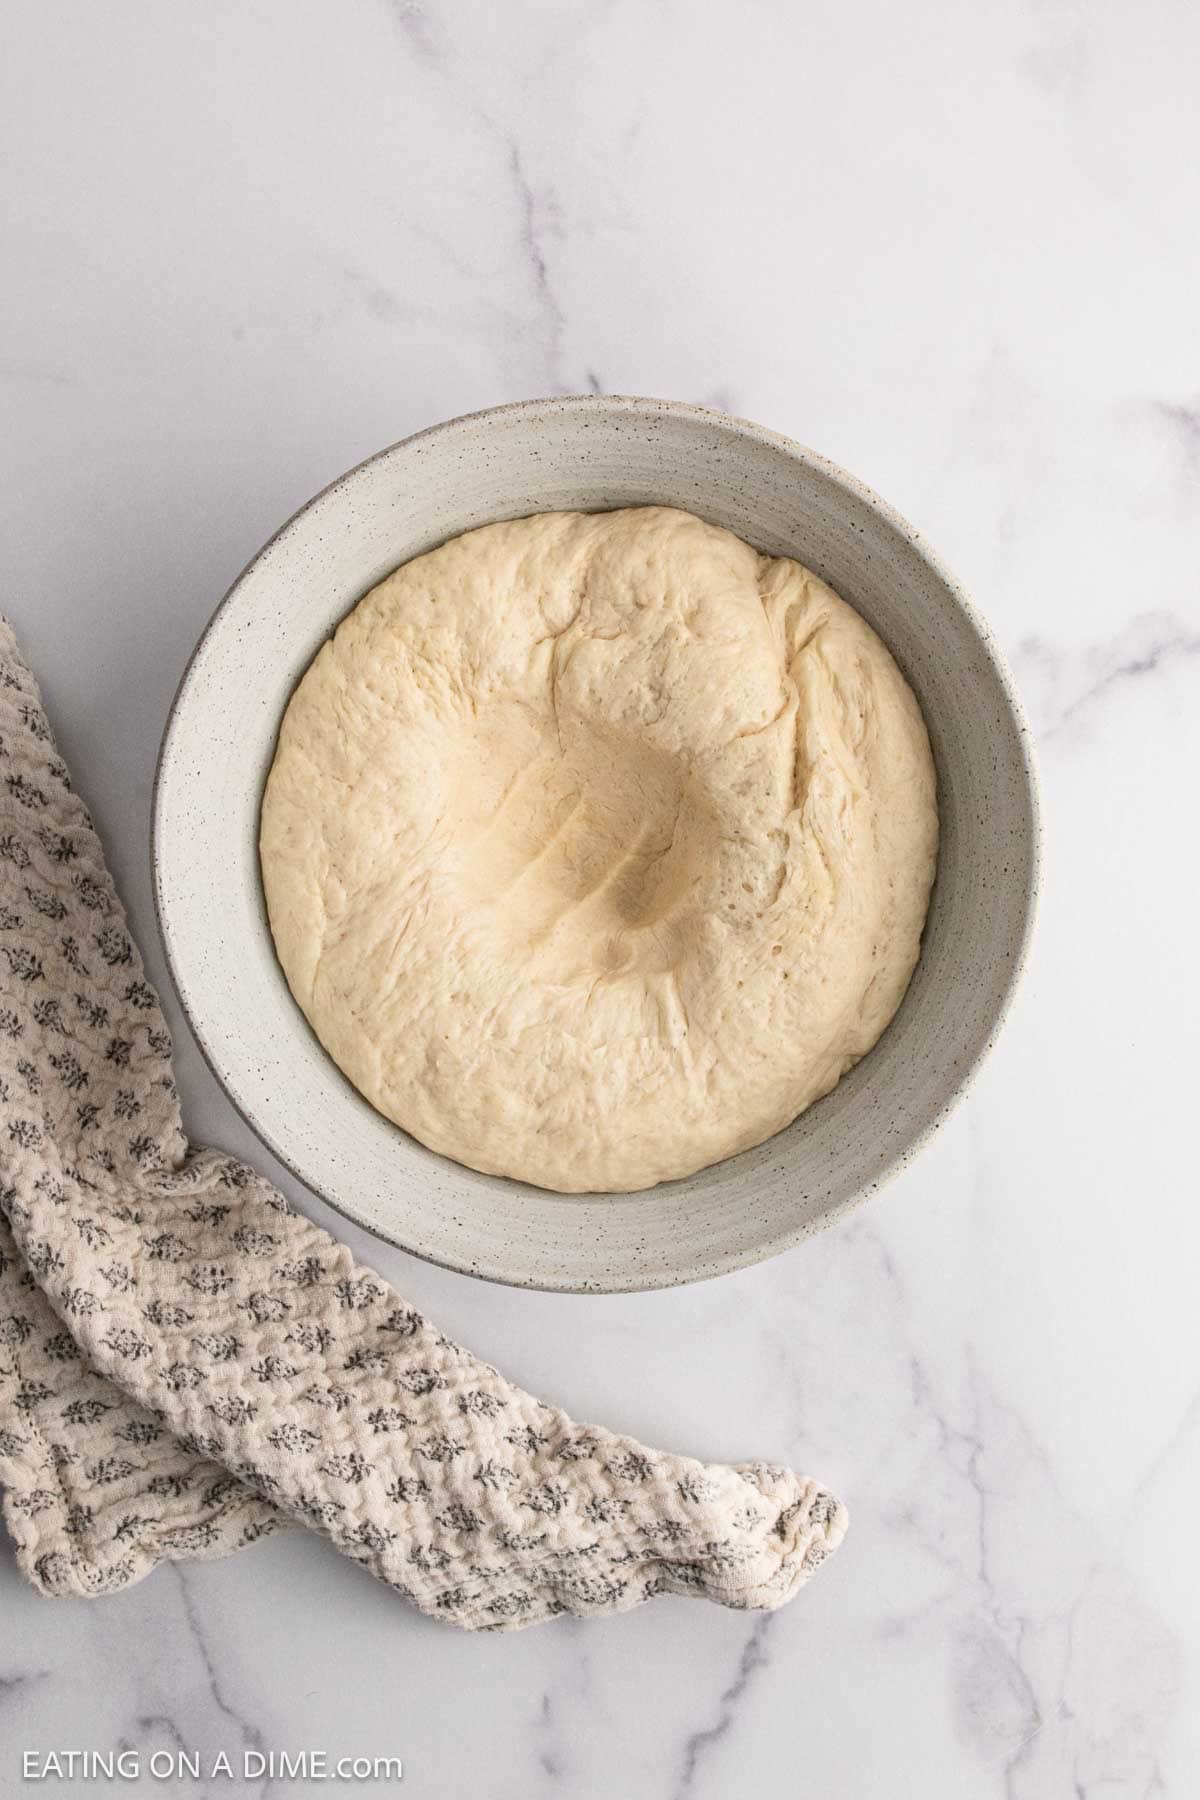
Step 5 – Place the dough in a clean oiled bowl. Cover the bowl with plastic wrap and a kitchen towel and let it rise for 1 hour until the dough doubles in size.
Step 6 – Punch the dough back down into the bowl and remove to a clean work surface.
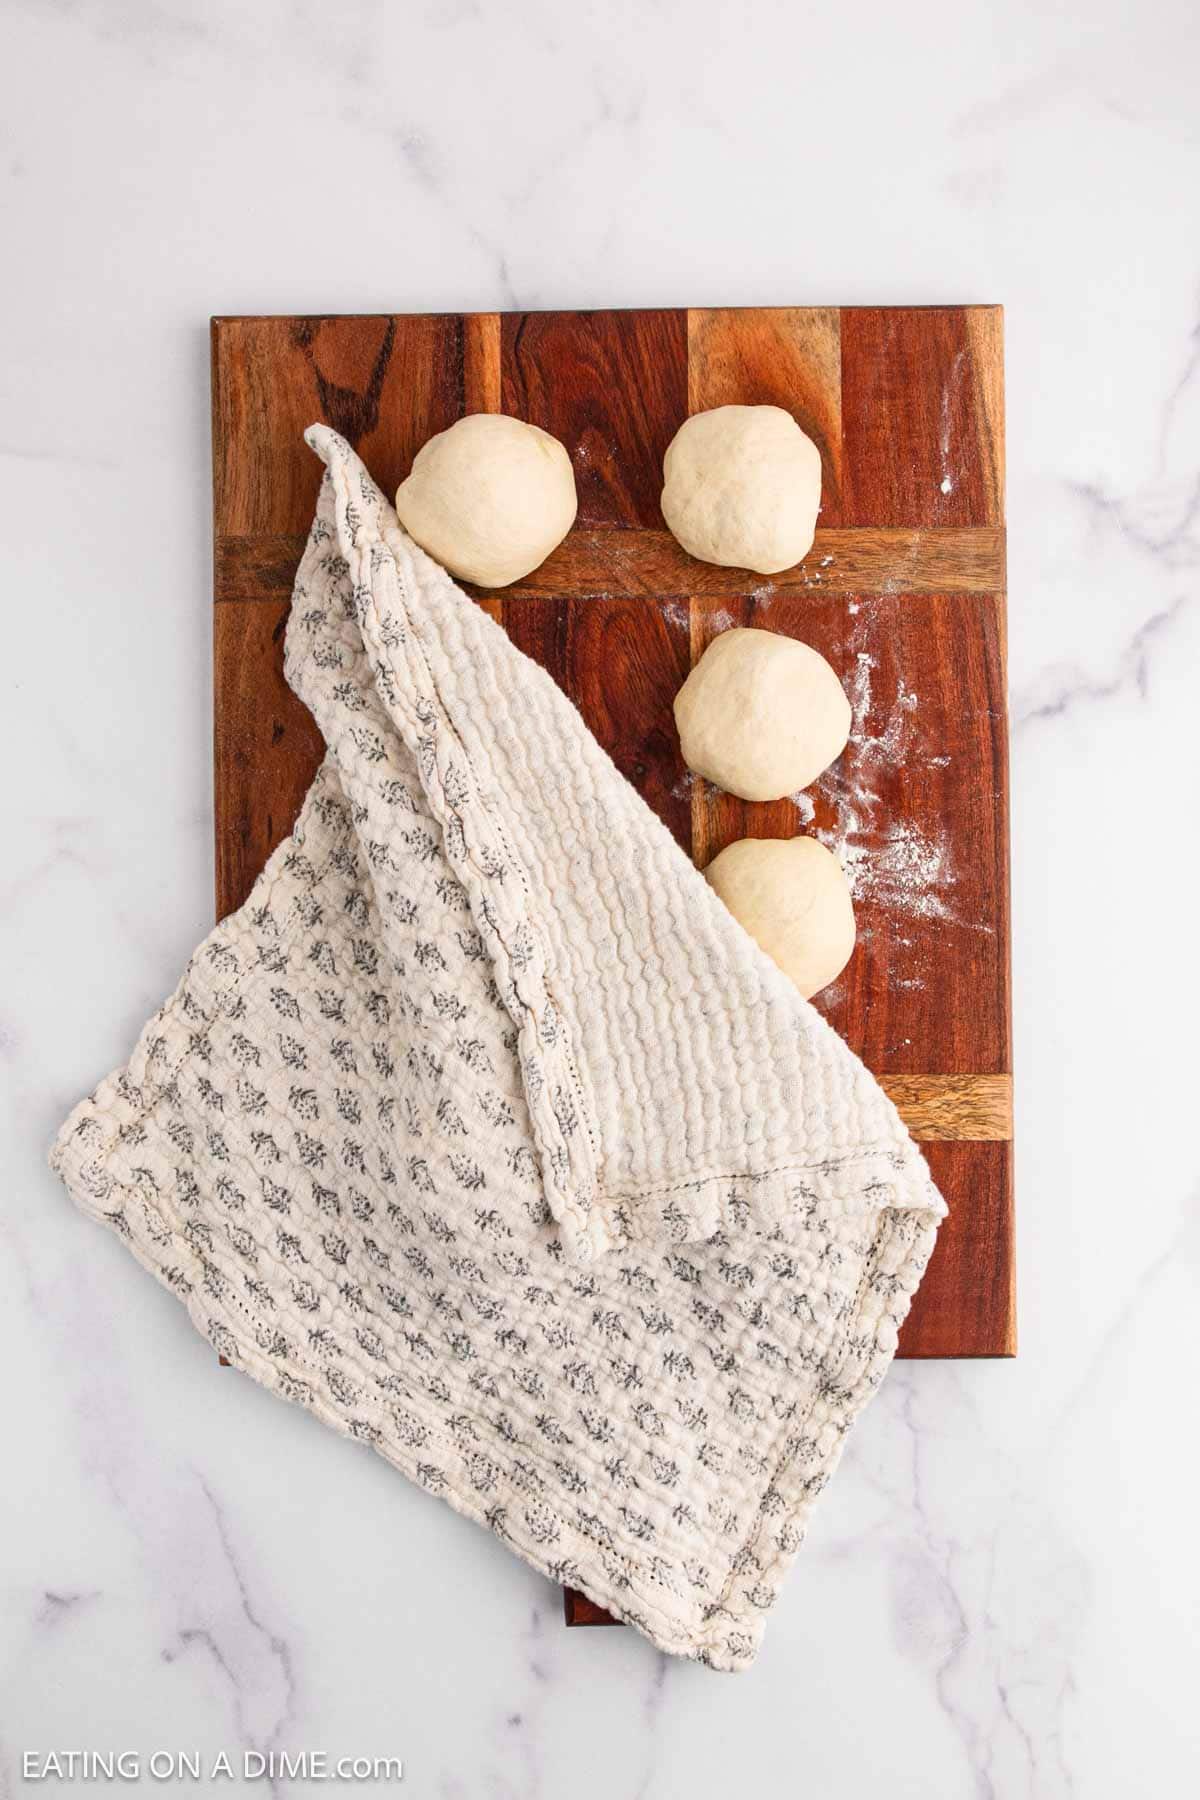
Step 7 – Divide into 8 even pieces and shape into balls. Cover with a clean kitchen towel and let them rise for 10 more minutes.
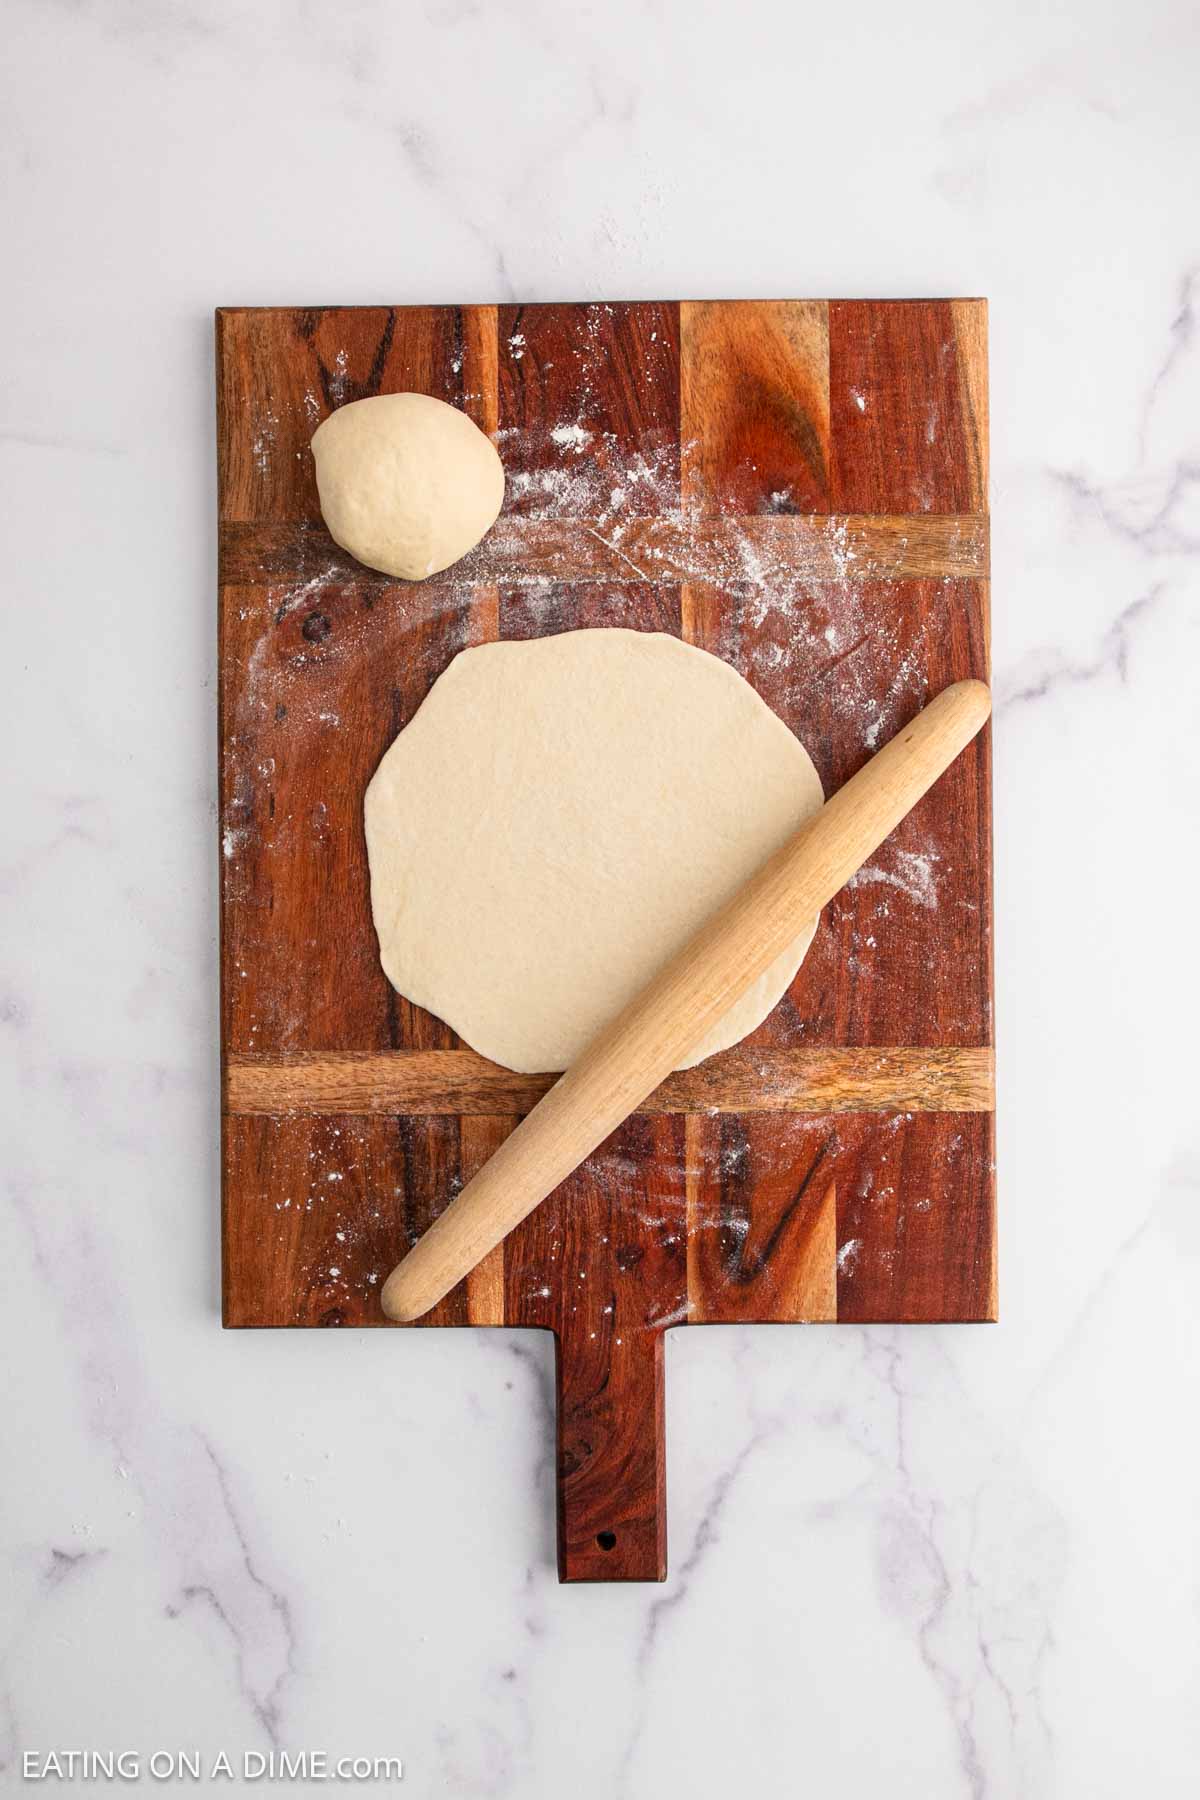
Step 8 – Use a floured rolling pin to roll each of the dough balls into a circle that is approximately 6-7 inches wide and approximately ¼ inch thick. Be careful not to over roll the dough because you don’t want to force the air pockets out of the dough. Continue this process until all are formed.
Baking Instructions
Step 1 – Preheat the oven to 475 degrees F and place a cast iron skillet into the oven while it’s preheated to warm up on the pan.
Step 2 – Place the pita dough on the baking sheet or pizza stone onto the pan approximately 1 inch apart so that it does not crowd the pan (you may have to work in batches).
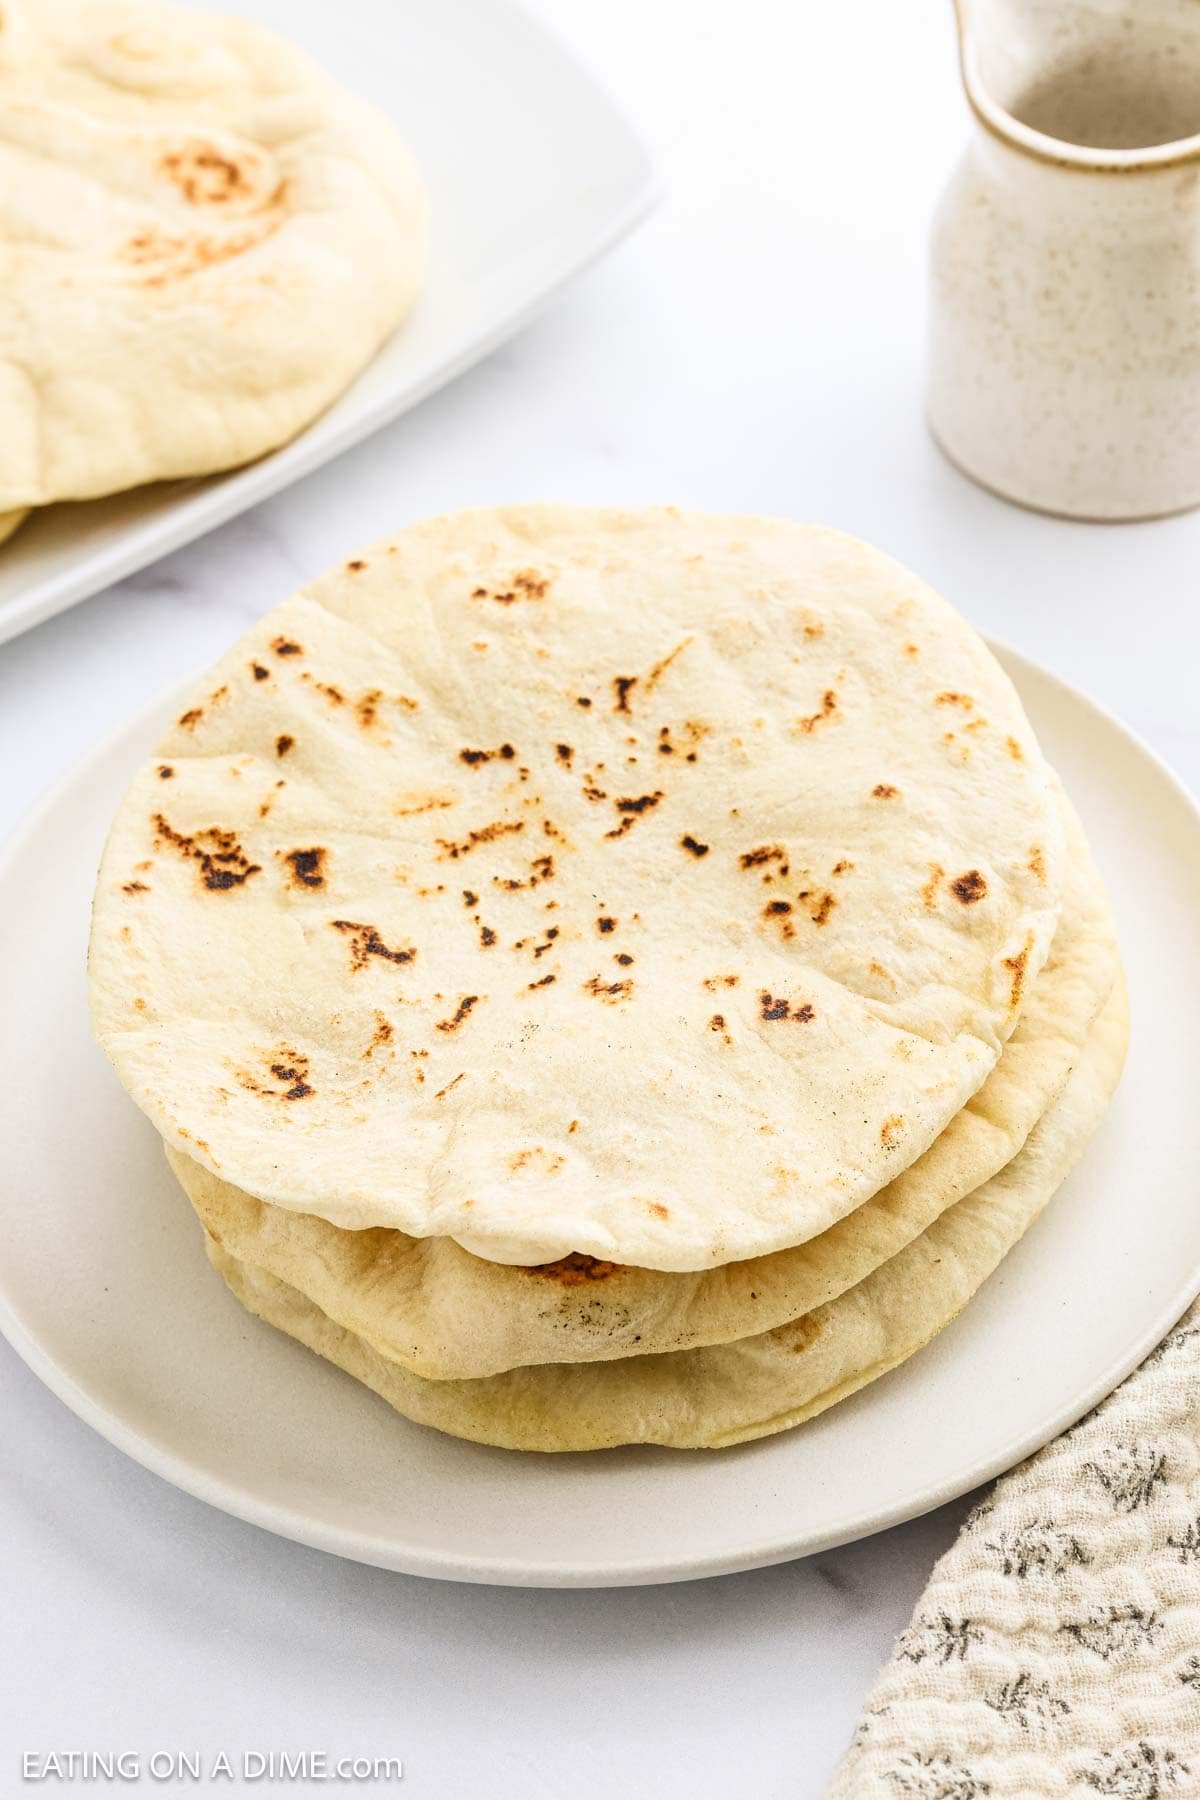
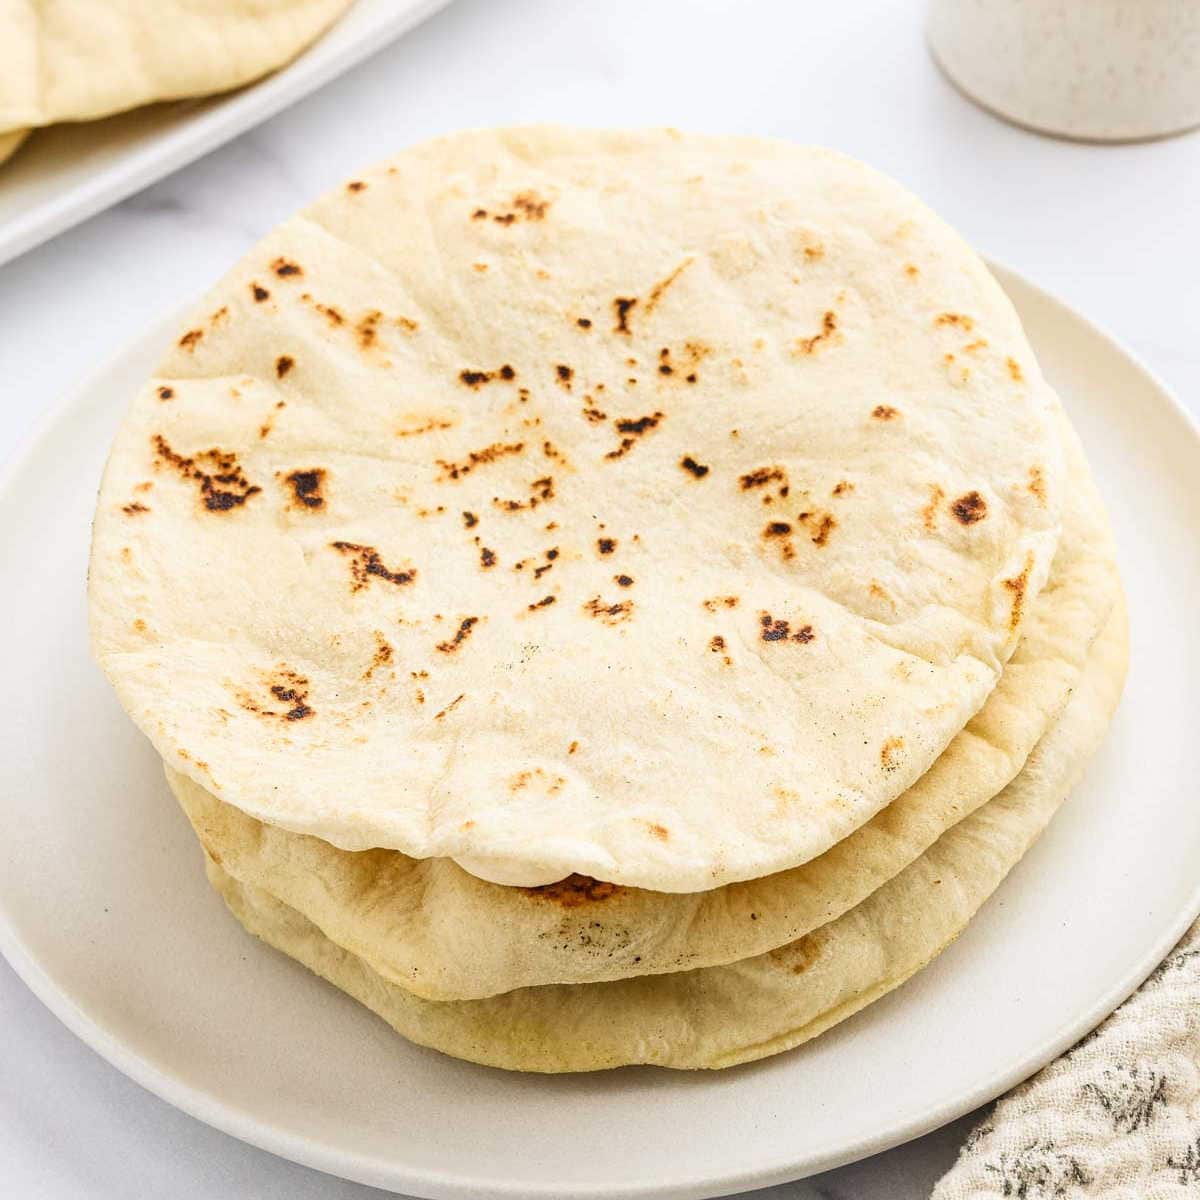
Step 3 – Bake for 2 minutes and then flip them over with a spatula or tongs. Bake the other side for 1-2 more minutes until the other side is browned. The pita should puff up nicely while baking.
Step 4 – Carefully remove the fresh pita bread from the oven and cover with a paper towel while you continue to bake the other pita doughs.
Stovetop Instructions
Step 1 – Heat a cast iron skillet over medium high heat.
Step 2 – Drizzle a small amount of oil into the skillet and spread it around evenly with a spatula.
Step 3 – Place the pita dough into the pan and do not crowd the pan (you may have to work in batches).
Step 4 – Cook for approximately 30-40 seconds until bubbles start to form into the dough.
Step 5 – Flip with a spatula and cook for 1-2 minutes until it starts to brown slightly.
Step 6 – Flip and cook the other side for 1-2 more minutes until the other side is slightly browned as well.
Step 7 – Carefully remove from the pan, place on a wire rack and cover with a paper towel while you continue to cook the other pita doughs.
Step 8 – Once all the pita doughs are cooked through, serve immediately while warm and enjoy!
Homemade Pita Bread
Ingredients
- 1 cup Lukewarm Water
- 1 packet Instant Yeast ¼ ounces (if you have active dry yeast, see notes)
- ½ teaspoon Granulated Sugar
- 3 cups All Purpose Flour divided
- 1 teaspoon Salt
- 2 Tablespoon Olive Oil
Instructions
- Whisk together the water, sugar and yeast in a large mixing bowl until combined and the sugar is dissolved.
- Stir in the salt and oil.
- Add the flour into the mixture ½ cup at a time until all is combined and it has reached a dough consistency (you may not need all the flour).
- The dough will be wet and that’s normal. Gently dust the dough with flour and carefully knead the dough inside the bowl to incorporate all the dough together.
- Remove the dough from the bowl and knead on a clean work surface for a few minutes. Let the dough rest for 10 minutes and then knead again for a few more minutes.
- Place the dough in a clean oiled bowl. Cover the bowl with plastic wrap and a kitchen towel and let it rise for 1 hour until the dough doubles in size.
- Punch the dough back down into the bowl and remove to a clean work surface. Divide into 8 even pieces and shape into balls. Cover with a kitchen towel and let them rise for 10 more minutes.
- Use a floured rolling pin to roll each of the dough balls into a circle that is approximately 6-7 inches wide and approximately ¼ inch thick. Be careful not to over roll the dough because you don’t want to force the air pockets out of the dough. Continue this process until all are formed.
Baking Instructions:
- Preheat the oven to 475 degrees F and place a cast iron skillet into the oven while it’s preheated to warm up on the pan.
- Place the pita dough on the pan onto the pan approximately 1 inch apart so that it does not crowd the pan (you may have to work in batches).
- Bake for 2 minutes and then flip them over with a spatula or tongs. Bake the other side for 1-2 more minutes until the other side is browned. The pita should puff up nicely while baking.
- Carefully remove from the oven and cover with a paper towel while you continue to bake the other pita doughs.
Stovetop Instructions:
- Heat a cast iron skillet over medium high heat.
- Drizzle a small amount of oil into the skillet and spread it around evenly with a spatula.
- Place the pita dough into the pan and do not crowd the pan (you may have to work in batches).
- Cook for approximately 30-40 seconds until bubbles start to form into the dough.
- Flip with a spatula and cook for 1-2 minutes until it starts to brown slightly.
- Flip and cook the other side for 1-2 more minutes until the other side is slightly browned as well.
- Carefully remove from the pan and cover with a paper towel while you continue to cook the other pita doughs.
- Once all the pita doughs are cooked through, serve immediately while warm and enjoy!
Recipe Notes
Nutrition Facts
Recipe Tips
- Cooking Pita – Preheat the oven or stovetop to hot heat so moisture turns to steam and separates layers.
- Even Thickness – Thick spots won’t puff make to aim for uniform ⅛-inch when rolling the dough.
- Lightly Floured Surface – Make sure to not over-flour the working surface. It could prevent layers from sealing and puffing up.
- Work Quickly – Roll and cook the dough quickly so it does not dry up.
- Kneading – You will only need to do a little kneading and no stand mixer with a dough hook is needed.
Flavor Variations
- Whole Wheat Pita – Swap 1 cup of all purpose flour with 1 cup of whole wheat flour for a nutty, high fiber twist.
- Garlic Herb – If you are looking for a savory boost, add in 1 Tbsp minced fresh herbs and 1 tsp garlic powder. Other additions include rosemary or thyme.
Serving Ideas
- Sandwiches – These pita bread are perfect to fill with Chicken Salad Recipe or Tuna Salad.
- Dips – Make Homemade Hummus or Homemade Tzatziki Sauce Recipe then slice the pita bread into wedges for dipping.
- Pizza – Make Pita Bread Pizza for a delicious lunch or after school snack.
Frequently Asked Questions
Heat too low or dough too thick. Preheat longer and roll the pita bread thinner on the next batch.
Generally, I use instant yeast for this recipe but dry active yeast can be used instead. If using dry active yeast, mix the yeast with the water and sugar. Stir in ½ cup flour and let the mixture sit for 15-20 minutes until the mixture starts to bubble slightly. Then continue to follow the remaining recipe.
Pita relies on gluten for pocket formation. If you use a gluten-free flatbread recipe instead, it won’t puff but tastes great.
Storage and Reheating Tips
- Room Temp – I love enjoying this pita bread fresh, immediately after it’s made. However, leftover pita will keep in an airtight container for up to 1-2 days.
- Freezer – Layer the pita bread with parchment in a freezer safe bag, freeze up to 3 months.
- Reheating – When reheating leftovers, reheat the leftovers in the oven, toaster or microwave and then it’s ready to enjoy
More Homemade Bread Recipes
Easy Pizza
Little Caesars Crazy Bread

Quick Bread
How to Make Naan Bread
250+ Easy Keto
90 Second Keto Bread
If you make Homemade Pita Bread Recipe, please leave us a comment or a star review. We love to hear from you!


I haven’t made this, but was looking it over and noticed that the directions say to combine water, sugar, and yeast. The ingredients list doesn’t include sugar, though.
I’m so sorry about that Joyce. I use 1/2 teaspoon in this recipe and I have updated the recipe with this information.
Would love to try this recipe but how much Sugar is needed?
Thank you!
I’m so sorry about that Judy. I use 1/2 teaspoon in this recipe and I have updated the recipe with this information.