
The kids are going to love these Halloween Oreos. Try these 4 Ingredient Jack-O-Lantern Chocolate Covered Oreos for a fun treat.

Halloween Chocolate Covered Oreos are perfect for Halloween parties or class parties. The cookies look really impressive but they are so easy.
My kids and I love to make fun Halloween treats and this simple treat is our favorite. For a healthier snack, try Jack O Lantern Oranges.
Another family favorite is spider cupcakes, Halloween rice Krispie treats, homemade Oreo cookies, or white chocolate mummy treats.
Why We Love these Halloween Oreos
- Simple Ingredients – These Oreo Halloween treats only require 4 ingredients and they can be made in a variety of ways.
- Quick and Easy – If you are needing a last minute Halloween dessert, this is the one to make.
- Halloween Party Treat – Make these treats for your next Halloween party. They are always a hit and taste amazing.
Ingredients

- Orange Candy Melts
- Yellow Candy Melts
- OREO Sandwich Cookies
- M&M Candies- You only want to use the green M&Ms
Scroll to the bottom to see recipe card for the full ingredients and recipe.
Variation Ideas
- Use Chocolate Chips – You can use white chocolate chips and food coloring instead of candy melts if you prefer. Dark chocolate chips will also work, the color maybe not be as bright.
- Change Oreos – We used traditional Oreo cookies, but you can also use double stuffed Oreos. During the Halloween holiday, they have orange creme filled Oreos that would work perfectly in this recipe.
- More fun ideas – Use sprinkles and candy eyeballs to decorate the Oreo cookies. The kids love to use candy eyes or candy eyeballs.
- Halloween Sprinkles – Skip the faces and just use Halloween sprinkles.
- Change for the Holidays – Feel free to change to make for different holidays. You may like these chocolate covered Christmas oreos.
How to Make Jack-O-Lantern Chocolate Covered Oreos
Step 1 – Prepare the baking sheet or cutting board and line it with wax paper or parchment paper.
Step 2 – Put half a bag of candy melts into a bowl that is microwave safe. Heat this on high for 2 minutes but stir every 30 seconds.

Step 3 – Keep doing this until it is melted. It is important to stir in intervals so the candy melts don’t burn. Microwave times vary so you may not need the entire 2 minutes.
Step 4 – Once melted, dip an Oreo in the orange candy. Make sure to do this one cookie at a time.
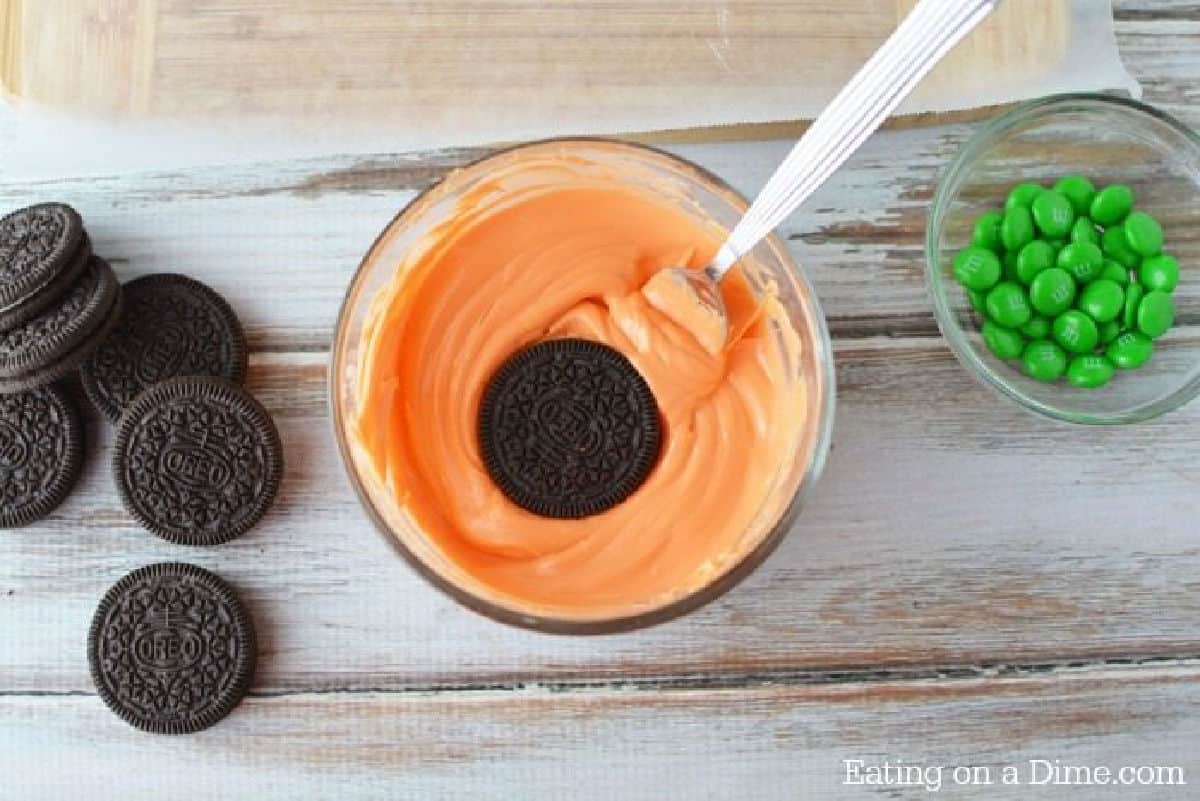
Step 5 – Be careful that you coat the entire cookie getting the front and back. Just flip the cookie over to coat the other side in chocolate. I use a fork to do this and it makes it really easy.

Step 6 – Once coated, remove the Oreo cookie from the candy melts. Remove any excess by tapping the cookie on the side of the bowl.
Step 7 – Put the cookie on the wax paper. Put a green candy at the top of the Oreo for the stem.
Step 8 – Keep repeating until you have finished all of the cookies. Let the cookies harden completely before decorating.
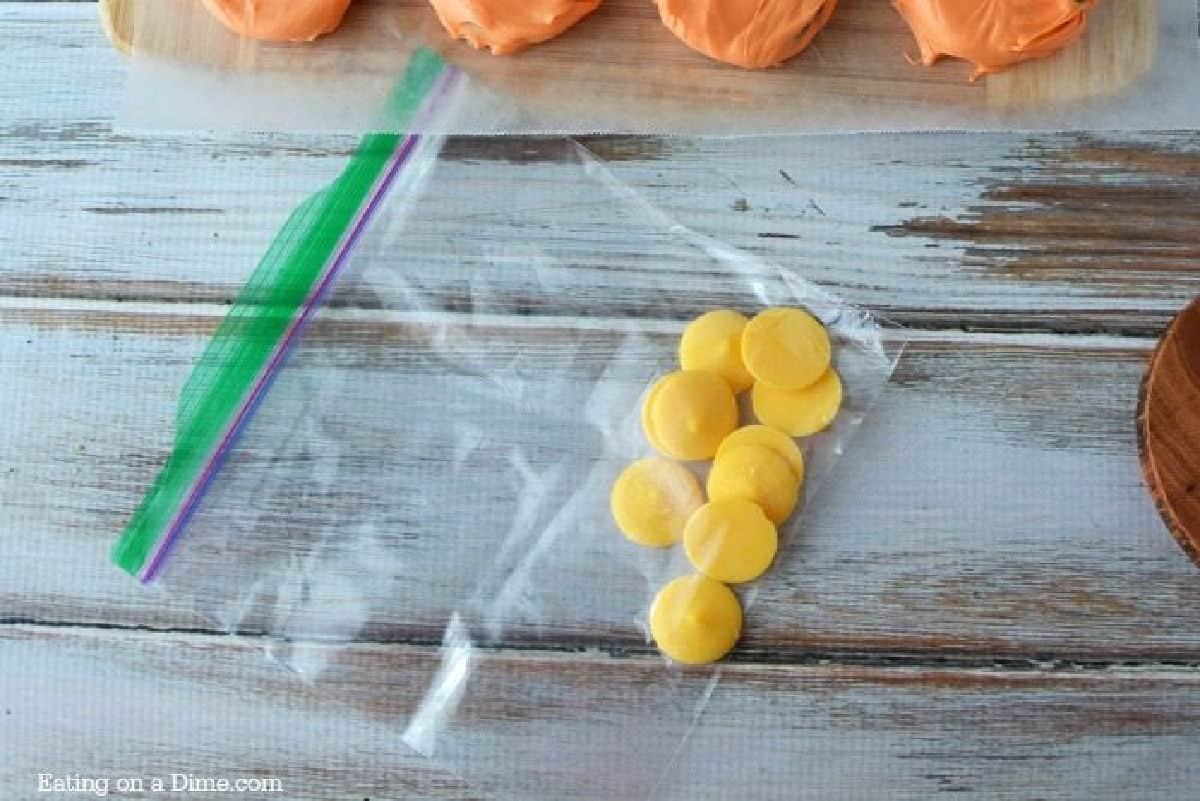
Step 9 – The last step is to make the face. Add 15 yellow candy melts into a ziplock bag but don’t seal it. Microwave this for 10 seconds.
Step 10 – Knead the candy until melted and put back in the microwave if needed. I would do this in 5 second intervals.
Step 11 – When it is completely melted, make sure you knead all the lumps out of it. It needs to be smooth to easily decorate the cookies.
Step 12 – Now just use scissors to snip the tip of the bag. You just want a small opening. Use this to pipe a jack-o-lantern face on each of the cookies.

Step 13 – Allow this to set completely before storing.

More Halloween Oreo Designs
Keep the Jack-O-Lantern Oreos as the main design, then use the same simple method to make a few more Halloween treats.
- Mummy Oreos – Dip the Oreos in white candy melts, add candy eyes, and drizzle more white coating across the top for mummy stripes.
- Monster Oreos – Use green candy melts, add candy eyes, and decorate with sprinkles or a simple piped mouth.
- Ghost Oreos – Dip the Oreos in white candy melts and add candy eyes with a small chocolate mouth.
Jack O Lantern Oreos Recipe Tips
- Colored Candy Melts – I use candy melts to make this recipe even simpler. Wilton works great and you can purchase the color you need. Your local craft store should have an assortment of colors.
- M&M’s – We bake a lot so I normally buy the party size bag of M&M’s. Feel free to also use green candy melts.
- Piping Bag – You can decorate the chocolate covered Oreos with a piping bag or a zip lock bag.
- Dipping Oreos – When dipping the Oreos, make sure to completely cover them. Remove excessive chocolate before placing on the baking sheet.
Candy melt troubleshooting: If the candy melts are too thick or lumpy, stir in a small amount of coconut oil or vegetable oil until smooth. Keep all bowls and utensils completely dry, and melt the candy in short intervals so it does not overheat.
Party and Gifting Ideas
Package individual Halloween Oreos in clear treat bags and tie with ribbon for class parties or party favors. You can also arrange them on a platter with other Halloween treats for an easy dessert table.

Storage Instructions
Store the Halloween Oreos in an airtight container at room temperature for up to 1 to 2 weeks. If stacking, place parchment or wax paper between the layers so the decorations do not smudge or stick together.
Frequently Asked Questions
We recommend melting candy melts in a microwave safe bowl in 30 second intervals. Make sure to stir after each interval as it will continue melting as you stir.
Yes, these chocolate covered Oreos are perfect to make ahead of time. You can easily make these up to 2 weeks in advance for all your holiday parties.
Store them in an airtight container for up to 1 to 2 weeks at room temperature.
I have not tested freezing them, so I recommend storing them in an airtight container at room temperature.
They may have overheated or come into contact with moisture. Melt them slowly in short intervals and stir in a small amount of coconut oil or vegetable oil if needed.
More Easy Halloween Recipes



If you make these Halloween Oreos, make sure to give a star rating!
Jack-O-Lantern Halloween Chocolate Covered Oreos
Equipment
- Microwave Safe Bowls
- Fork
- Wax or Parchment Paper
- Piping or Ziplock Bags
Ingredients
- 1 bag orange candy melts
- 15 yellow candy melts
- 12 OREO sandwich cookies
- 12 M&M candies separated so you just have green M&Ms
See how we calculate recipe costs.
Instructions
- Line a baking sheet or cutting board with wax paper.
- Place half of the orange candy melts in a microwave-safe bowl. Microwave in 30-second intervals, stirring after each interval, until completely melted (about 1½ to 2 minutes). Do not overheat, as the candy melts can burn quickly.
- Using a fork, dip one Oreo into the melted candy, coating it completely. Lift the cookie out, gently tap the fork on the side of the bowl to remove excess coating, and place the Oreo on the prepared baking sheet.
- Immediately press one green M&M onto the top of the cookie to create the pumpkin stem.
- Repeat with the remaining Oreos. If the candy melts begin to thicken, melt the second half of the bag and continue dipping.
- Let the coated Oreos sit until the candy coating is completely hardened.
- Place the yellow candy melts in a small resealable sandwich bag (leave the bag unsealed). Microwave for 10 seconds, then knead the bag until smooth. If needed, continue microwaving in 5-second intervals, kneading between each interval until fully melted.
- Snip a very small corner off the bag and pipe jack-o'-lantern faces onto each Oreo.
- Allow the yellow candy to harden completely before serving or storing.

My kids love these cookies! They love making festive desserts. They come out so cute and the kids love making them!